All MetalShaping

Go Back   All MetalShaping > Metal Shaping Projects > Automotive Projects
  Today's Posts Posts for Last 7 Days Posts for Last 14 Days  

Reply
 
Thread Tools Search this Thread Display Modes
  #491  
Old 07-30-2016, 05:16 PM
skintkarter skintkarter is offline
MetalShaper of the Month Nov. 2018, Jan. 2021
 
Join Date: Feb 2013
Location: Auckland New Zealand
Posts: 877
Default

Nicely done Marcus!
__________________
Richard
"I know nothing. I from Barcelona" (Manuel - Fawlty Towers)
Link to our racecar project https://www.facebook.com/pages/Elan-...ab=public&view
Reply With Quote
  #492  
Old 07-31-2016, 04:20 AM
Gojeep's Avatar
Gojeep Gojeep is offline
MetalShaper of the Month March 2015, March 2020,, June 2022,Aug 2023
 
Join Date: Nov 2013
Location: Eastern Melbourne, Australia
Posts: 3,000
Default

Thanks Dennis and Richard.
__________________
Marcus
aka. Gojeep
Victoria, Australia
http://willyshotrod.com

Invention is a combination of brains and materials.
The more brains you use, the less materials you need.
Reply With Quote
  #493  
Old 07-31-2016, 07:46 AM
RockHillWill RockHillWill is offline
MetalShaper of the Month Jan 2019
 
Join Date: Oct 2009
Posts: 3,089
Default

WOW! Very impressive stuff. I really like checking out your progress.
__________________
Will
Reply With Quote
  #494  
Old 07-31-2016, 08:41 AM
Babych44 Babych44 is offline
Member
 
Join Date: May 2011
Location: Finland
Posts: 33
Default

Quote:
Originally Posted by Gojeep View Post
Really enjoyed this week as was good to see it taking more shape.


Time to try out the upper part of the wall to make sure they are exactly at the same height as each other. Had to take nearly 2 millimeters out of the right side to get it sitting perfectly level across the top of the window.


Strangely both sides of the lower part of the window angled up in the middle? To get it parallel with the top, I shrunk both sides at the corner of the bottom edge to pull it down. Then had to retrim the bottom edge.


I have the level hard against the edge of the door to make sure the door opening stays square to the door pillar. The back of the door is perfectly straight so can do this.


Tacked and ready to grind down the tack welds flush, inside and out, so I can run over them as I tig weld. If I don't do that I can feel the hard spots left during planishing, leaving uneven stretch.


The tig weld pulled hard when shrinking during cooling, but easily fixed by plashing to stretch the weld back out again.


Had a section marked in chalk where it was still pulled in a bit.


Hammering from the inside out against this steel block got all but a section above the weld area flush.


Used the shrinking disc on the inside along with compressed air to cool it to push the low spot outwards.


Nice and flat right across now.


As I was tacking the other side, this end lifted even after plashing the tacks as I went along. So stopped to rectify it.


Fully tig welded the section tacked and then planished only the area around the side to raise that part which brought this end down back to perfect.
Whats your method in grinding the welds down? Looks super job compared to many others (like myself). Sorry if someone has already asked the same question
__________________
Jani
Reply With Quote
  #495  
Old 08-01-2016, 06:18 AM
Gojeep's Avatar
Gojeep Gojeep is offline
MetalShaper of the Month March 2015, March 2020,, June 2022,Aug 2023
 
Join Date: Nov 2013
Location: Eastern Melbourne, Australia
Posts: 3,000
Default

Jani, I start with a air powered cutoff grinder with worn down discs from my 9" cutoff grinder.

I make sure none of the parent metal either side gets touched and stop just short of flush. Keeping the grinder at around 30-45* to the weld line seems to work best for me as I move along in the direction of the weld.
At that point I already start planishing to get it all nice and flat so I don't lose metal thickness to less than the parent metal in the hammering or the next stage.
The next stage is taking just the weld down to flush with a 5" flap disc. More correction made to have it all flat again and then finally hit it with a 7" sanding disc. Often after that a strip it disc just for texture. If your metal is not flat you wont end up with a nice finish in the end. Never grind down high spots that include the parent metal as will just thin the whole area.
__________________
Marcus
aka. Gojeep
Victoria, Australia
http://willyshotrod.com

Invention is a combination of brains and materials.
The more brains you use, the less materials you need.
Reply With Quote
  #496  
Old 08-01-2016, 12:12 PM
Babych44 Babych44 is offline
Member
 
Join Date: May 2011
Location: Finland
Posts: 33
Default

Quote:
Originally Posted by Gojeep View Post
Jani, I start with a air powered cutoff grinder with worn down discs from my 9" cutoff grinder.

I make sure none of the parent metal either side gets touched and stop just short of flush. Keeping the grinder at around 30-45* to the weld line seems to work best for me as I move along in the direction of the weld.
At that point I already start planishing to get it all nice and flat so I don't lose metal thickness to less than the parent metal in the hammering or the next stage.
The next stage is taking just the weld down to flush with a 5" flap disc. More correction made to have it all flat again and then finally hit it with a 7" sanding disc. Often after that a strip it disc just for texture. If your metal is not flat you wont end up with a nice finish in the end. Never grind down high spots that include the parent metal as will just thin the whole area.
Thanks Marcus for a great answer
__________________
Jani
Reply With Quote
  #497  
Old 08-01-2016, 12:15 PM
Babych44 Babych44 is offline
Member
 
Join Date: May 2011
Location: Finland
Posts: 33
Default

Quote:
Originally Posted by Gojeep View Post
Jani, I start with a air powered cutoff grinder with worn down discs from my 9" cutoff grinder.

I make sure none of the parent metal either side gets touched and stop just short of flush. Keeping the grinder at around 30-45* to the weld line seems to work best for me as I move along in the direction of the weld.
At that point I already start planishing to get it all nice and flat so I don't lose metal thickness to less than the parent metal in the hammering or the next stage.
The next stage is taking just the weld down to flush with a 5" flap disc. More correction made to have it all flat again and then finally hit it with a 7" sanding disc. Often after that a strip it disc just for texture. If your metal is not flat you wont end up with a nice finish in the end. Never grind down high spots that include the parent metal as will just thin the whole area.
Thanks Marcus for the great answer I guess my problem is trying to grind the whole weld flush with the grinding disc
__________________
Jani
Reply With Quote
  #498  
Old 08-06-2016, 08:07 AM
Gojeep's Avatar
Gojeep Gojeep is offline
MetalShaper of the Month March 2015, March 2020,, June 2022,Aug 2023
 
Join Date: Nov 2013
Location: Eastern Melbourne, Australia
Posts: 3,000
Default


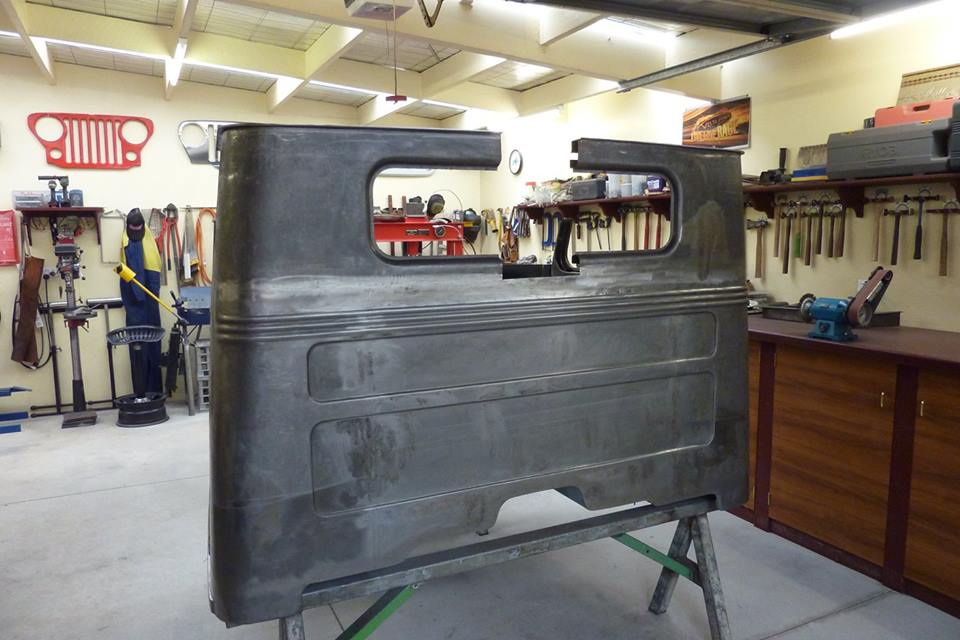
Finished the other side off so getting there.


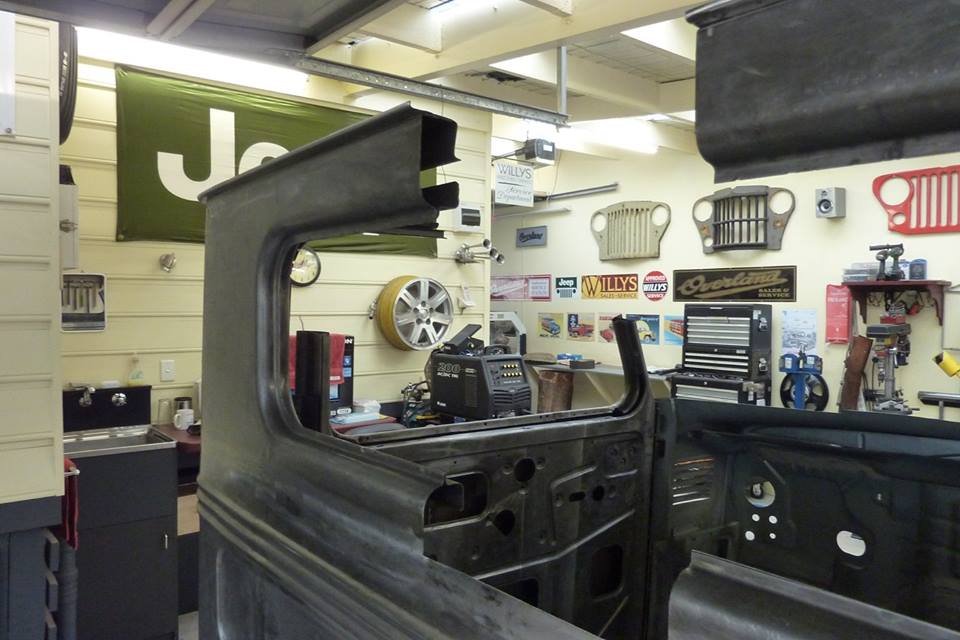
Have to make the pieces in between now. The curves outside the window frame are different to the ones on the inside. Two pieces make up the bottom and four pieces for the top.


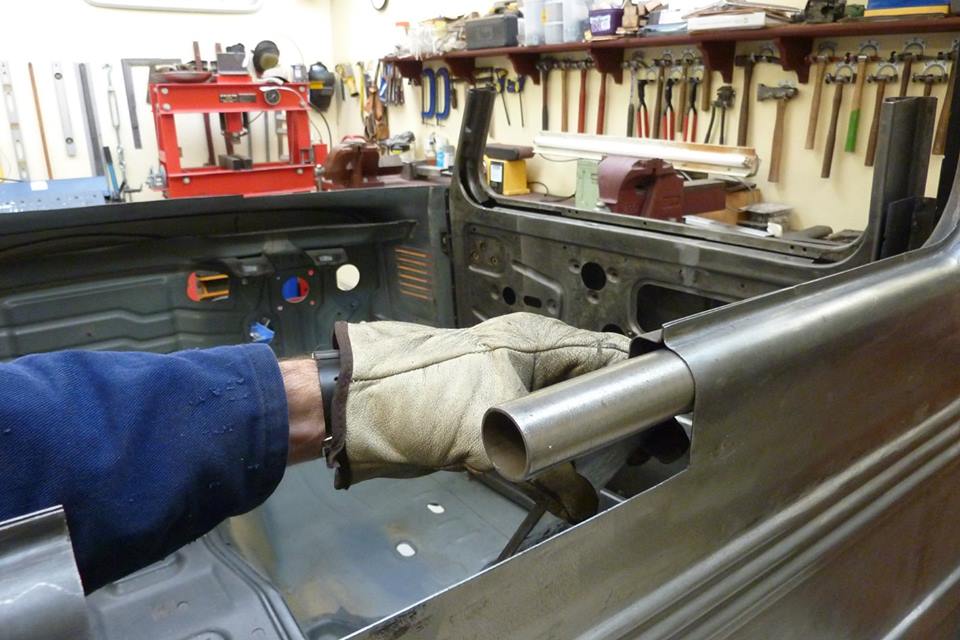
One of the stake dollies I made fits quite well so will use this to form the outer window curve.


Just marked where I wanted the curve to start and used a lead working bat to quickly form the bend. Leaves no hammer marks and less than 2 minutes work. I picked this one up last year in England at an old hardware store that was closing down.


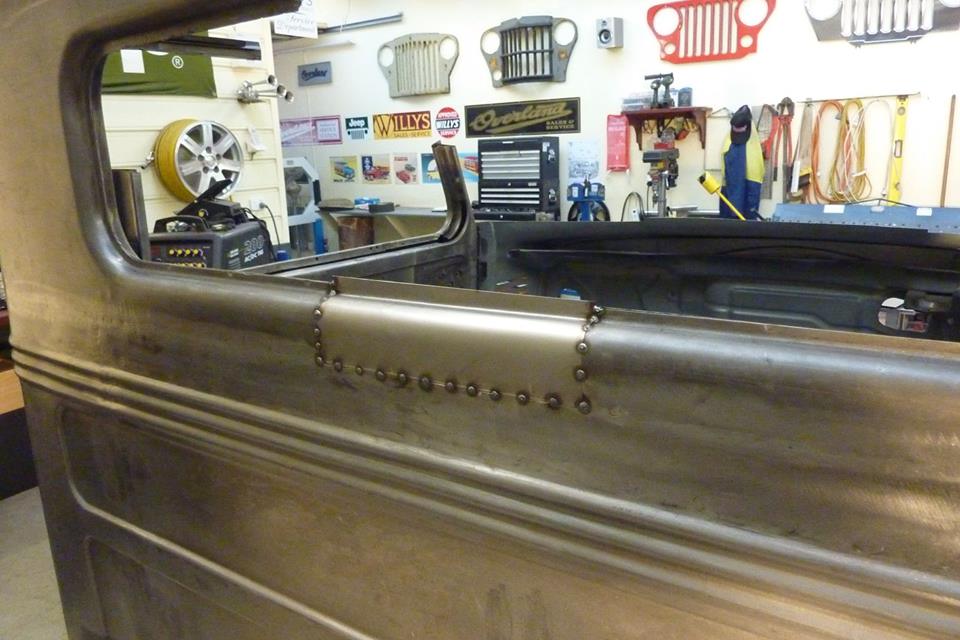
Quick fold at the top and tacked into place. Will trim the excess later at the top once the inside flange is attached.


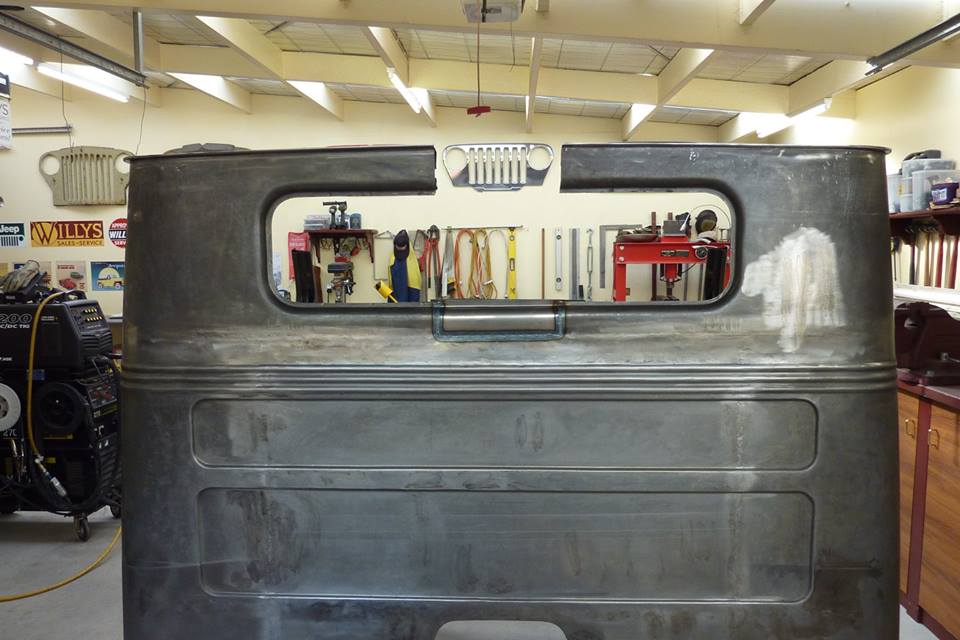
Tig welded into place.


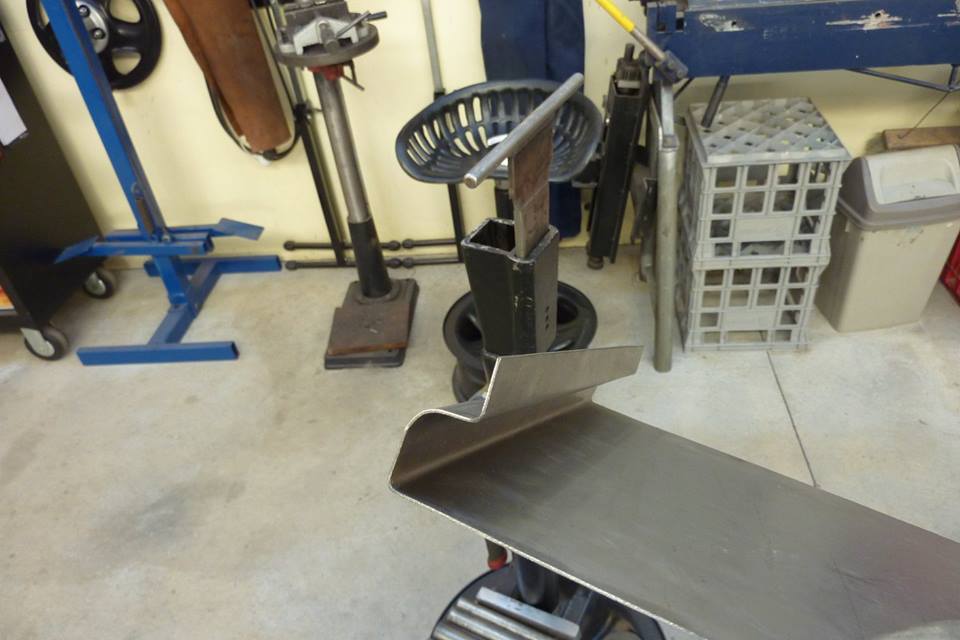
Inside window flange taking shape. Bottom flange just needs to be trimmed off to length.


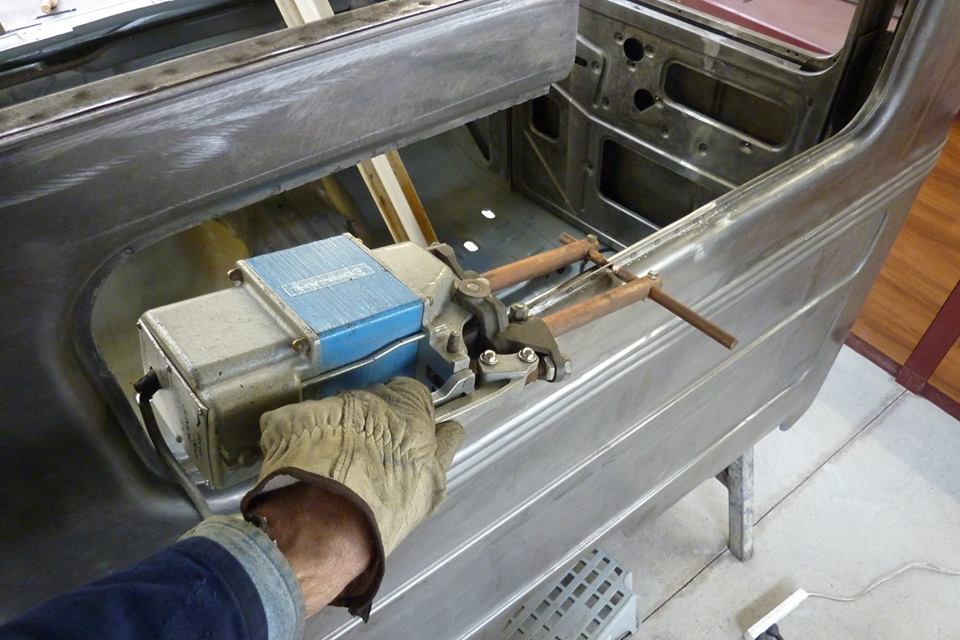
My wife bought me this old Australian made spot welder as a gift. Thinks I will get plenty of use out of it when I build her a custom car next! Thing weigh a ton but works really well. Came from a business that was closing down making stretched funeral cars!


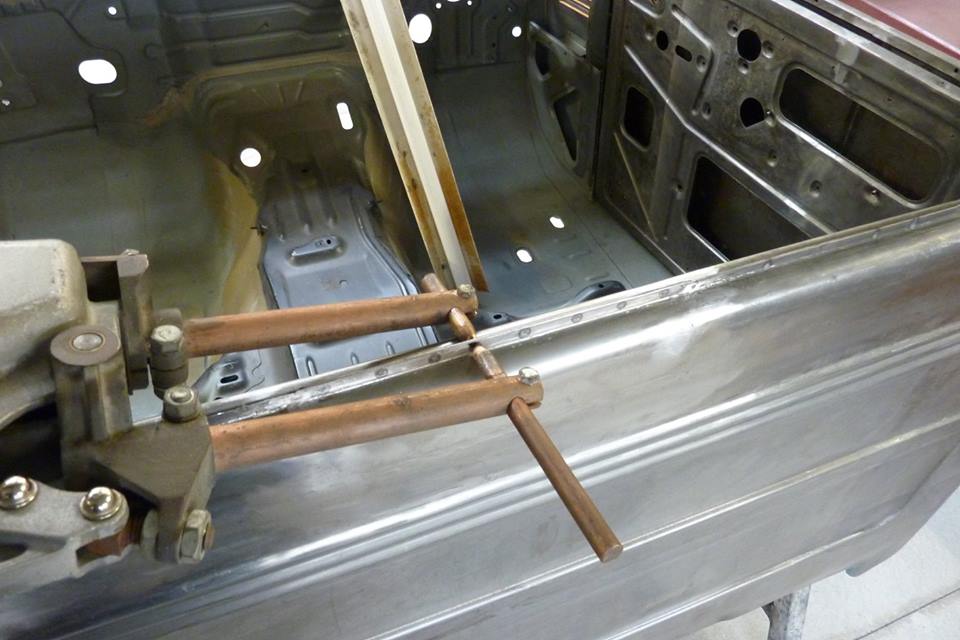
Feels like cheating as does it so quick and easy. No timer so have to keep a close eye on it as will burn holes right through both layers otherwise!
__________________
Marcus
aka. Gojeep
Victoria, Australia
http://willyshotrod.com

Invention is a combination of brains and materials.
The more brains you use, the less materials you need.

Last edited by Gojeep; 08-13-2017 at 12:43 PM.
Reply With Quote
  #499  
Old 08-06-2016, 09:36 AM
Jack 1957's Avatar
Jack 1957 Jack 1957 is offline
MetalShaper of the Month Dec . 2016, Sept 2019 Metal Shaper Of The Year 2021
 
Join Date: Sep 2014
Location: Strongsville,OH
Posts: 1,133
Default

Hey Marcus, in that one picture of the back of the cab you can see the Jeep grille hanging on the wall perfectly positioned. It looks like a bed light like the newer trucks have. What do you think?
__________________
Jack

Set a Goal So Big That You Can't Achieve It Until You Grow Into The Person That Can.
Reply With Quote
  #500  
Old 08-07-2016, 04:54 AM
Gojeep's Avatar
Gojeep Gojeep is offline
MetalShaper of the Month March 2015, March 2020,, June 2022,Aug 2023
 
Join Date: Nov 2013
Location: Eastern Melbourne, Australia
Posts: 3,000
Default

Quote:
Originally Posted by Jack 1957 View Post
Hey Marcus, in that one picture of the back of the cab you can see the Jeep grille hanging on the wall perfectly positioned. It looks like a bed light like the newer trucks have. What do you think?
Might have to make something like that for there.
__________________
Marcus
aka. Gojeep
Victoria, Australia
http://willyshotrod.com

Invention is a combination of brains and materials.
The more brains you use, the less materials you need.
Reply With Quote
Reply

Thread Tools Search this Thread
Search this Thread:

Advanced Search
Display Modes

Posting Rules
You may not post new threads
You may not post replies
You may not post attachments
You may not edit your posts

BB code is On
Smilies are On
[IMG] code is On
HTML code is On

Forum Jump

All times are GMT -5. The time now is 03:36 PM.

Powered by vBulletin® Version 3.8.11
Copyright ©2000 - 2024, vBulletin Solutions Inc.