
|
|
|
#731
 05-29-2017, 05:53 AM
|
||||
|
||||
|
Thanks for the comments Steve and Leigh.
Registration is much harder over here, more so as I am going on to full registration rather than Street Rod Club reg. I made sure my ideas were sound and had a engineer ok them before I started. I will have a full inspection done before going to paint so the welds can all be checked for quality and soundness. Required boxing plates, K or X member, and dimensions of them as well etc. All bolts used in suspension, steering, body mounting etc have to be approved. A raft of other things too like seat belts, collapsible steering column, seat mounts and anything safety related. Right down to approved glass, heater/defrost functioning along with wipers and so on. It is no easy task but have kept it all in mind with every step so don't expect many surprises. Lots of projects here for sale that could not be passed and they try and sell them off to the unwitting. Don't plan to be doing that!
__________________
Marcus aka. Gojeep Victoria, Australia http://willyshotrod.com Invention is a combination of brains and materials. The more brains you use, the less materials you need. 
|
|
#732
06-10-2017, 07:47 AM
|
||||
|
||||
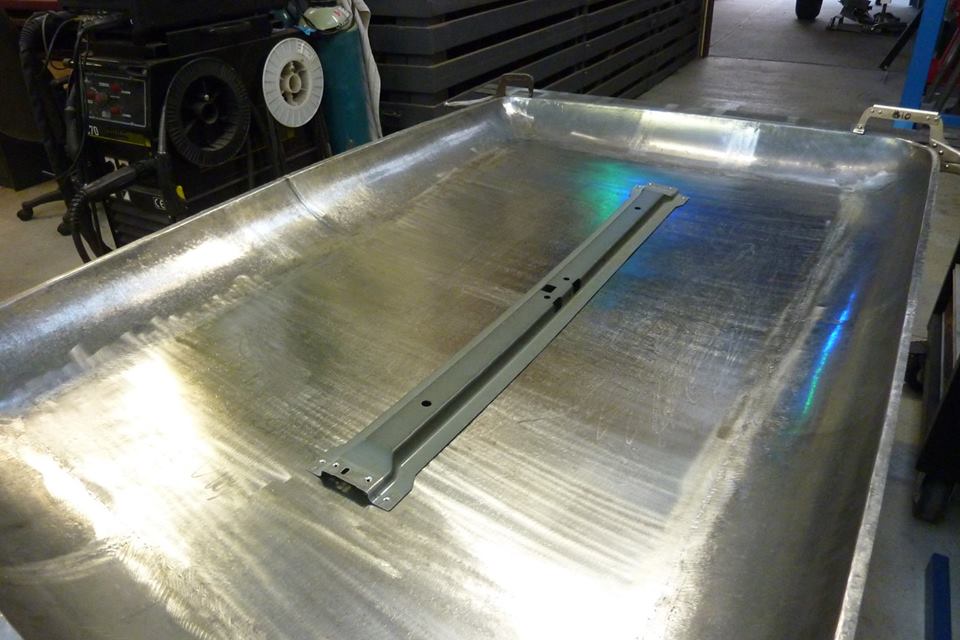 I decided to fit a centre roof support even though it didn't have one before. The panel was nice and tight all over but it is a much wider, longer and flatter profile than stock. I started with the roof support from the 2008 Jeep donor roof and altered the profile to match. Surprising how much extra I will have to add to the length of it. 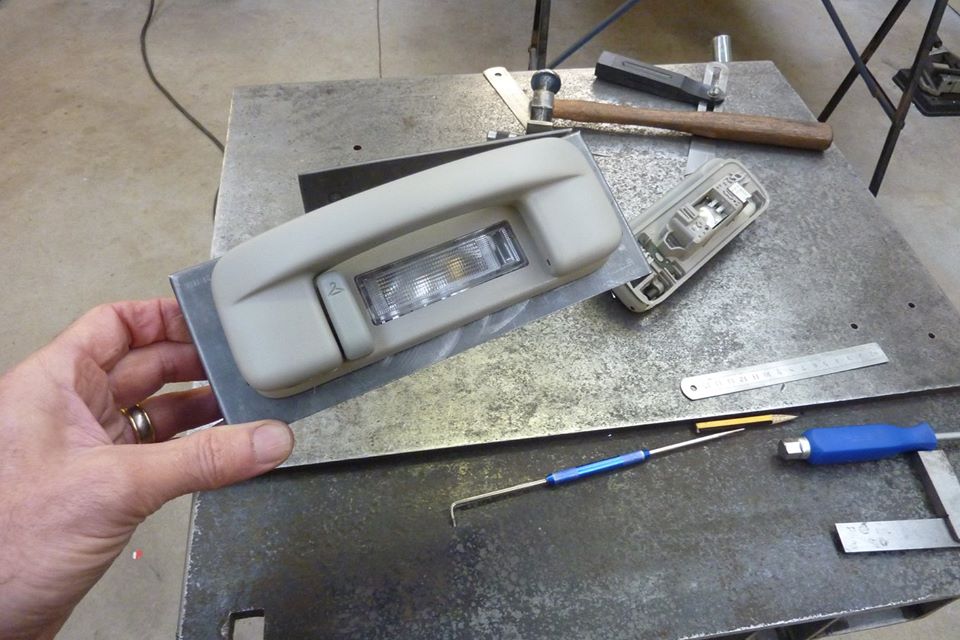 Another reason for the support was to act as a brace between these flip down grab handles from the donor that have inbuilt lights. I folded up these supports with cutouts in them to mount them into. 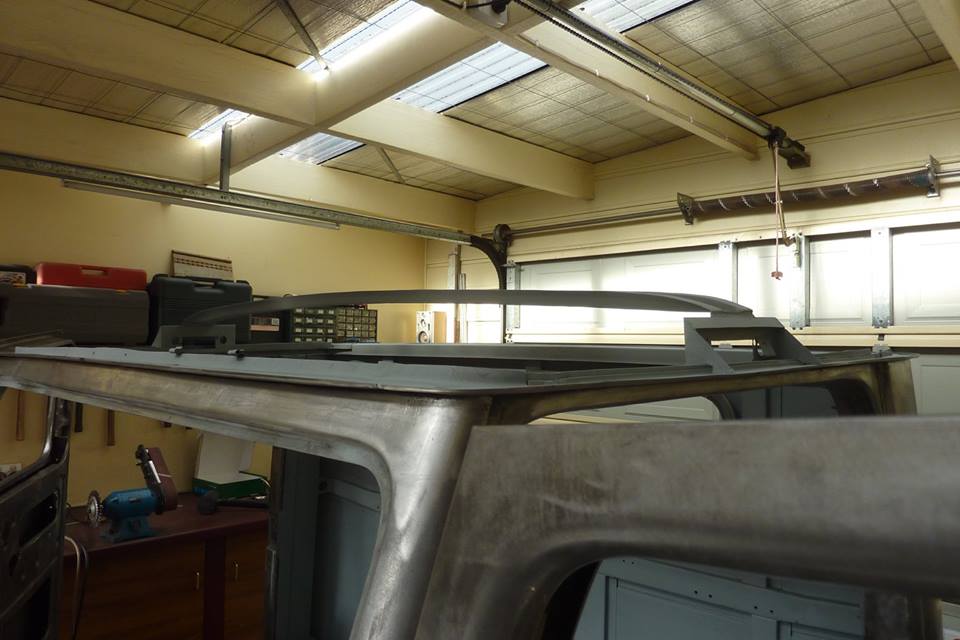 The handle brackets brace back across the roof frame all the way to the gutter line. Also shows just how much arch is still in the roof even though it looks flatter than this from the outside. 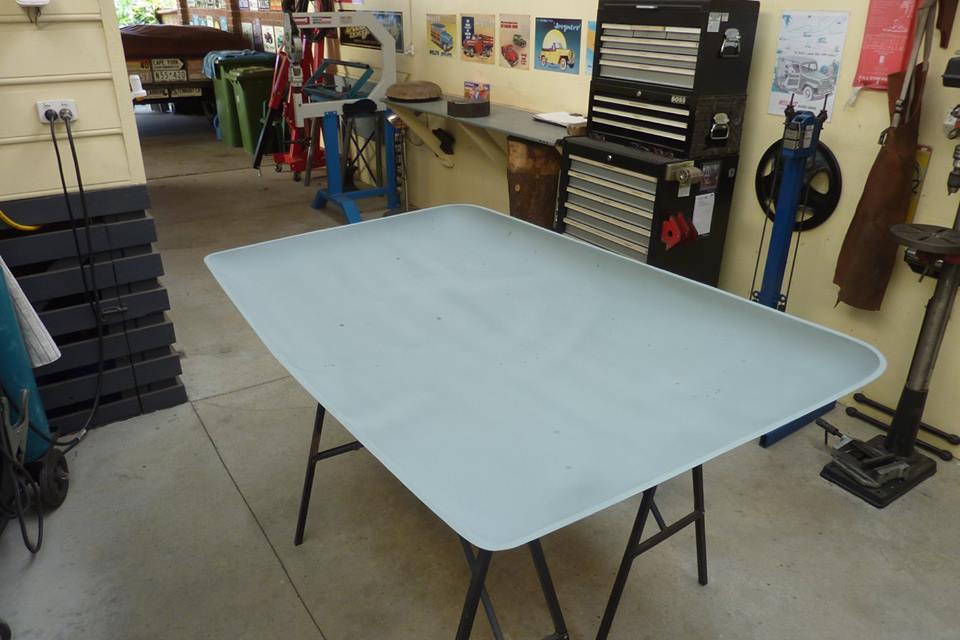 The roof was coated with zinc, as was the roof support and frame, and left to dry overnight ready for welding into place. 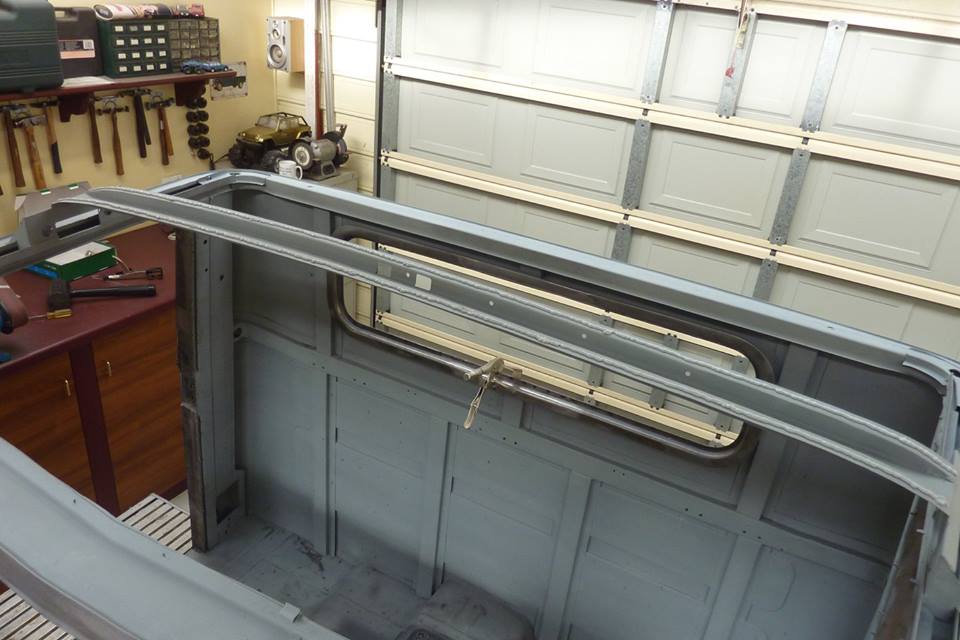 A nice thick beads of sealant was run over the support to cushion the roof and keep moisture out. 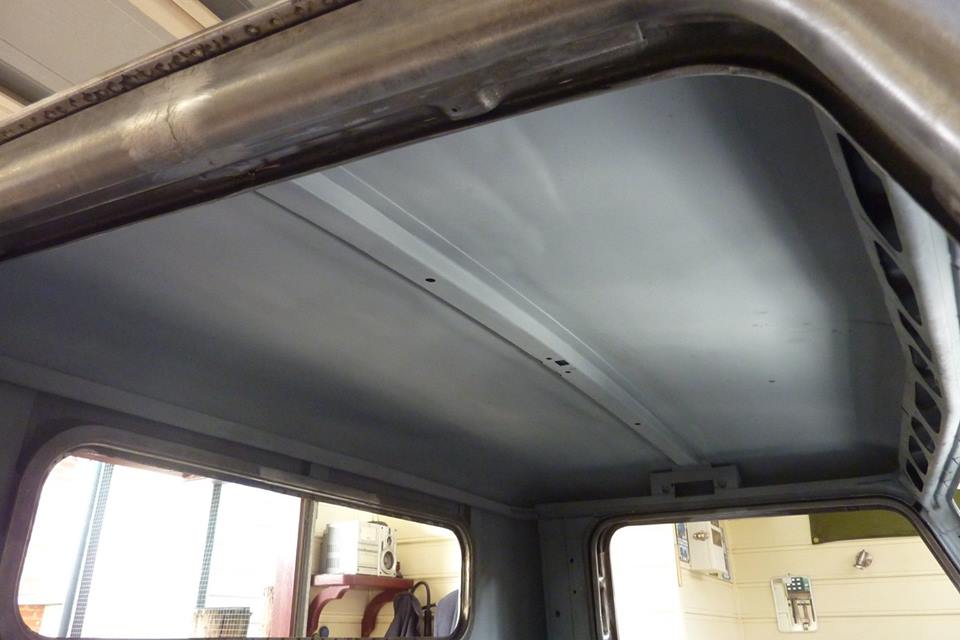 It followed the roof profile nicely. 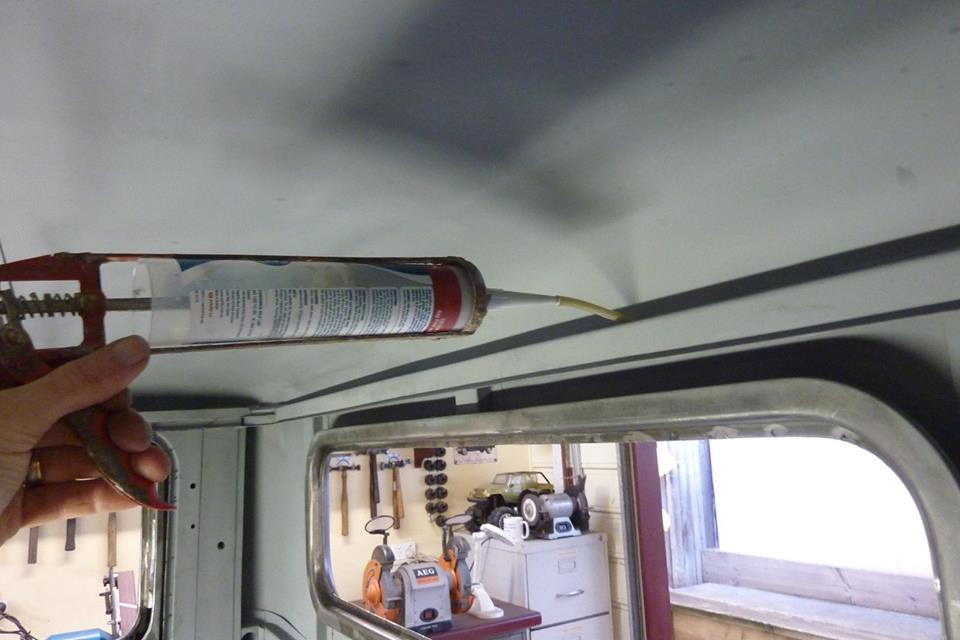 After welding zinc was sprayed into the join and left over night to dry. Fitting a bit of hose to the end of the cartridge I was able to get sealant right along the whole join. It was further pressed into it with a finger and the excess wiped off. Sprayed with zinc again the next day to seal it all off  The 1948 roof had 208 spot welds holding the roof skin in place and was still in great condition and what I used in the corners of the this roof. The 1958 skin only had 89 spot welds and was full of rust and was not worth using. Yet the opposite was true with rust in the lower cab so was not like they had different levels of exposure. So with that in mind I put in 350 spot weld into this roof! 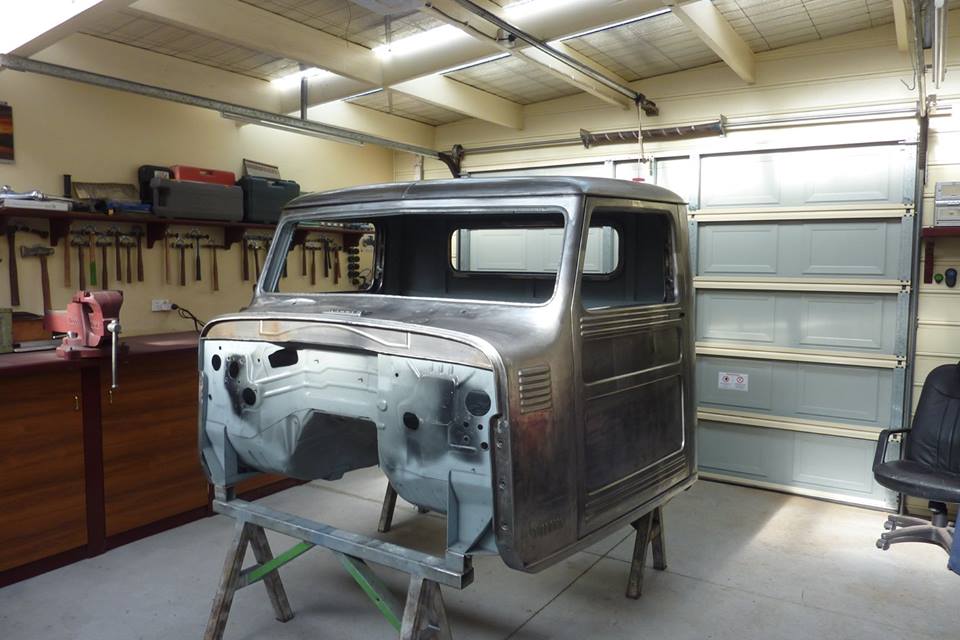 So here we have it. Last panel to go on! 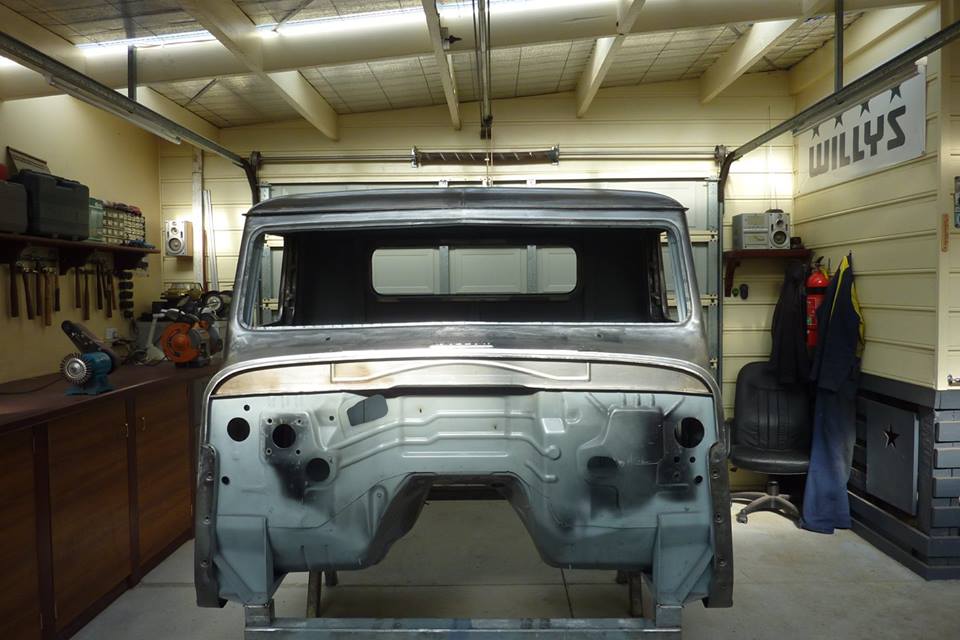 I'm very pleased with the outcome.  Glad I put the wedge shape back into it after the pancaking. Originally I took 1/2" more out of the back than the front, but ended up laying the front back more which dropped it back down to 1.5" all round from stock. 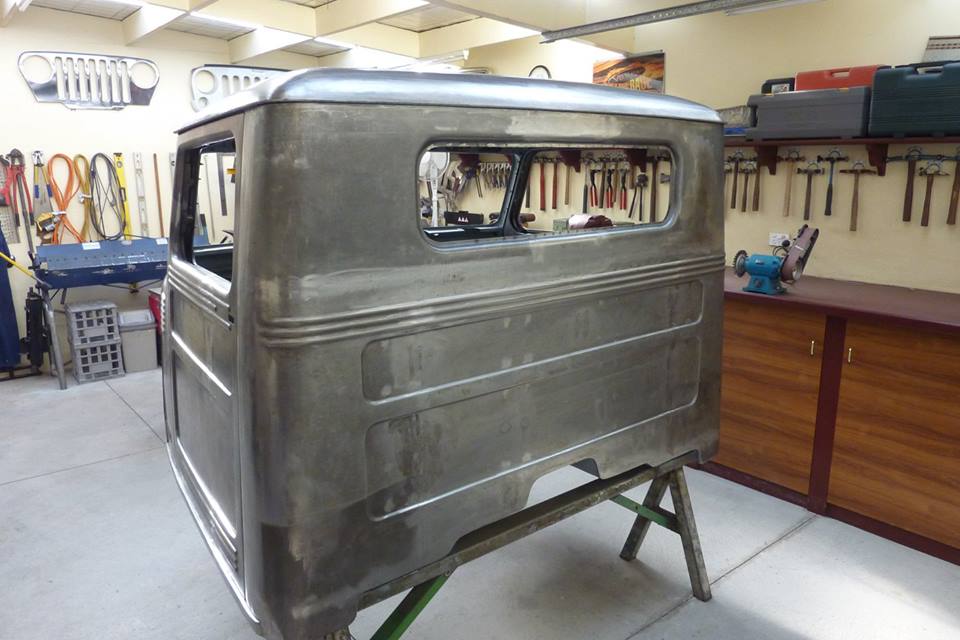 10.5" longer than stock rear window, but stock height, fits well too I think. Cab is actually now 3.5" lower than stock from the floor to roof. 2" in the walls and 1.5" out of the roof. 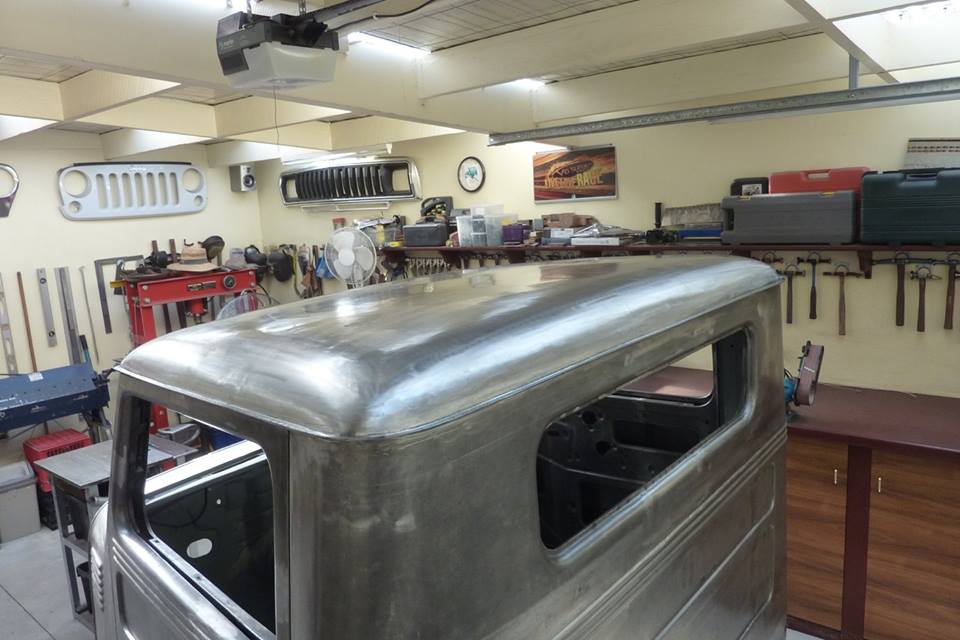 Last shot of the roof I promise! Not perfect but the shape is consistent from one side to the other without any high spots. Some surface imperfections but rather that than over work the metal or thin it from filing it.  Remember I only started with this plus the donor floor and firewall and made anything else!
__________________
Marcus aka. Gojeep Victoria, Australia http://willyshotrod.com Invention is a combination of brains and materials. The more brains you use, the less materials you need. Last edited by Gojeep; 08-14-2017 at 04:48 AM.
|
|
#733
06-10-2017, 08:17 AM
|
||||
|
||||
|
Marcus congratulations
what a milestone! You should be very proud of what you have accomplished, looks like a factory built body. proportions are good, very pleasing to the eye. thanks for sharing with us. Great educational tool for those that are dreaming of a major project of their own. Projects of this size require a huge dedication of time and can become overwhelming. you have shown that if you keep working on a regular schedule the end is not that far down the road.  Steve
__________________
Steve Hamilton Hamilton Classics Auto Restoration & Metalshaping
|
|
#734
06-10-2017, 10:47 AM
|
|||
|
|||
|
Man, Marcus- that's really fantastic. I really appreciate your investment in sharing to guide the rest of us, even though the likelihood of actually doing a project that involved from start to finish is questionable....
As far as your hand nailer experiment, I wondered about doing the same when I saw one for sale at the store recently. Some here like the comparable pneumatic Palm hammers with the larger striking face. Both are somewhat similar to my normal pneumatic hammers I use in stone work. When we dress the butts of those machine chisels for stone work, we spin them to square the end and then put a very low crown on the end. Either a square/flat end or a more tapered end like you showed seem to mushroom much faster than a crowned end. Some believe it makes tools hit harder in general and makes certain tools spin faster. I would use more appropriate material for the tool butt and shank as well as the striking face, even if the hammer face is attached by brazing/welding or taper. Obviously soft material will mushroom faster than properly heat treated material, but try a low crown end instead on future tooling. It may help. A figure eight- an "8" or rectangular piece of inner tube or similar material with hole in each end- one for tool shank and one for connection to hammer- will keep your tool held in place to free up a hand when you lift. I don't use them but some like them. using a pair of valves in line, especially different styles, can help fine tune your air flow of your hammer is sensitive enough to benefit. We figure it takes a minimum of 3 months of full time operation to break in a pneumatic hammer. The feel and performance can change dramatically. No reason to start the whole air motor/rivet gun vs pneumatic whatever hammer debate again. The point is having some blow by soften the hits, which has as many benefits in certain applications as a harsh sharp hit has in other situations. Not much to offer in comparison to this whole thread, but just a little something to say thank for all you've done.
__________________
AC Button II http://CarolinaSculptureStudio.com https://www.youtube.com/channel/UCzSYaYdis55gE-vqifzjA6A Carolina Sculpture Studio Channel
|
|
#735
06-10-2017, 11:32 AM
|
||||
|
||||
|
That is just a superb job of it.
Thanks Marcus.
|
|
#736
06-10-2017, 07:14 PM
|
|||
|
|||
|
Fantastic work Marcus; well done!
__________________
Why does dust stick to everything, but nothing sticks to dust?
|
|
#737
06-10-2017, 08:28 PM
|
|||
|
|||
|
The proportions look fantastic! Wonderful job!
__________________
Mike
|
|
#738
06-11-2017, 03:56 AM
|
||||
|
||||
|
you have come such a long way since making that bowl/hubcab and 2015 melb metal WEEKEND .. look forward to catching up again soon
__________________
David Geelong victoria Australia
|
|
#739
06-11-2017, 05:15 AM
|
||||
|
||||
|
Thanks for the great responses. Glad you have all stuck by the build all this time and given the feedback that you all have to help this build along. I have learnt much from others here and glad I can give a little back as well.
Thanks to Kiwi John and you Dave for suggesting I post the build on here too after that first metal meet. Had no idea it would gain so many views. The most of any of the forums it is posted on even though I started the thread here a few years later than the others. Here is a video I took this week as well. and the playlist on the build https://www.youtube.com/playlist?lis...13IPnXM81a8D45
__________________
Marcus aka. Gojeep Victoria, Australia http://willyshotrod.com Invention is a combination of brains and materials. The more brains you use, the less materials you need.
|
|
#740
06-11-2017, 05:18 AM
|
||||
|
||||
|
Quote:
Thanks for the input.
__________________
Marcus aka. Gojeep Victoria, Australia http://willyshotrod.com Invention is a combination of brains and materials. The more brains you use, the less materials you need.
|
 |
| Thread Tools | Search this Thread |
| Display Modes | |
|
|


 Linear Mode

