
|
|
|
#1
 09-17-2016, 10:17 PM
|
||||
|
||||
|
Working today on fitting up the wheel wells. The front half is re-popped and uses the same part as the sedans, the rear part is not available. Fitting the front, notice the right lower corner (as shown) tapers up with less overlap for plug/spot welding.
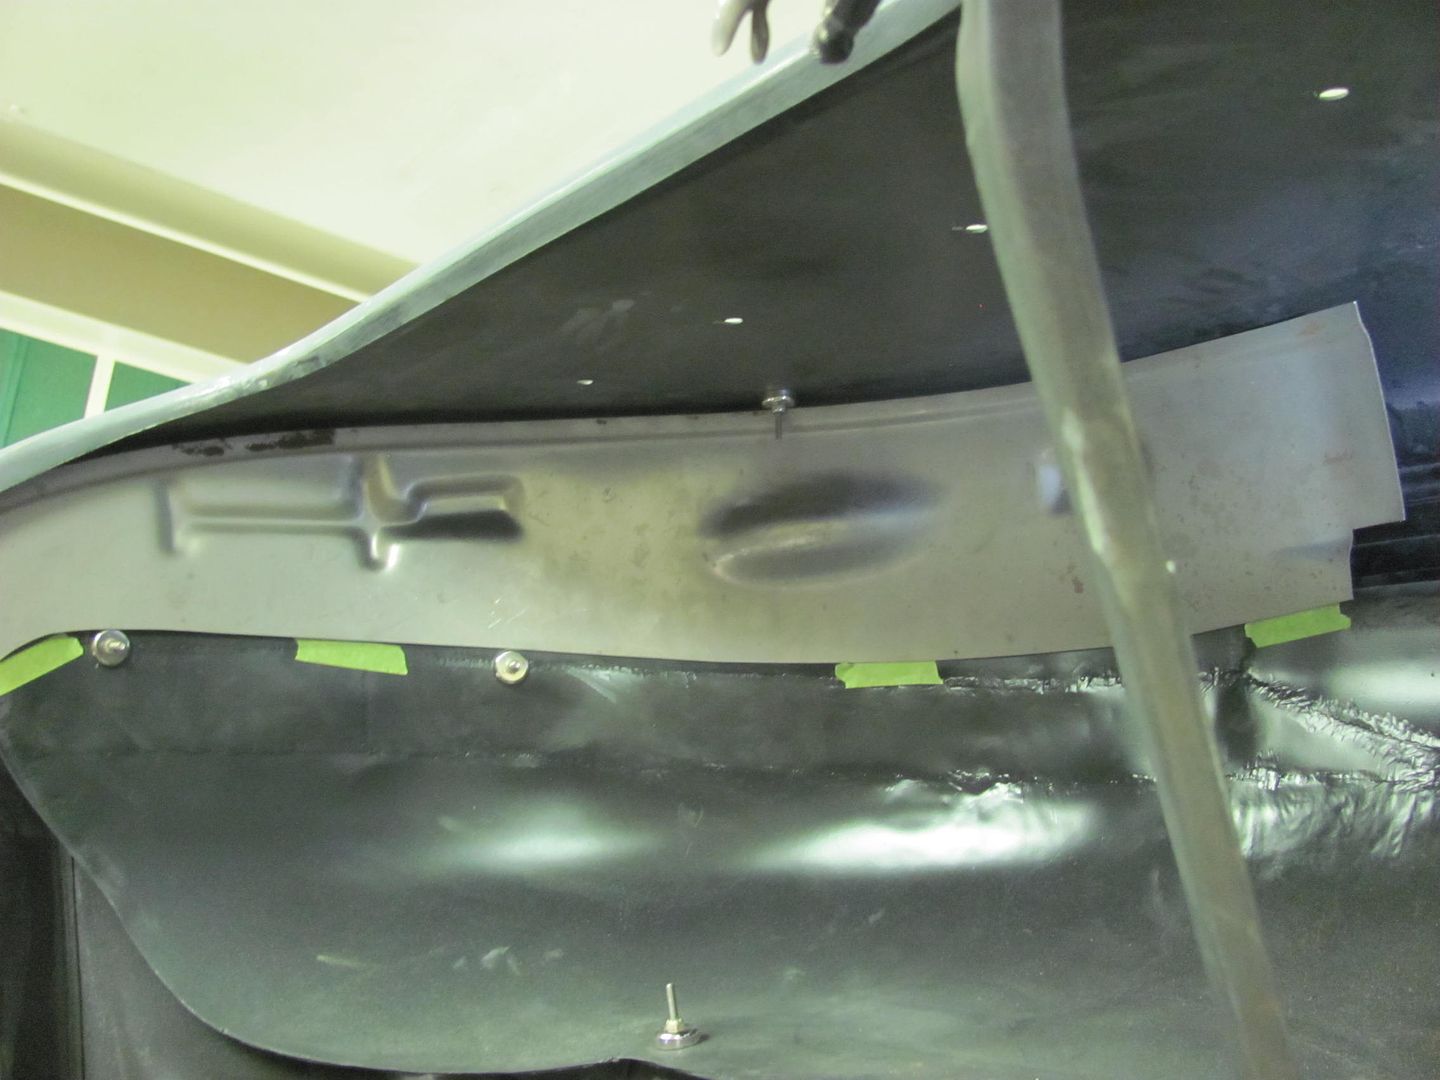 The rear section is NOT available in reproduction, and the notch you see there is for routing the fuel fill on a wagon tank. We've switched to a sedan tank to make room for dual exhaust, and given the widened wheel tubs and tires being used, no need in leaving such a gaping hole. So new parts it is.. The lower flap I'm holding is a separate piece that is spot welded on. In an effort to minimize moisture traps/rust generators in the future, we'll make this in one piece. 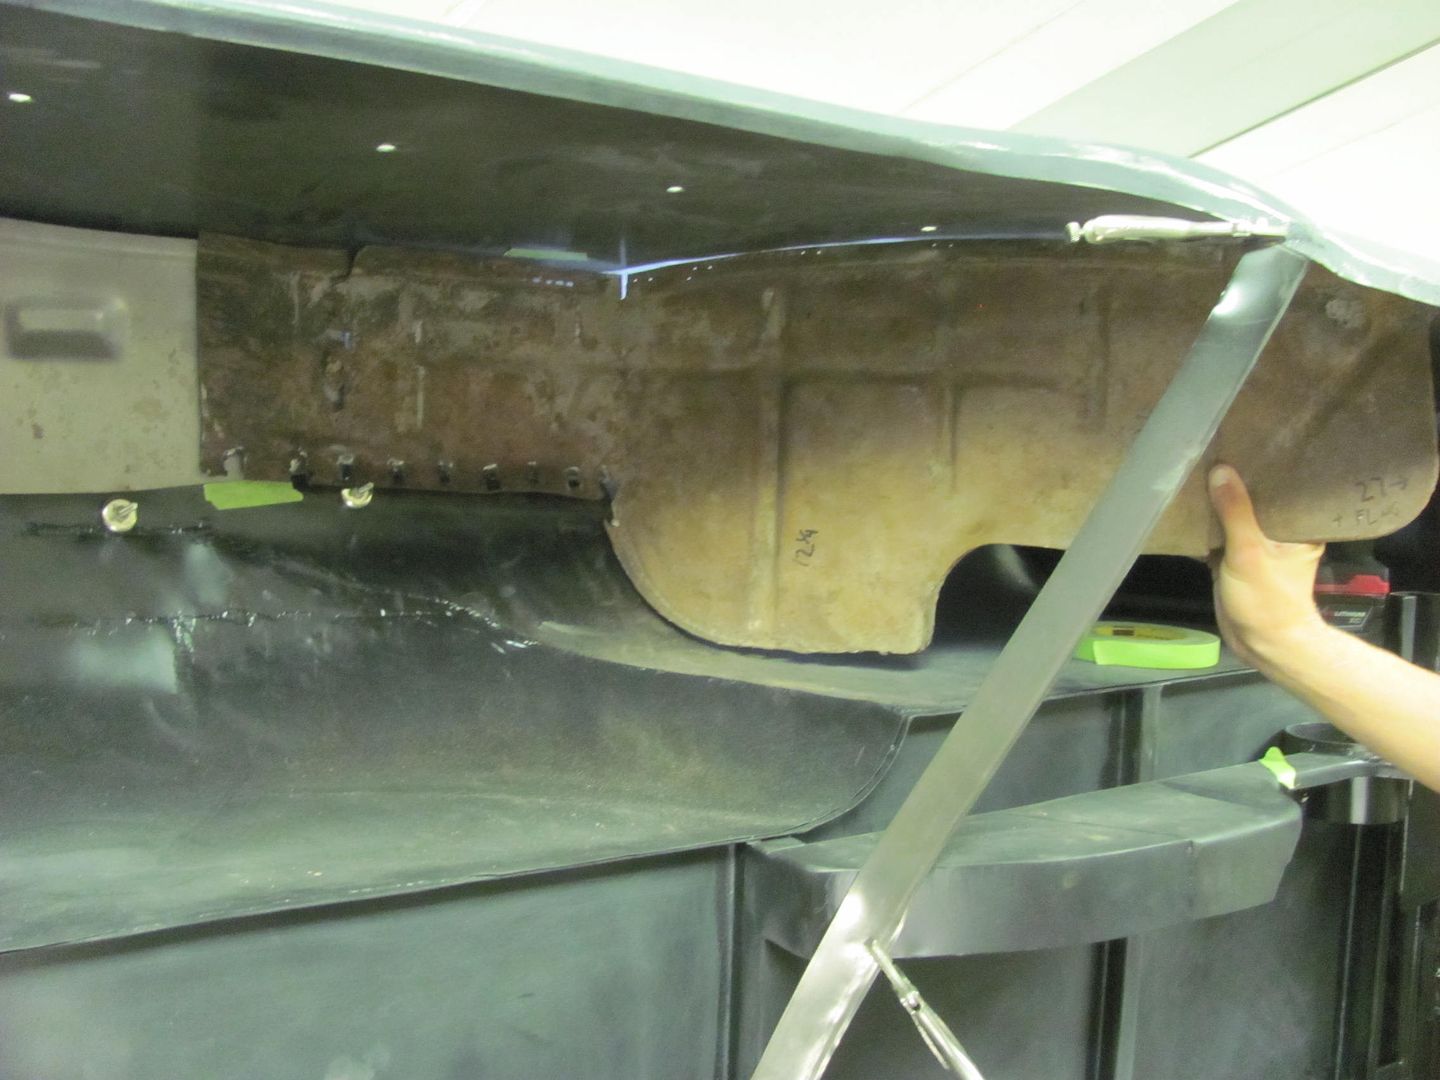 To fix our front repop, a piece of 18 gauge is TIG welded to give us a square corner... 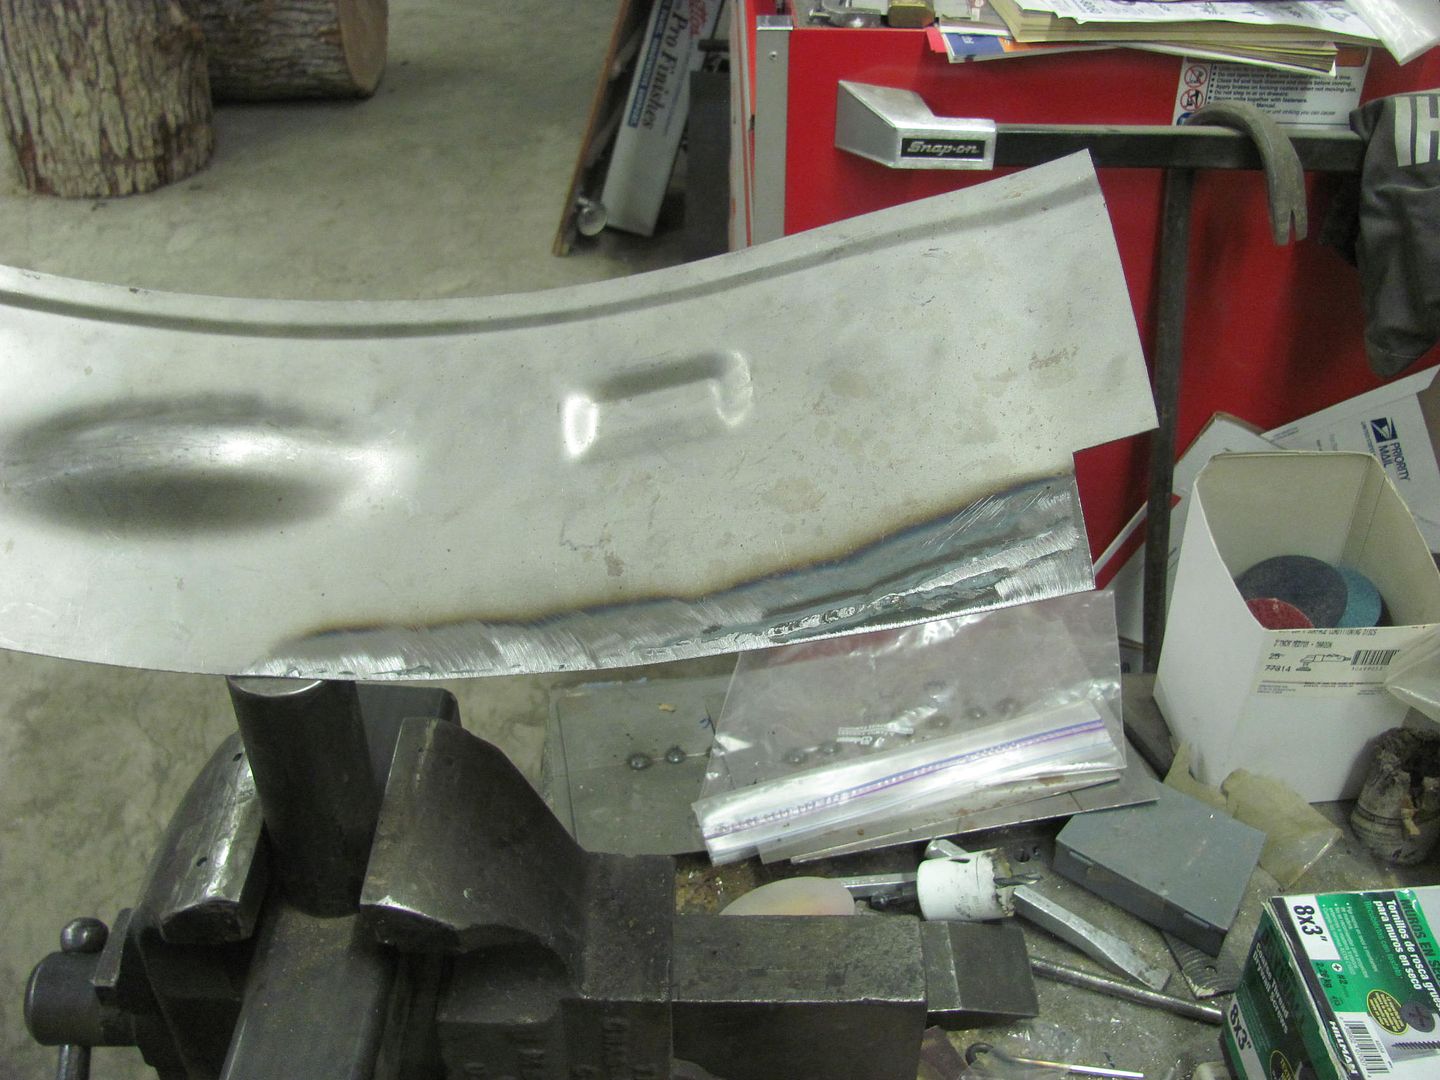 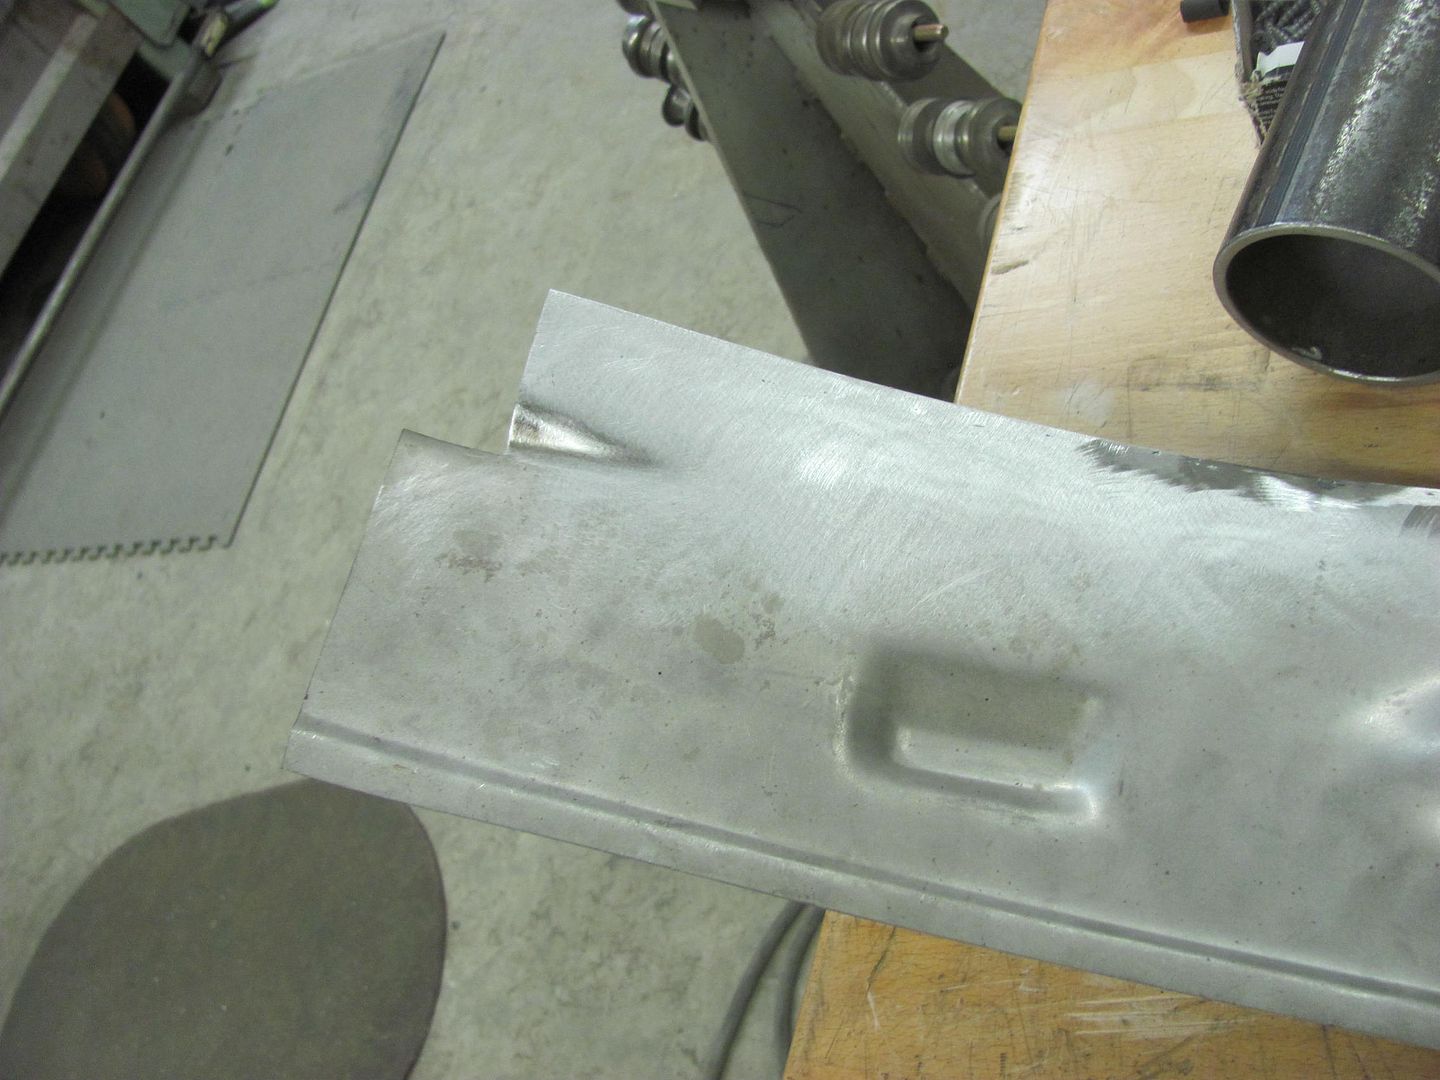 To make the new piece for the rear, we'll need a method to add beads that cross each other. This will entail a small table to use on the Lennox, an upper punch, and two pieces of matched MDF. Slots will be cut into the MDF, the top used as a guide for the punch, the bottom acts as our bottom die as it "rests" on the table.. The table will be supported in the lower tool holder using a 3/4 shank. The end is turned down to 1/2" to mate into a 1/2" hole in the 4 x 12 table, which is then plug welded. 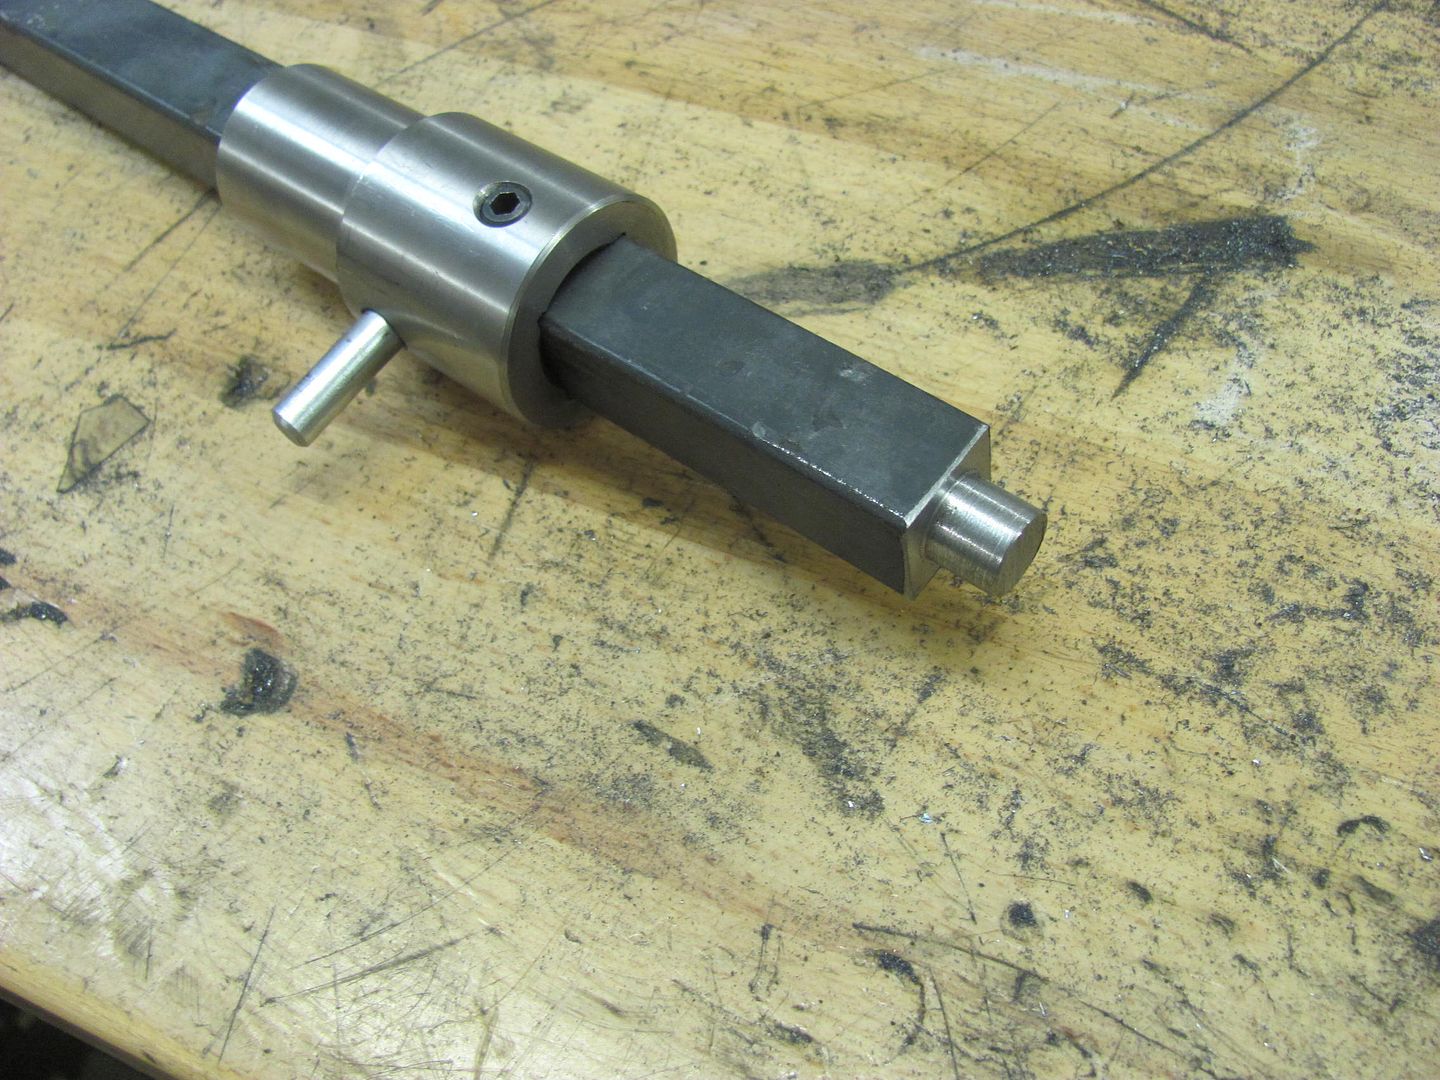 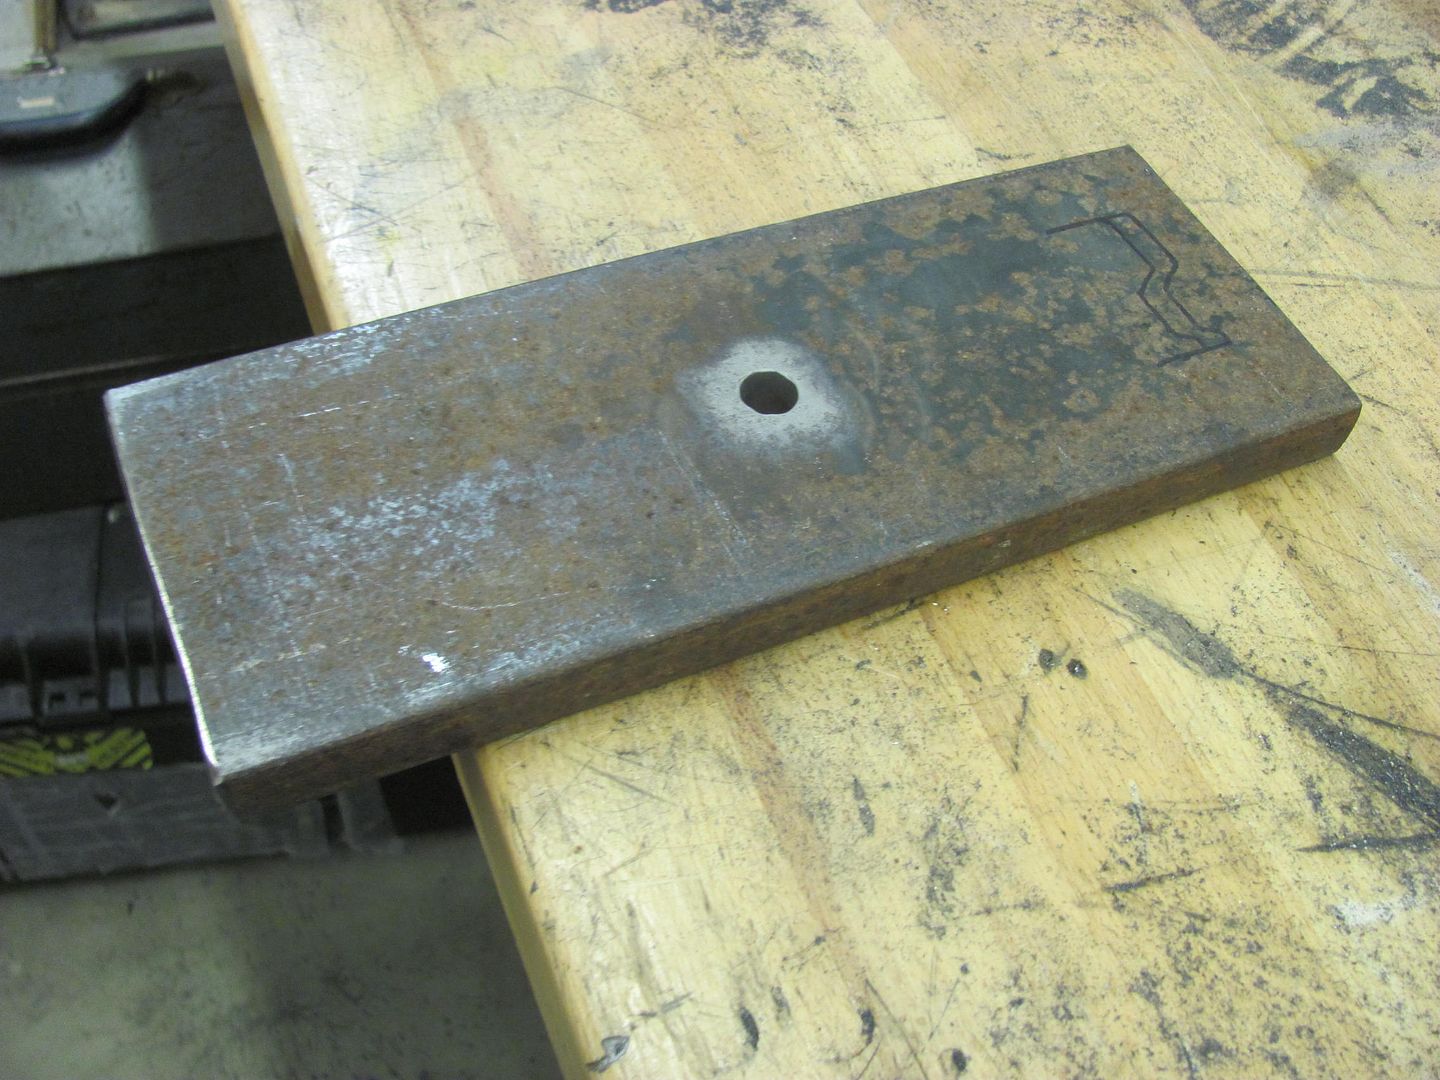 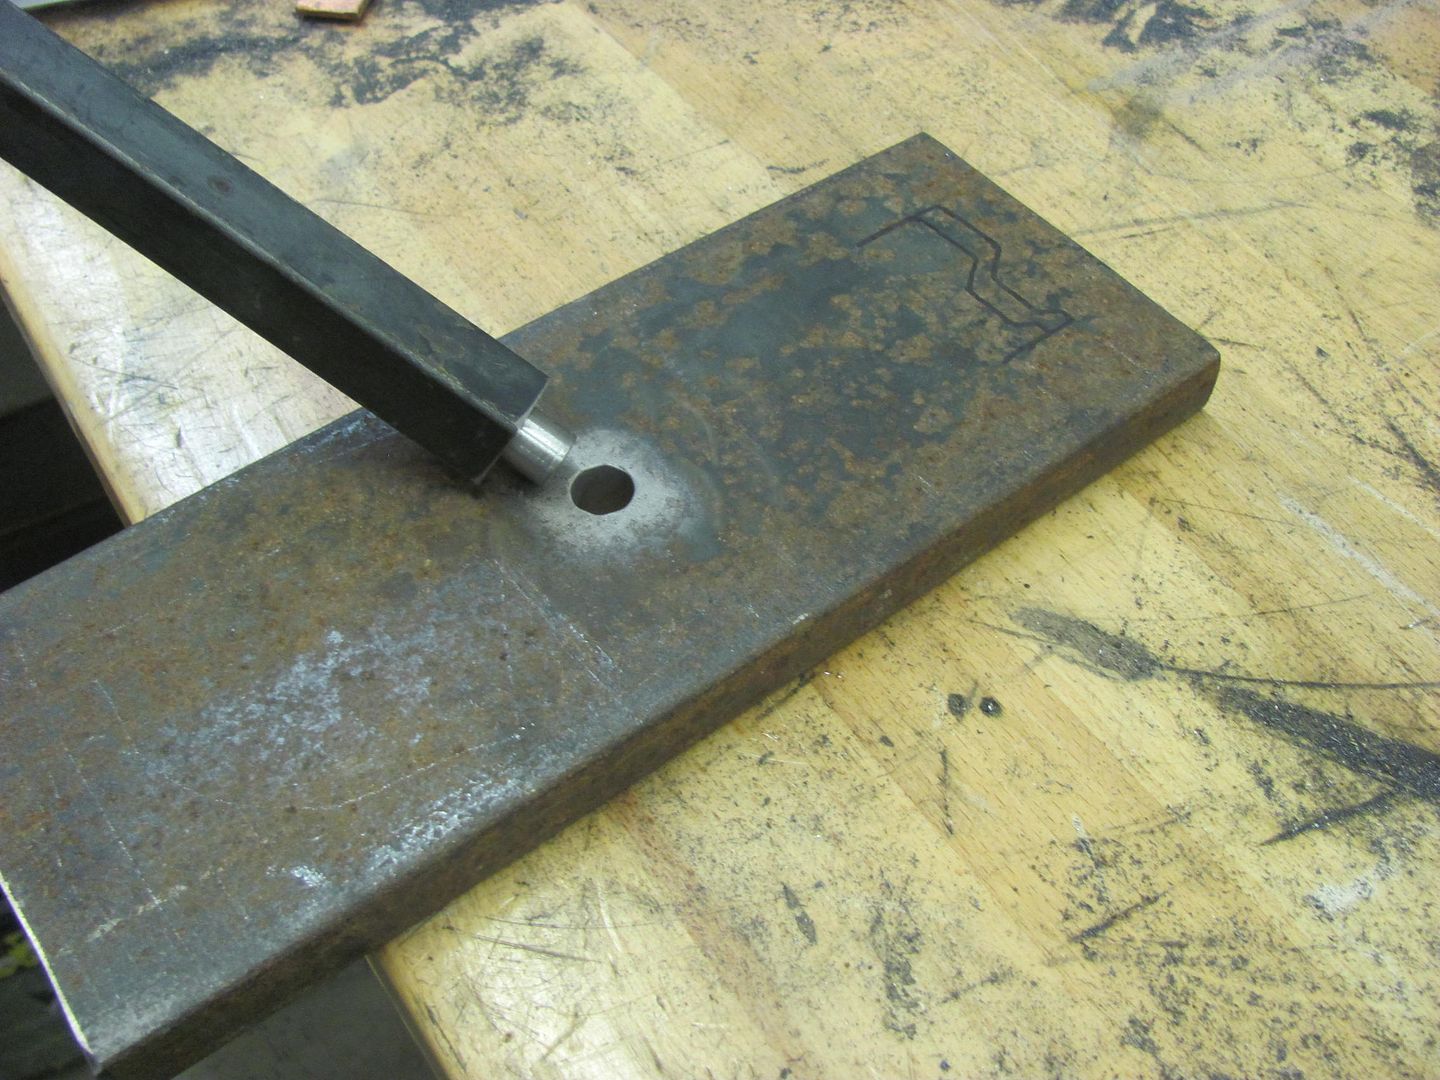 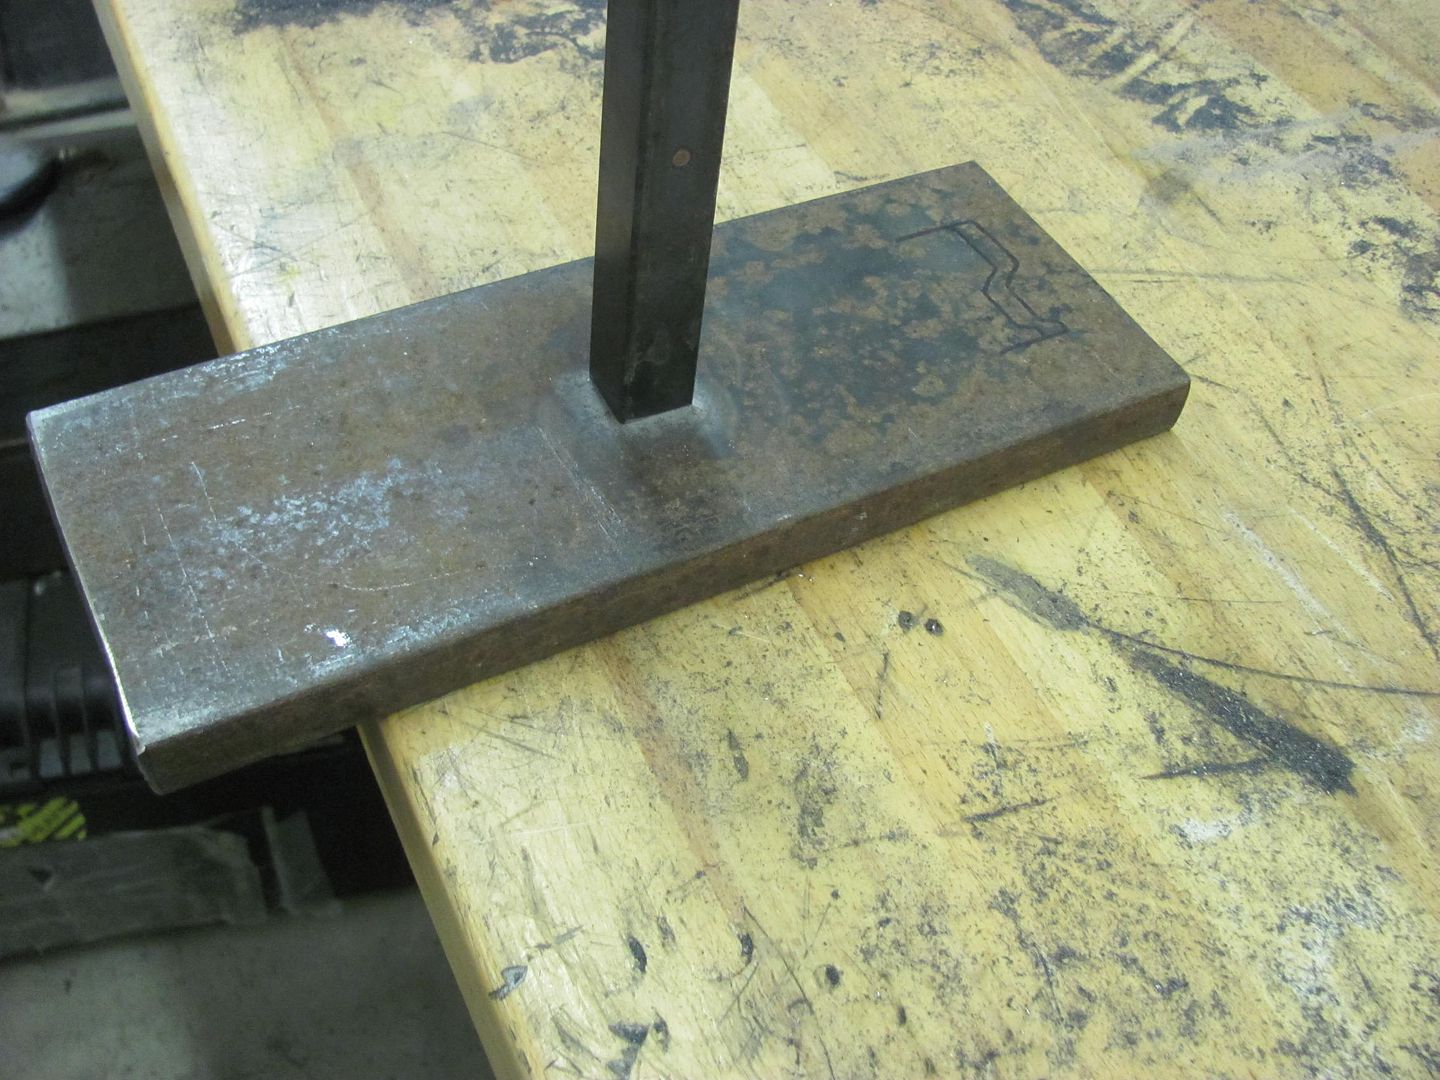 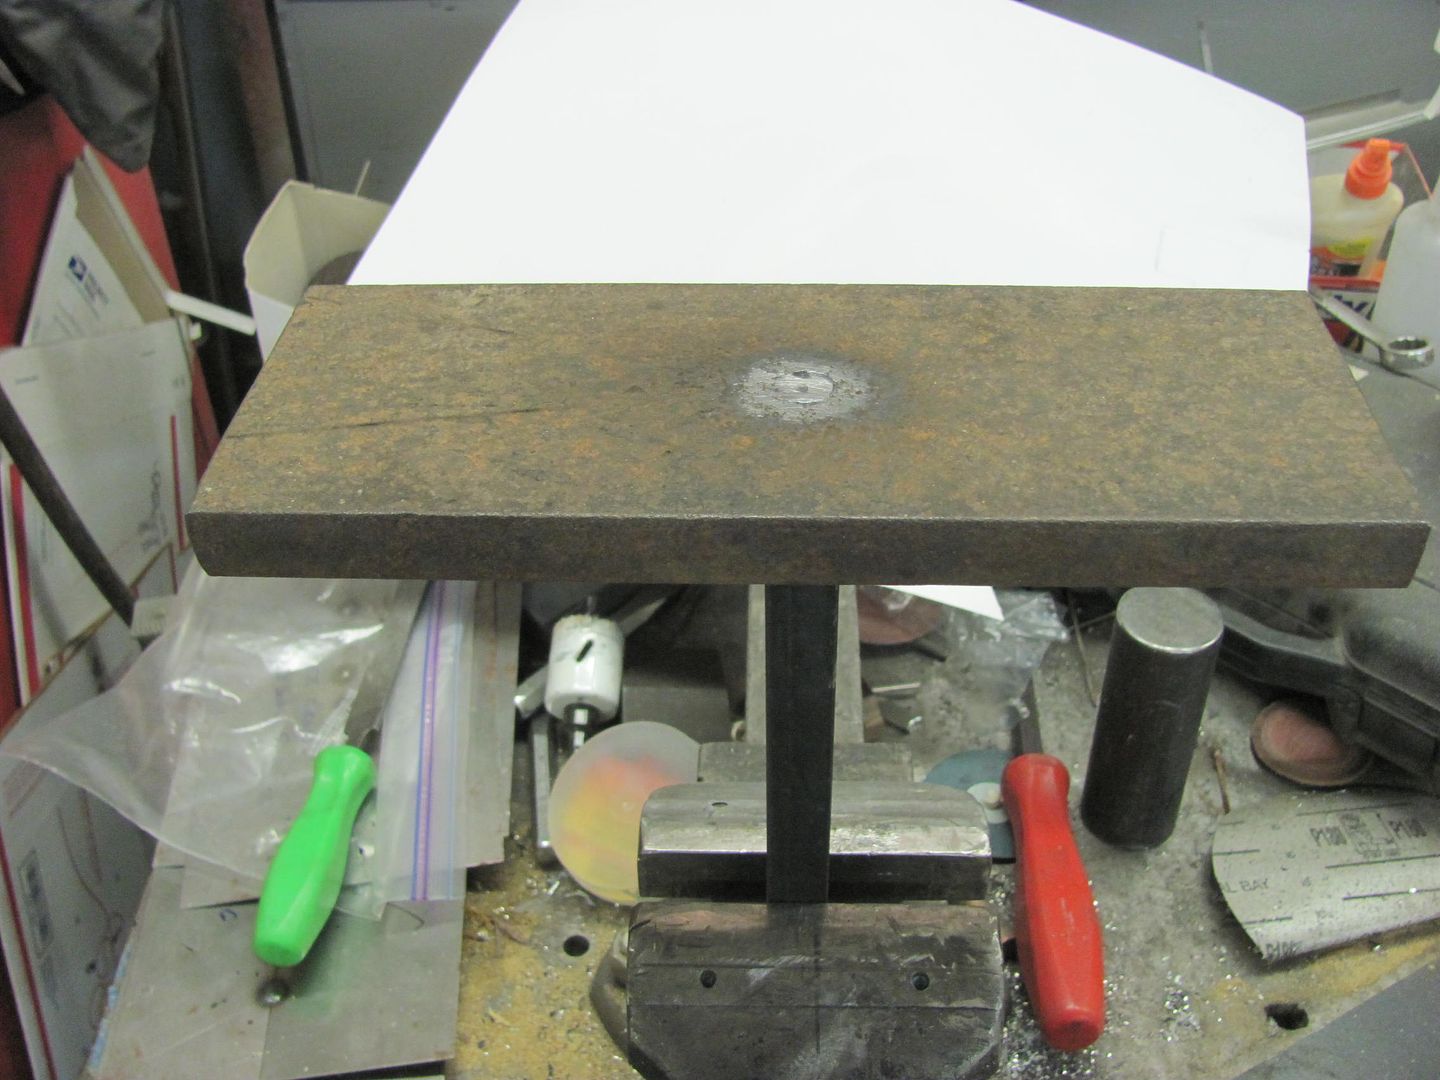 For an upper punch, we'll use some 3/4 oil hardening 4140, making it less pointed than the original just in case we want to use it for something besides the 55.  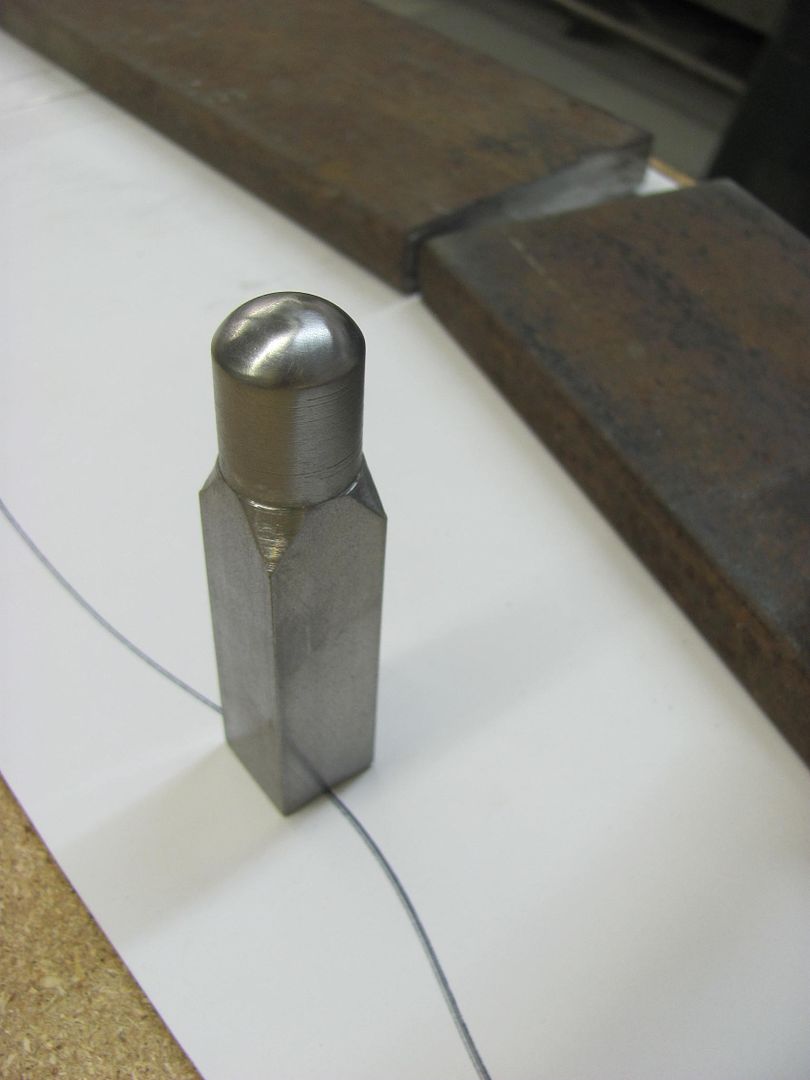  For a bead guide we first need to get a good template of the inside of the quarter. The adjustable spline comes in handy... 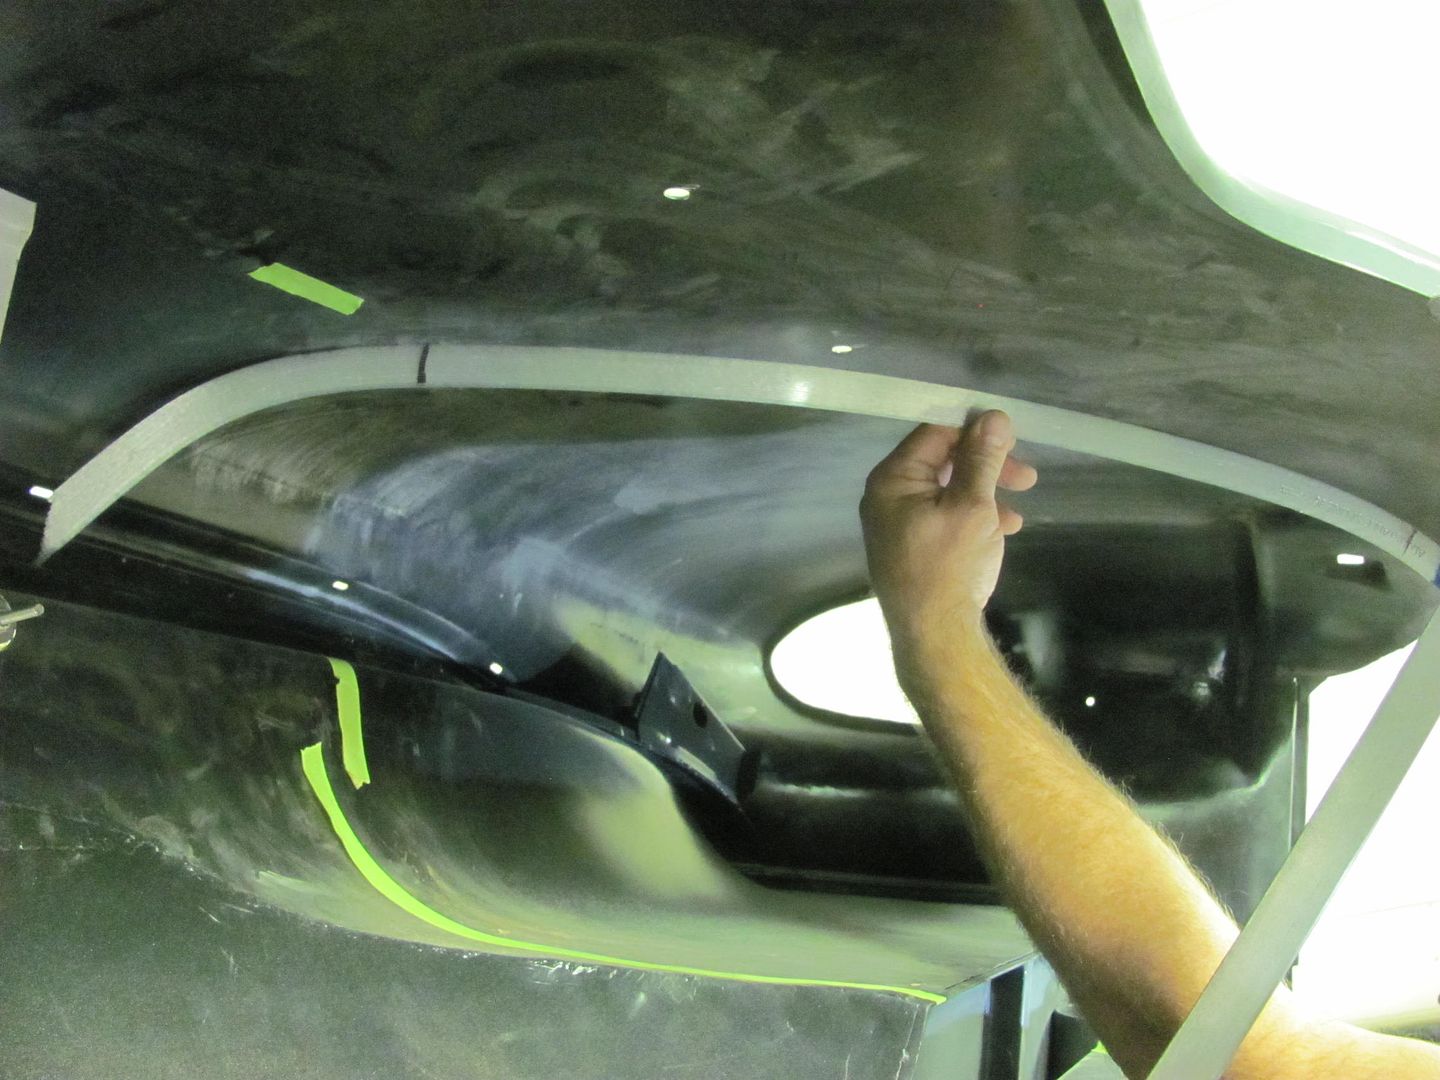 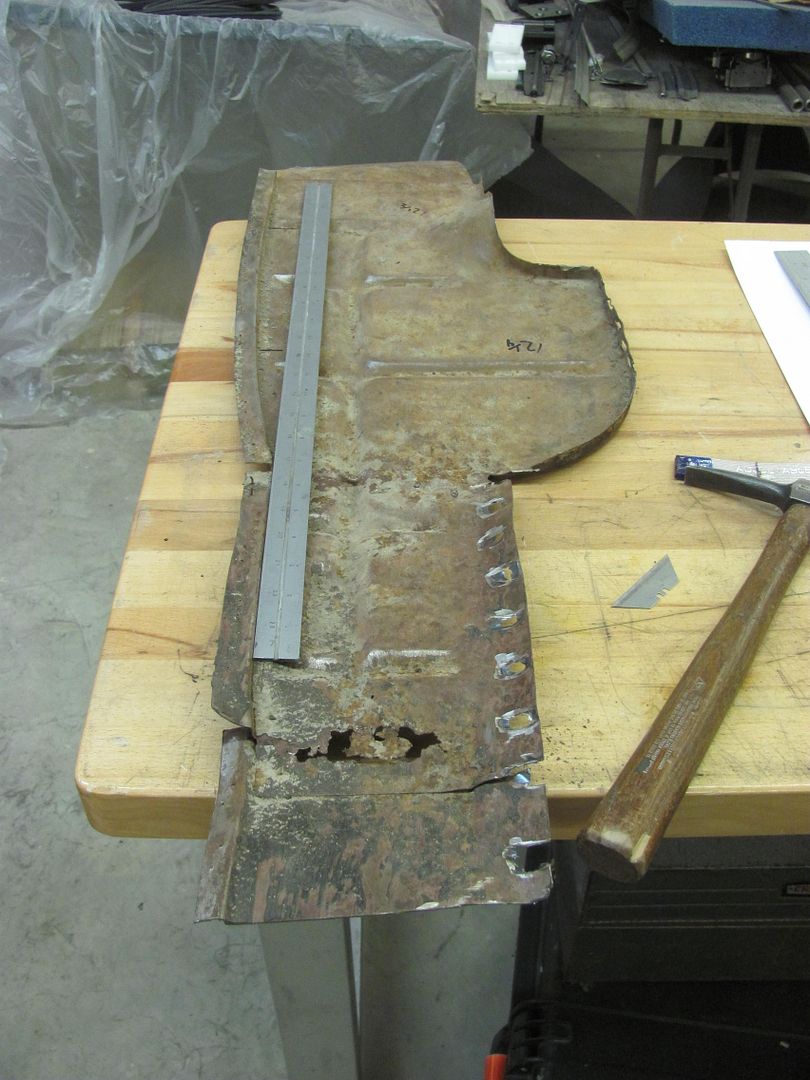 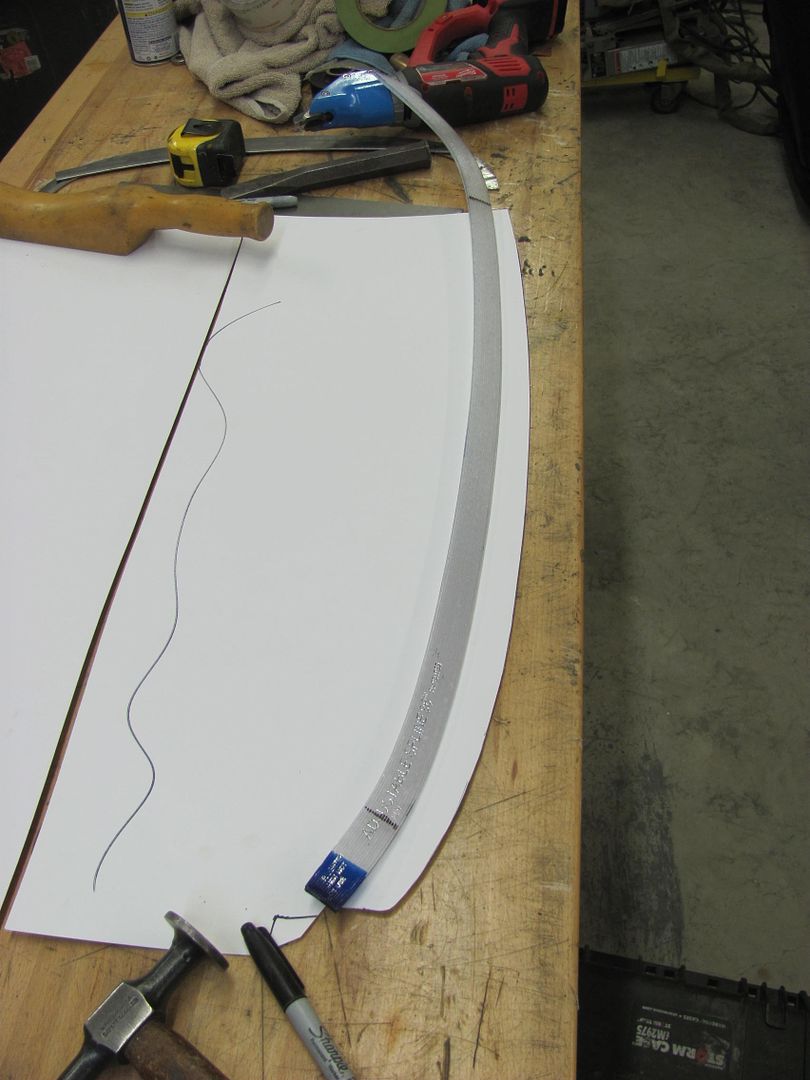 MDF is screwed together and then the edge profile cut.. 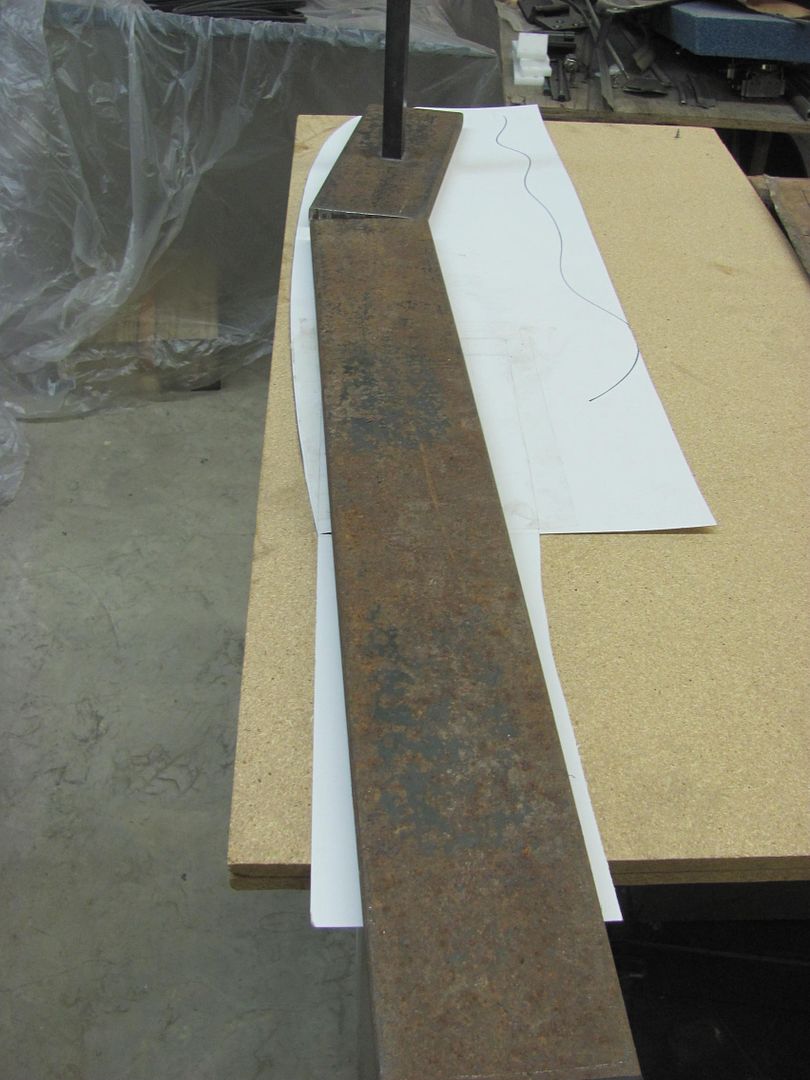 Cutting our bead pattern.. 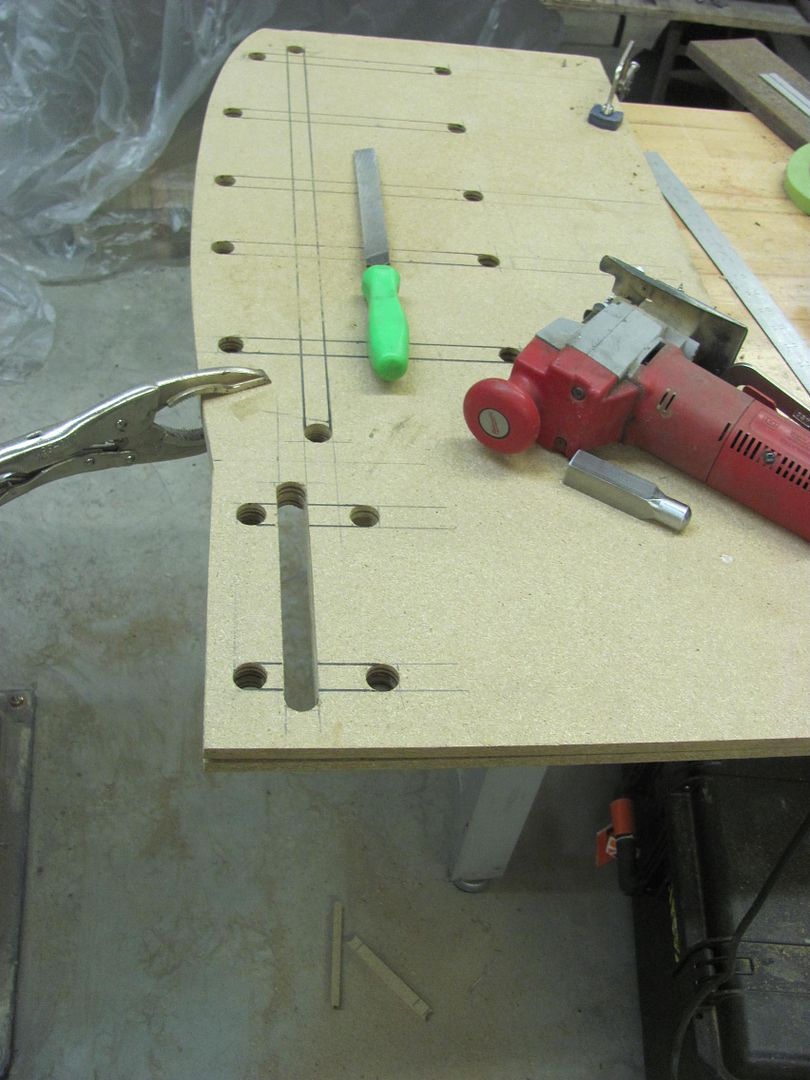 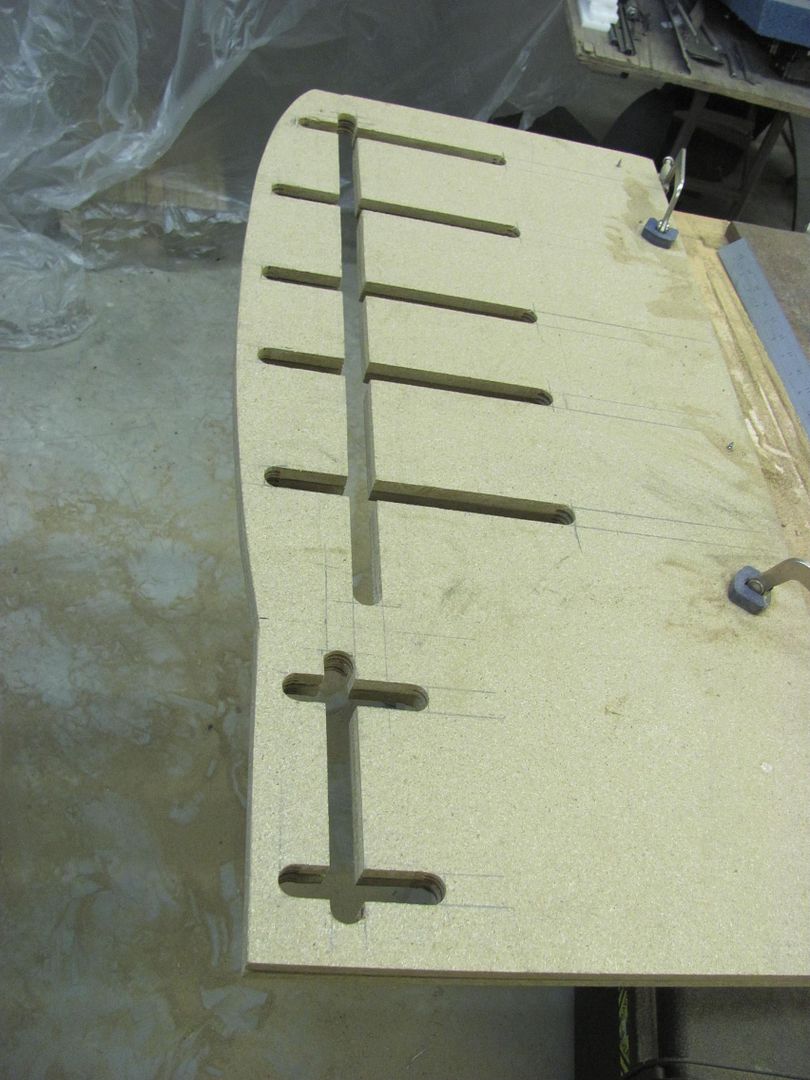 The offset of the original for the quarter seal is added using a tipping die in the Lennox, slight modification on the backstop for the correct width.. 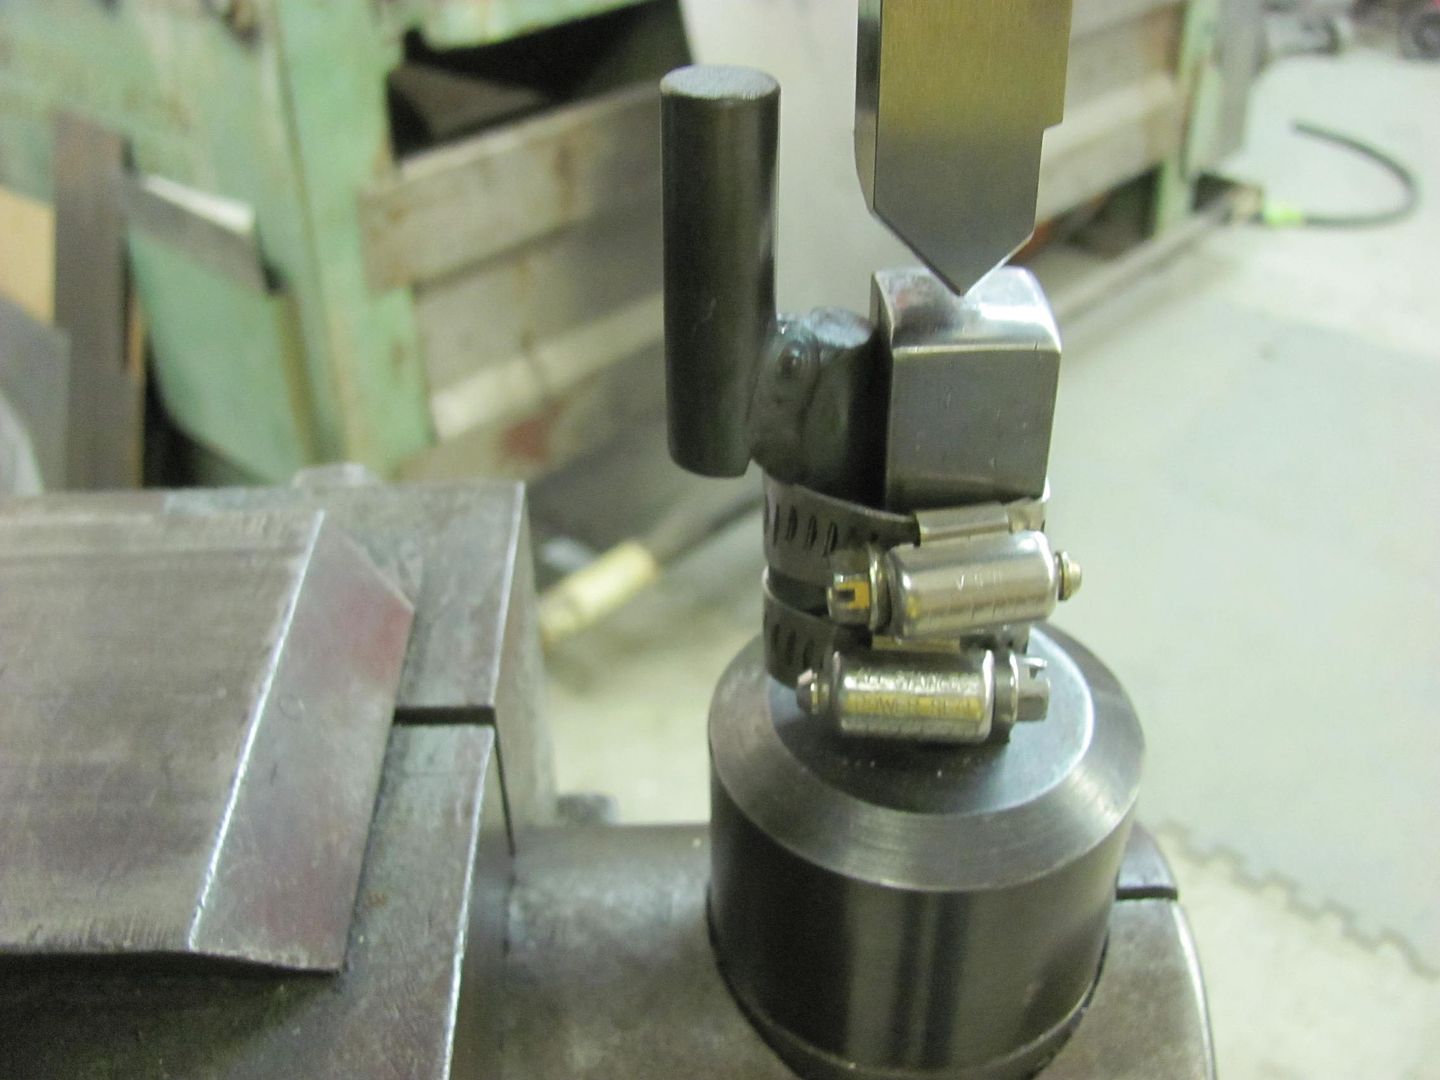 New matches the repop.... 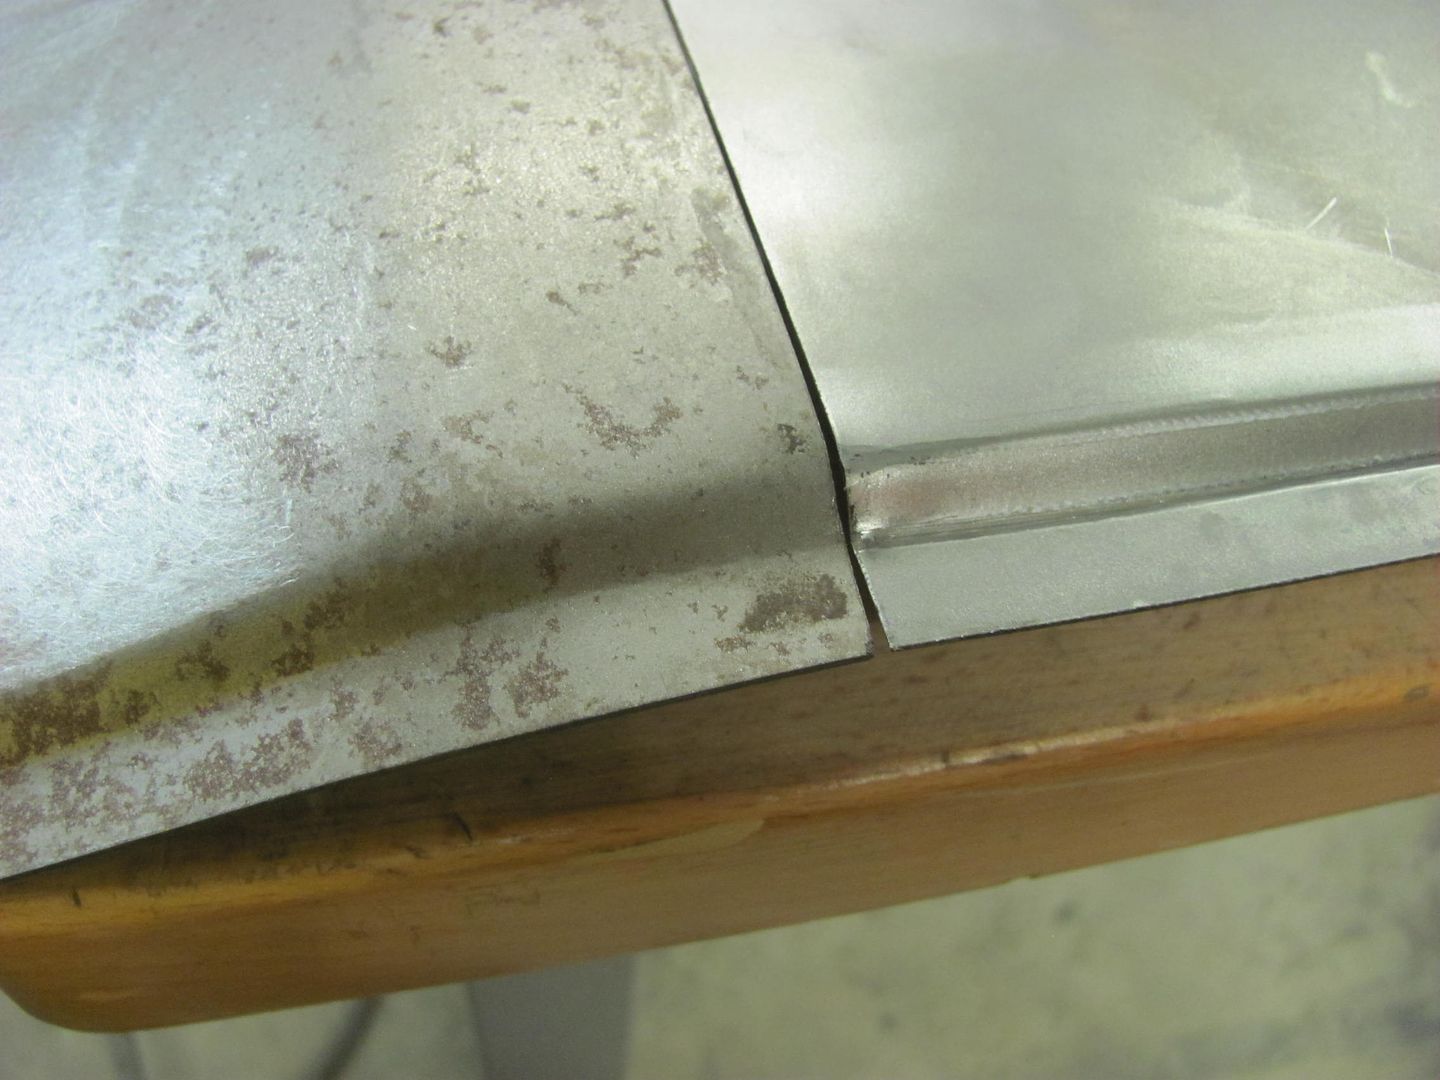 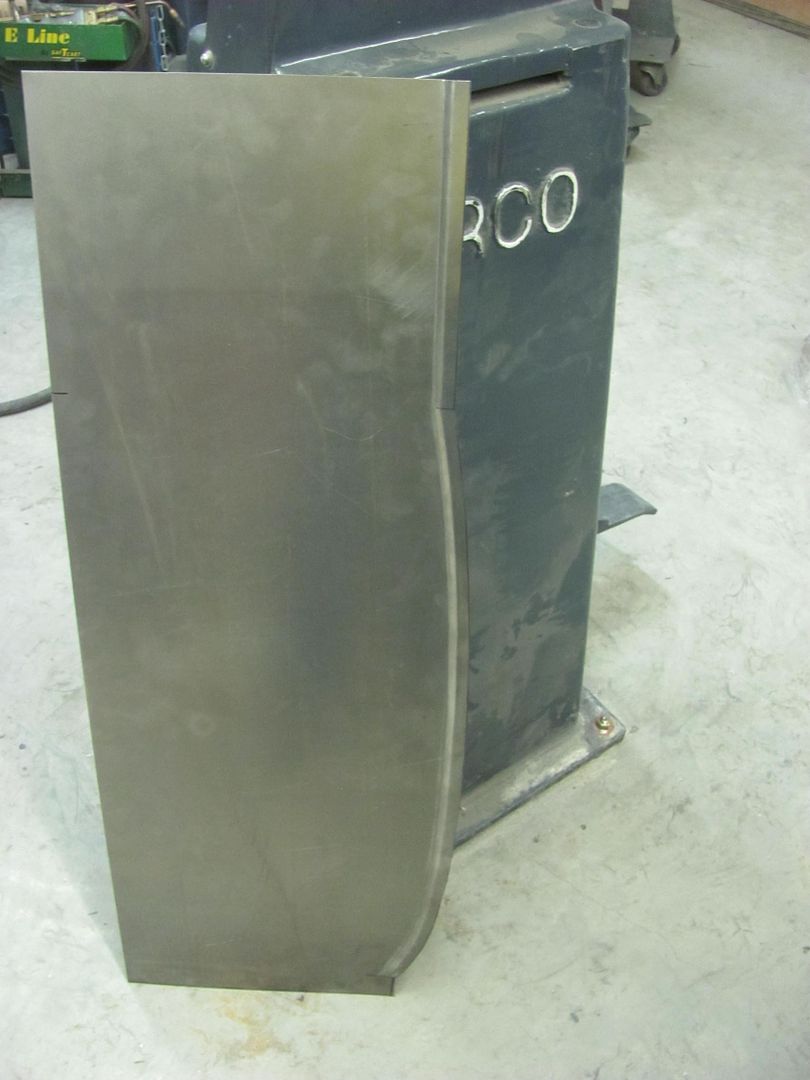 This seal will be used against the inside of the quarter.. 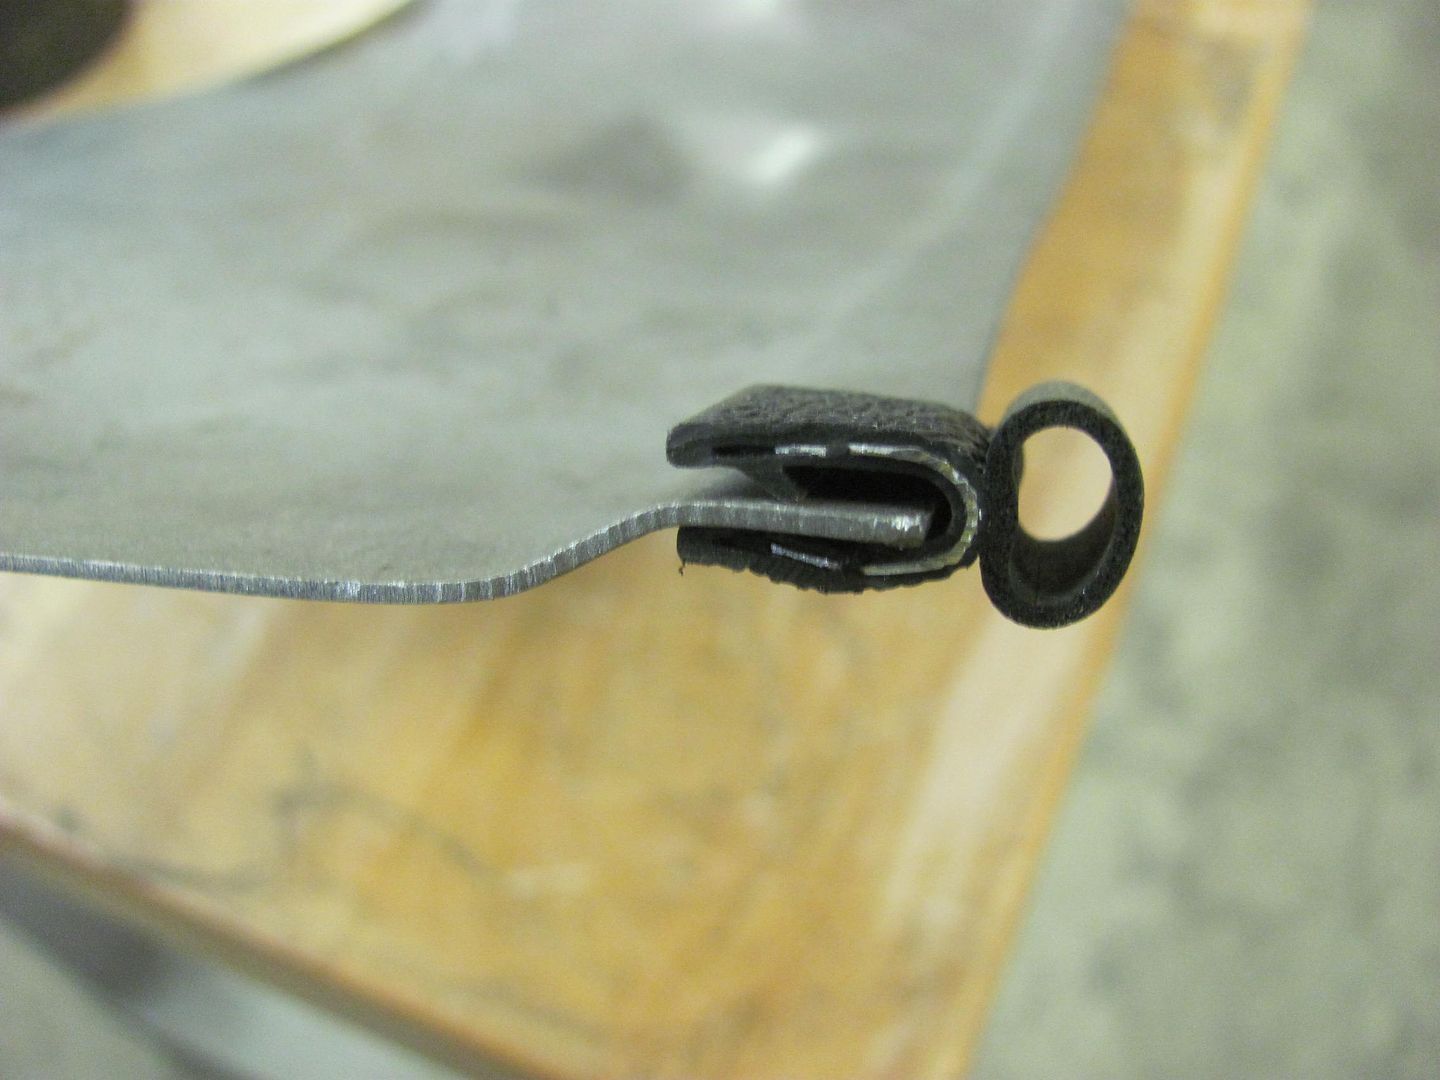 Running a test pattern... The table height is adjusted to set the punch depth... 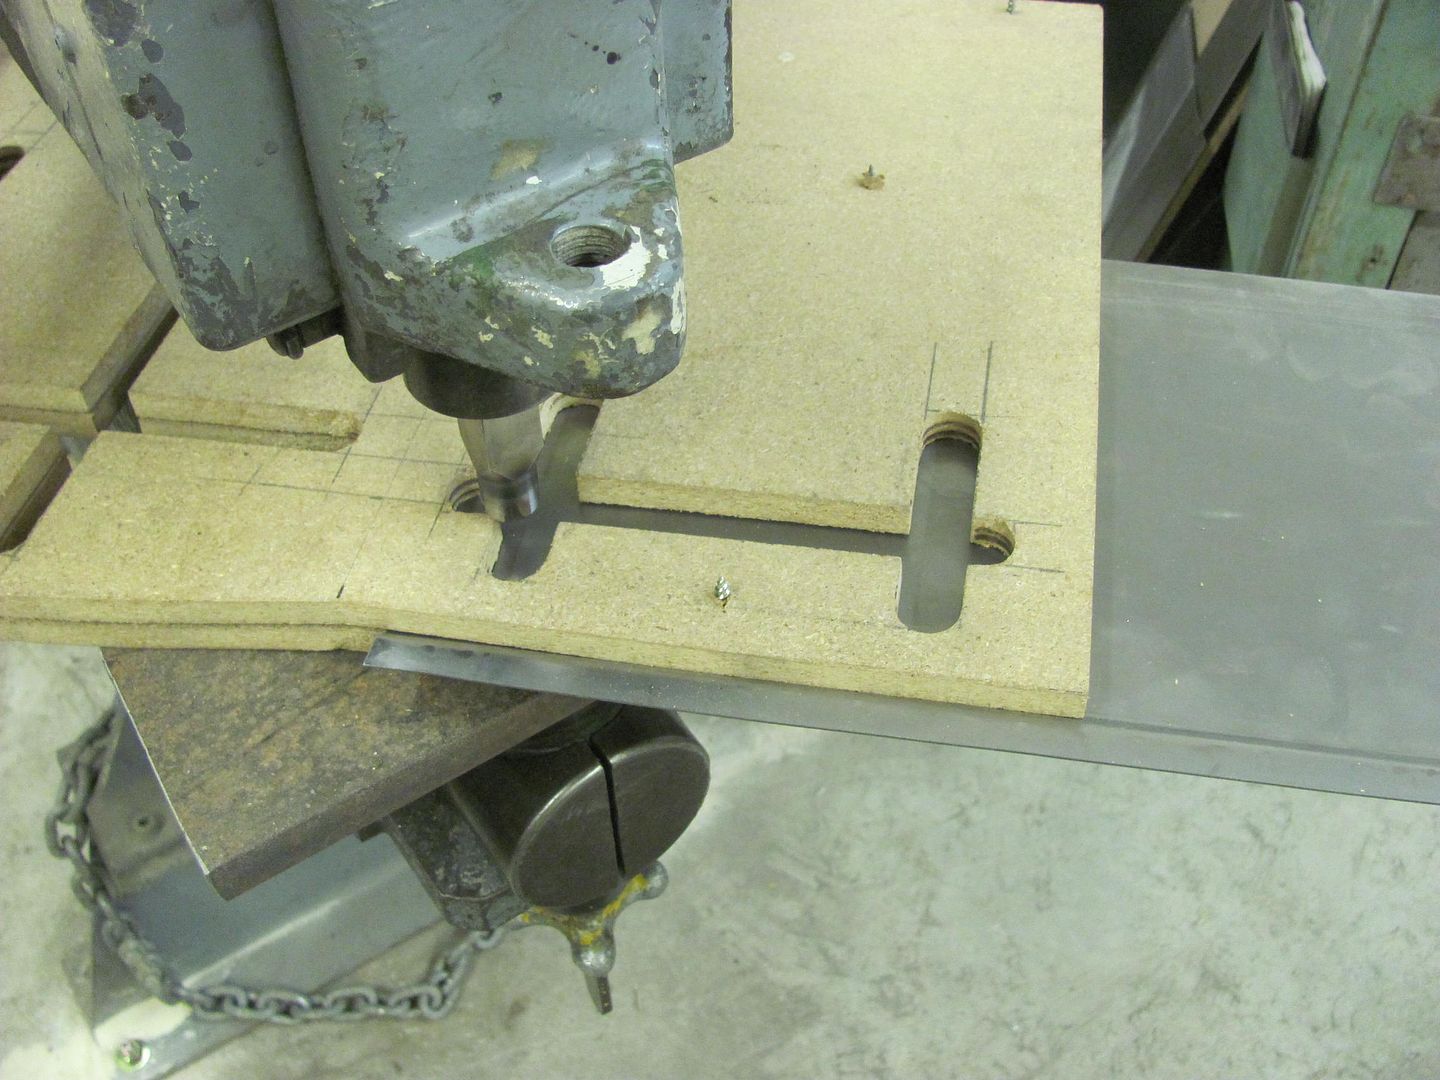 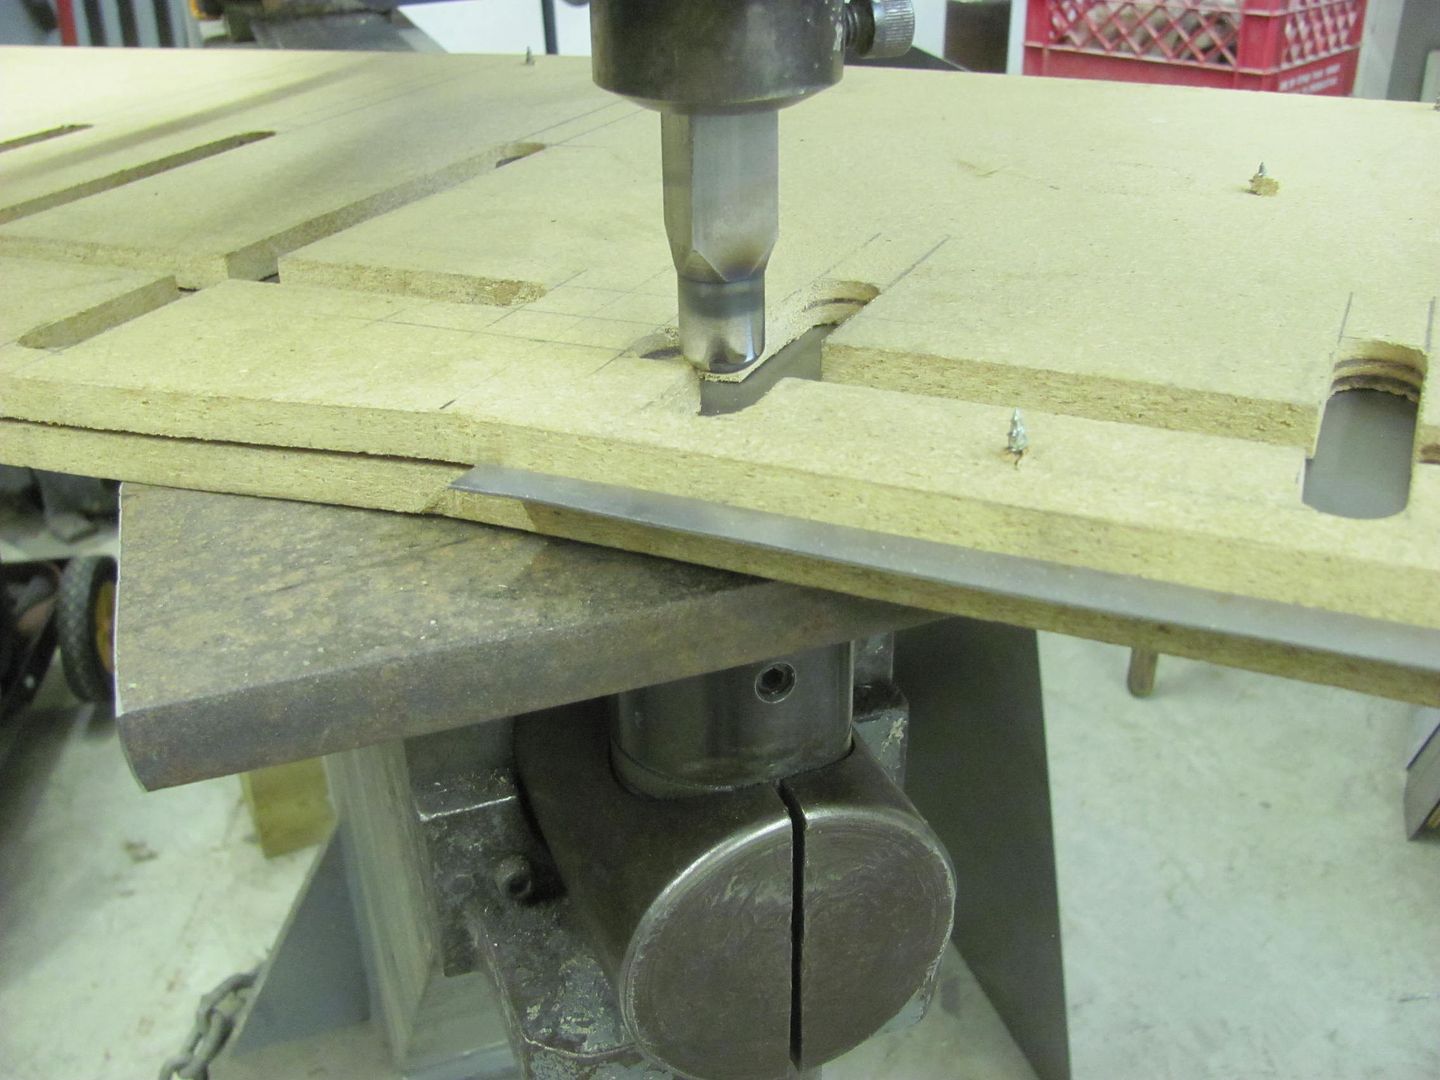 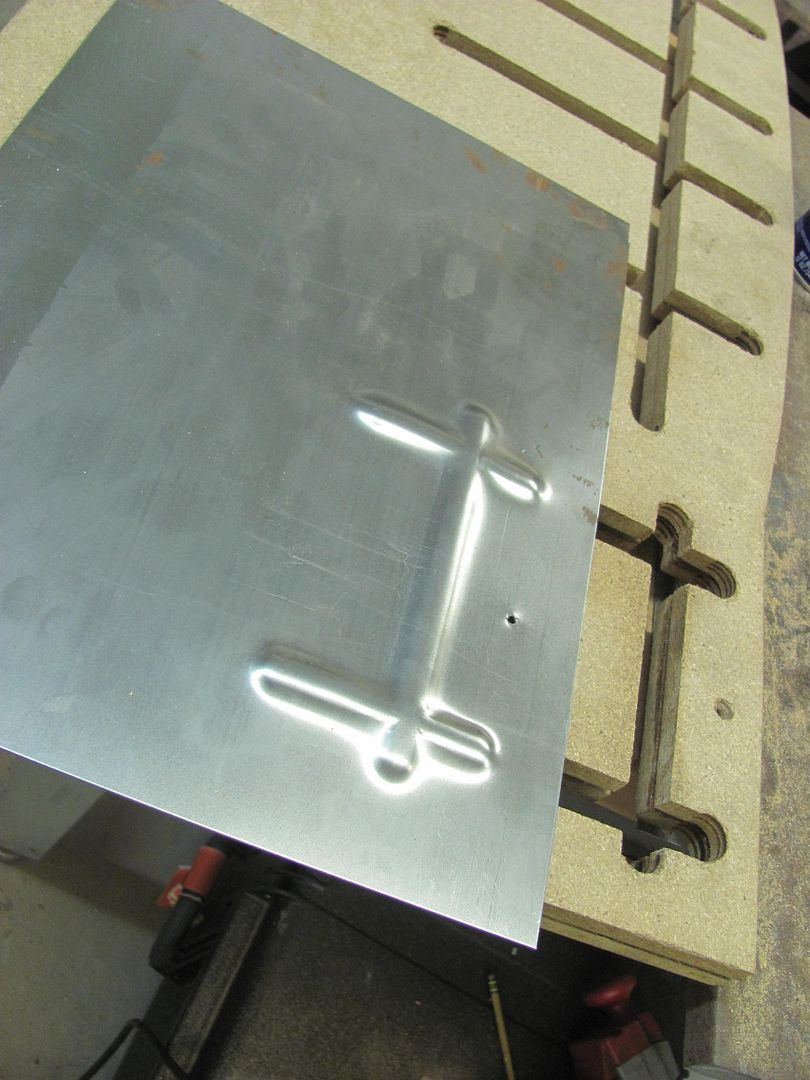 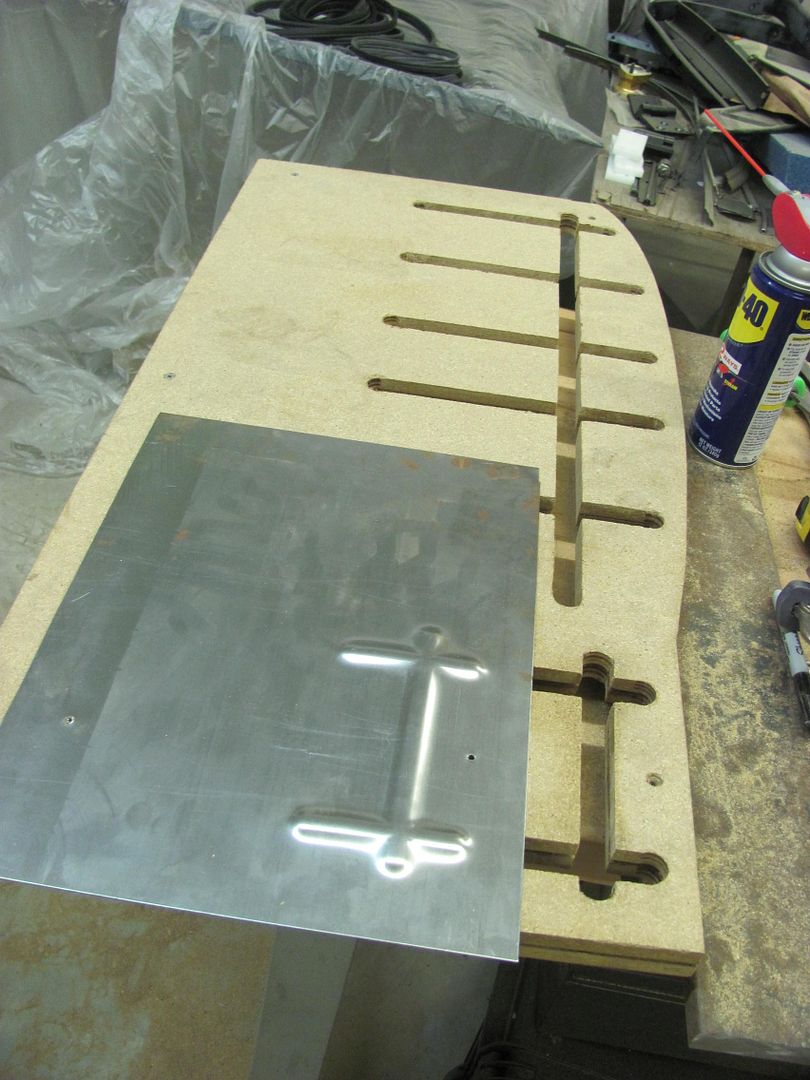 All clamped up, ready to go. Kyle has already left for the day so we'll finish up next time.. 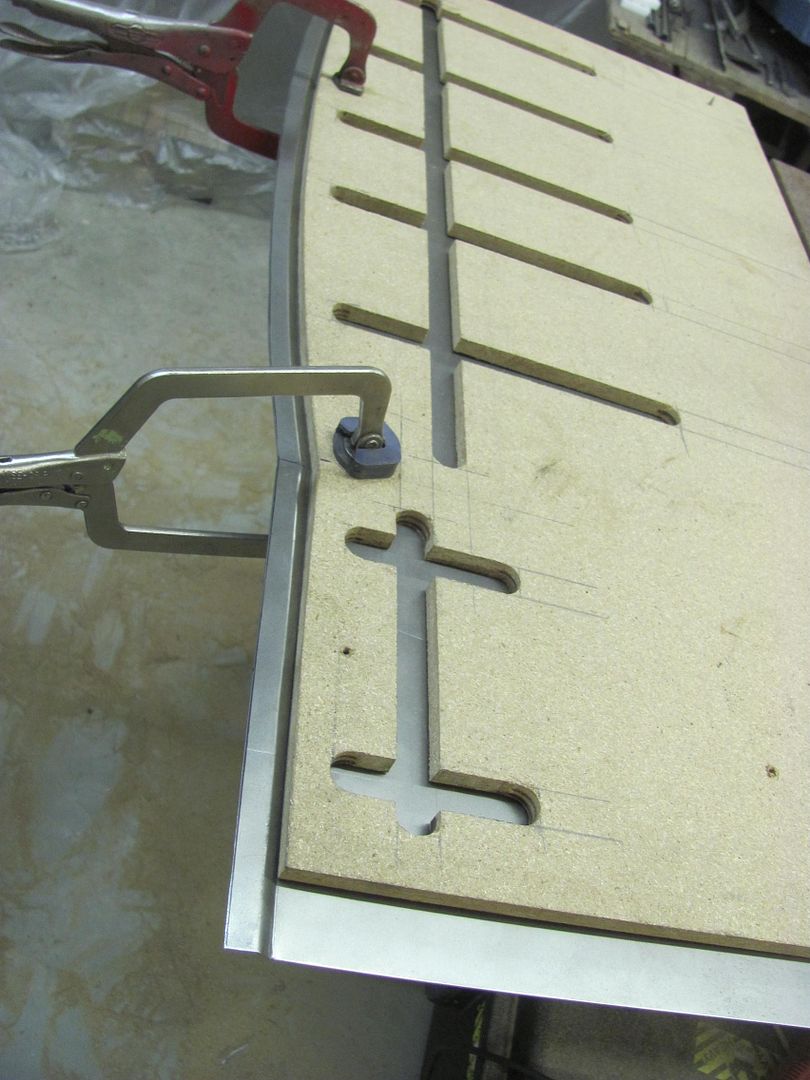 
__________________
Robert Instagram @ mccartney_paint_and_custom McCartney Paint and Custom YouTube channel Last edited by MP&C; 09-21-2016 at 08:40 AM. 
|
|
#2
09-17-2016, 11:11 PM
|
|||
|
|||
|
Very nice !!
 Peter
__________________
P.Tommasini Metalshaping tools and dvds www.handbuilt.net.au Metalshaping clip on youtube http://www.youtube.com/watch?v=WEAh91hodPg Making Monaro Quarter panel: http://www.youtube.com/watch?v=KIpOhz0uGRM
|
|
#3
09-18-2016, 06:52 AM
|
||||
|
||||
|
Sweet.
Very nice Robert.
|
|
#4
09-18-2016, 06:36 PM
|
|||
|
|||
|
Great work Robert! Thank you for sharing!
|
|
#5
09-19-2016, 02:11 PM
|
|||
|
|||
|
Very nice indeed! Useful info - thanks 👍
|
|
#6
09-20-2016, 10:30 PM
|
||||
|
||||
|
Thanks guys for all the kind words. Well enough practice..
Made our table slightly larger to better hold the panel level for punch depth consistency.. 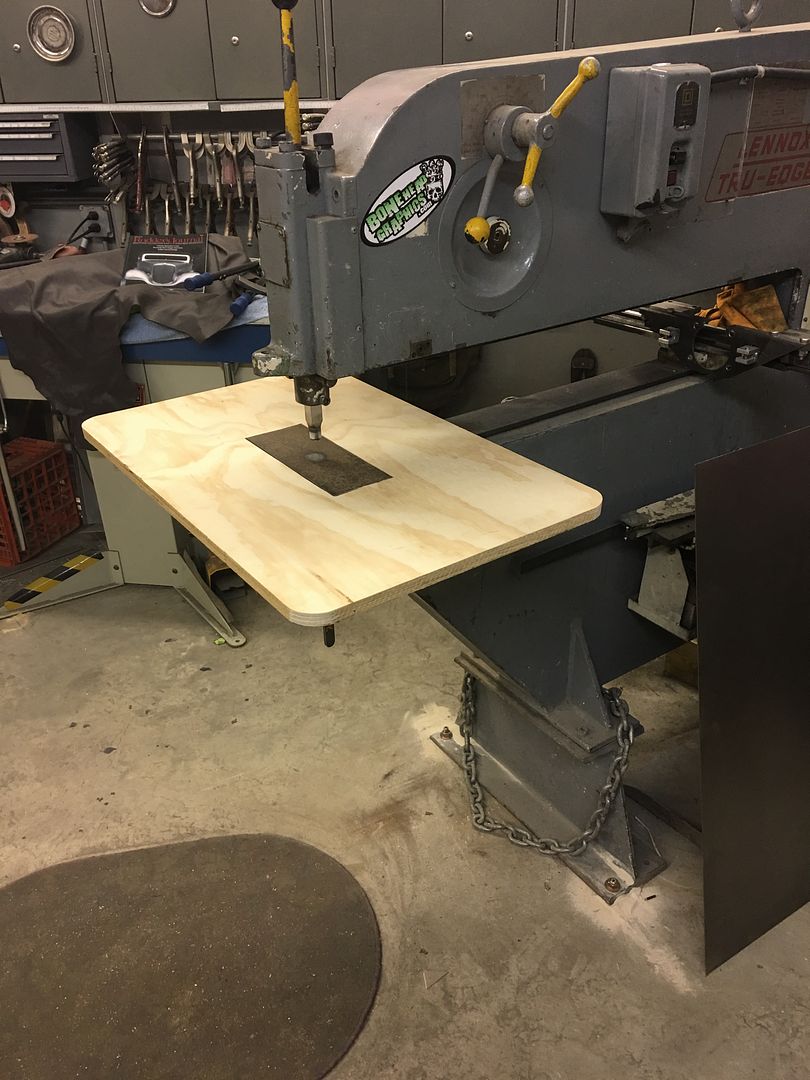 More holes for screws added to keep things snug 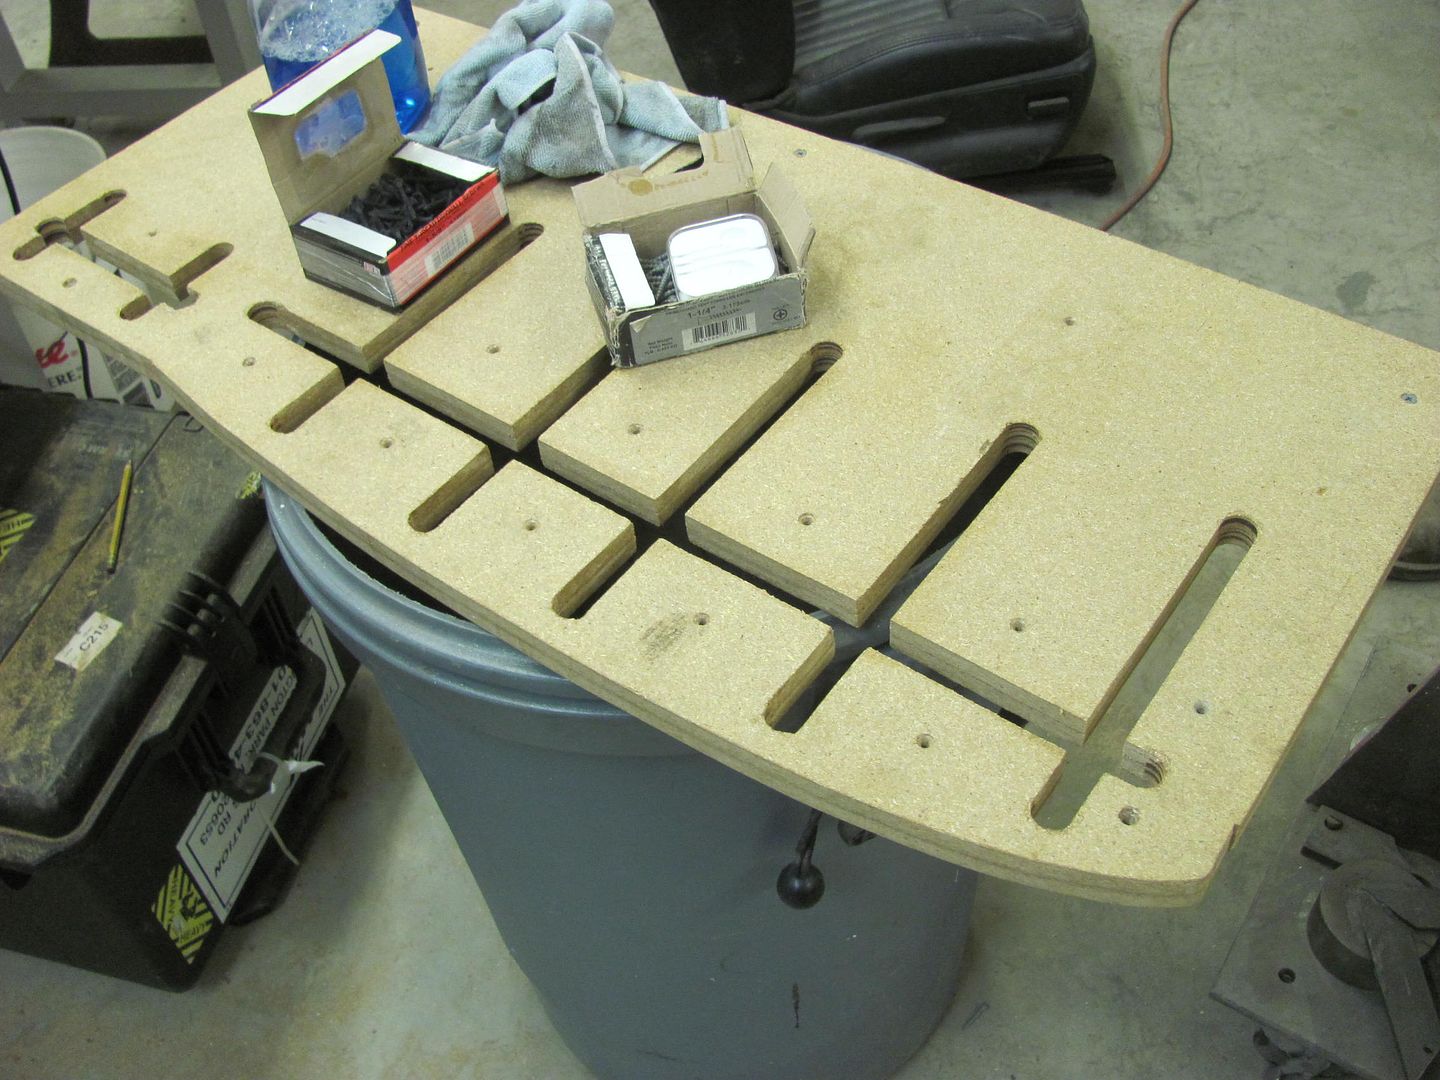 A few holes to fill, we'll get the other side done and weld them all in one sitting. 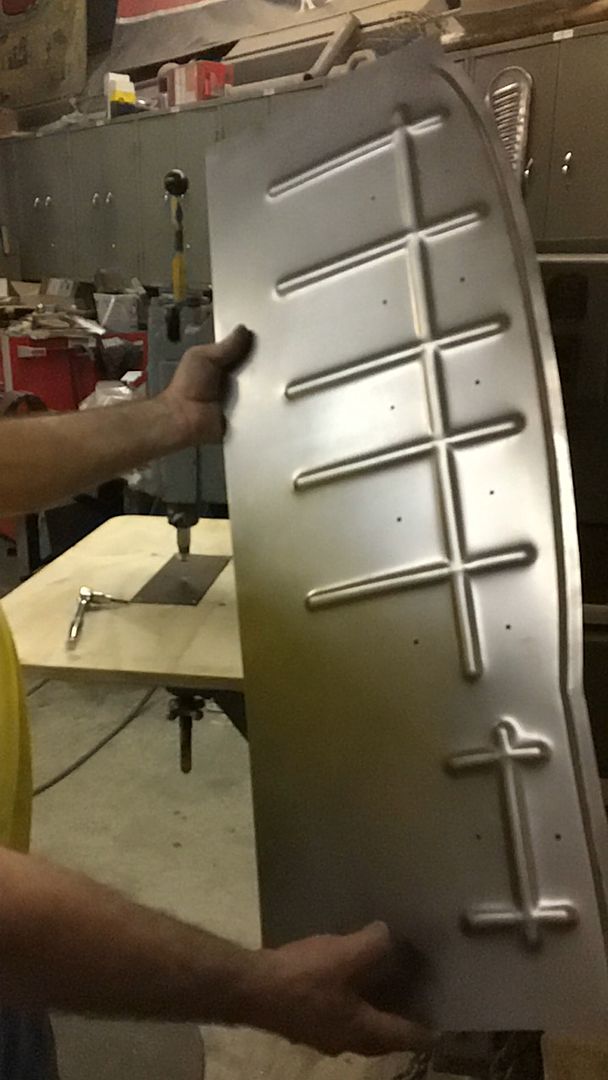 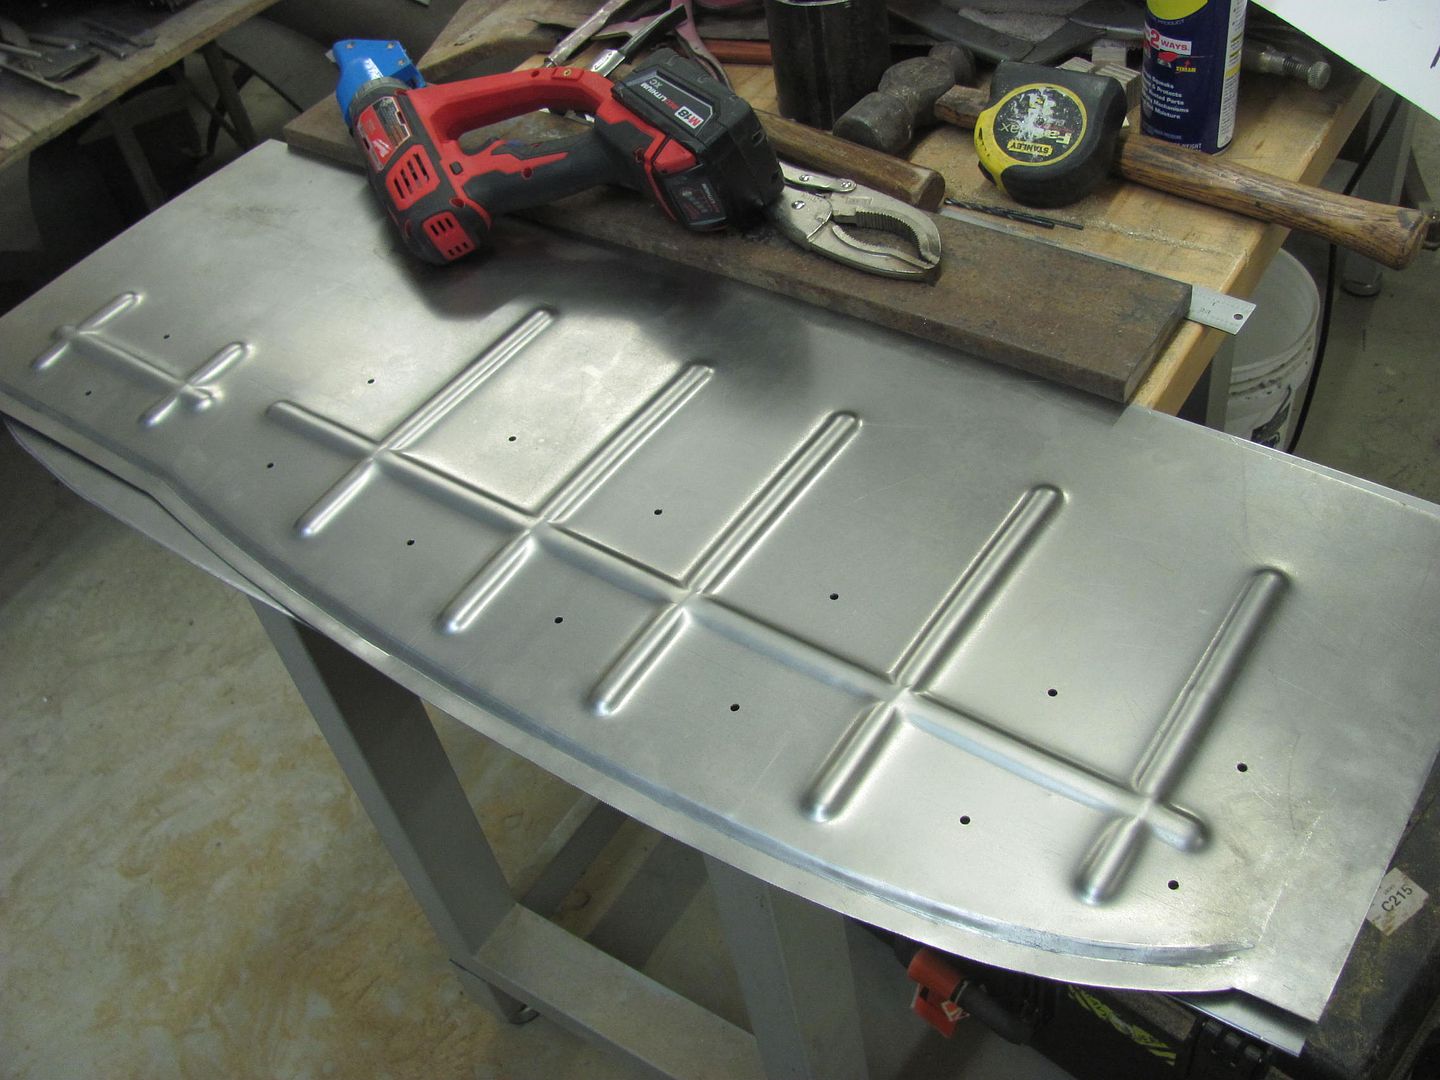 Motion picture version: https://www.youtube.com/watch?v=KCIv27b4dPs .
__________________
Robert Instagram @ mccartney_paint_and_custom McCartney Paint and Custom YouTube channel
|
|
#7
09-21-2016, 02:10 AM
|
|||
|
|||
|
Wow! Thank you for showing
__________________
Chrischan
|
|
#8
09-22-2016, 03:39 PM
|
|||
|
|||
|
Robert,
If you have the time/energy, would you be willing to show your preferred method for filling and planishing the holes in your panel? Your tutorials with photographs have certainly helped me move forward faster on projects with nicer results. Thank you for the time you spend.
__________________
Rex
|
|
#9
09-23-2016, 07:31 AM
|
||||
|
||||
|
Rex, these holes are about borderline for me on just plug welding with a MIG and copper backer or adding plugs and TIG welding. I am leaning toward using plugs as I think it will add less distortion. That would be quite a weld blob to fill in with the MIG.
__________________
Robert Instagram @ mccartney_paint_and_custom McCartney Paint and Custom YouTube channel
|
|
#10
09-23-2016, 12:44 PM
|
||||
|
||||
|
Last night we used the poster board template to check the fit of our pattern to the passenger side. Only a slight shave in the middle for a good snug fit. Then we test fit the repop front section of wheel well, which was horrendous. if we were to trim it to fit there wouldn't be enough step flange left over for the seal. So, Kyle added a 1/2" strip of 18 gauge cold rolled to the outside so we will have enough to trim for a proper fit. Still needs to add that corner on this side as well.
https://www.youtube.com/watch?v=DNiSM9Oyp2s While he was welding away, I trimmed the second panel for the passenger rear wheel well, used the Lennox with the tipping die to add the step flange for the seal, and got it prepped for the bead detail work, which we'll get to on Saturday.
__________________
Robert Instagram @ mccartney_paint_and_custom McCartney Paint and Custom YouTube channel
|
 |
| Thread Tools | Search this Thread |
| Display Modes | |
|
|


 Linear Mode

