 |
|
|
#11
|
|||
|
|||
|
Quote:
__________________
Richard When I die heaven can wait, I want to go to McMaster-Carr. My sculpture web page http://www.fantaciworks.com |
|
#12
|
||||
|
||||
|
I have gas welded a few times just for fun! I have a nice TIG machine so use it most of the time!
 I have arthritis and I'm laid up in bed for weeks at a time. The good part is I get to watch my DVD's . I have about a dozen or so, and watched them all 3-4 times each, some even more! Yes, David's is on the top of the list! I also watch a lot of YouTube's, some are just advertising their machines. Or how to modify a HF machine to make it usable!  I try to skip those! The best ones , I found, are the ones Lazze makes! I try to skip those! The best ones , I found, are the ones Lazze makes!
__________________
Rick Scott The second mouse gets the cheese! |
|
#13
|
|||
|
|||
|
That right there looks like a HUGE HIghschool Class ring, turned down on it's face.... Awesom work!
__________________
Scott Making Waves, and Curves and Shapes..... |
|
#14
|
||||
|
||||
|
I'm currently using tip nr 5 with the Meco for .050 ali. Set to a very soft flame and 3 psi for both A and O. TM flux and use medical alcohol to apply a small amount. Geoff Moss showed me welding without rot and I love it. Still have to practice of coarse.
Frank
__________________
Frank de Kleuver |
|
#15
|
|||
|
|||
|
The whistling sound you are hearing might be from an internal burn. Clean your tip and make sure the O-rings are good on the barrel end of the torch.
If the torch pops then whistles it's burning on the inside. You may be too lean on the mixture. Dave.
__________________
David Tracy |
|
#16
|
|||
|
|||
|
I highly recommend Kent White's DVD.
I went one step further, grabbed my son and attended his workshop for the four day intensive. We both had a blast. Someone asked me about setting up the torch... Select tip for material being welded. Three turns on the meco - both knobs. Adjust the pressure regulators all the way out. Open bottles (needle full raise tank pressure on acetylene, plus quarter turn -- maybe 3/4 turn on my bottle). Oxygen -- slowly open the screw as the gauge comes up, then screw all the way open (packing is on the top, that screw should be all the way up. About four full turns on my bottle). Now hold the unlit torch towards your cheek. Screw in a acetylene regulator till you feel a nice breeze. Light the torch. You should have zero black soot whispy's flying off. Just a good flame. Now bring up the oxygen. Nice solid balanced flame. Oh the flame is 1/8" away from the tip? Just flick the torch up and down (pointing with the flame in the same direction) and the flame will be on the torch. EDIT 10/23/2013: Now that I have a nice flame, I use the screw knobs in the Meco to adjust the flame. I do not touch the regulators, only the Meco knobs. If I need to refill my cup of coffee, I just shut down the torch, Screw the Meco knobs closed. Enjoy an espresso, then open the Meco knob about 3 turns on the actlyene, light torch -- no black wispys. Then bring up the oxygen will three full screws. Look at the flame, adjust back to where I want. Cone is about 2 to 2.5x the width of the aluminum I'm welding. END OF EDIT When I was all done, I looked over and realized with the 0.035" steel, uh.... my regulators had not moved off the peg rest. I wasted months trying to adjust the flame by setting pressures, that didn't register. I was cooking.... Best part was once I learned how to adjust the regulators.... get some decent magnifying glasses... it was time to go to town on some 5052. Prior to taking Kent's class, I would just leave big blobs of aluminum on the floor.... just a little correction to my method by the master... and not bad improvement in a day. 3003 - 0.050" Comments... tack about 1" from the edge. If you work on a butt weld starting at the edge there is too much heat.. Make all your tacks. first. The infamous "lips" puckering up got me every time. Finally discovered the secret... jump over the lips, keep welding... come back later to weld in up the lips (lots of cleaning, scrubbing, hammer lightly to close.... then weld them up). I kept trying to feed in rod, to no avail. Clean, clean, clean.... I found I have 10 minutes to start welding after cleaning. Oxide starts forming immediately. After 30 minutes, I can not weld the stuff. I'll scrub with a stainless steel brush, or 3M scotch brite with 70% or better alcohol. I have to give credit to Ben Lamonte's high school shop class for teaching me how to OA weld in '74.... and to Kent White showing me I can also weld Aluminum with OA in 2012! TAT (Thickness, Alloy, Temper.... ). Oh... OA welding Aluminum. I'm quicker welding, can weld in a T-shirt and shorts, and no leaks.... why didn't I lean about OA welding Aluminum thirty years ago! 
__________________
Tom It is one of the most beautiful compensations of this life that no man can sincerely try to help another without also helping himself. --Ralph Waldo Emerson Last edited by Tom Walter; 10-22-2013 at 03:30 PM. |
|
#17
|
|||
|
|||
|
The correct way to set up the torch for welding is as follows...
Open your bottles slowly, so you don't damage your gauges. One full turn is fine. Open the acetylene valve on the torch, adjust the pressure on the acetylene gauge on the bottle to three pounds. Shut the acetylene valve on the torch. Repeat the process for the oxygen. Both gauges should have the same pressure so you can get a neutral flame. If you set the pressure any other way you are just guessing. If your gauges are too knackered to register properly they may well be dangerous, time to get some new ones. This is the process that was set out by the British standards and taught to apprentices throughout the country for several generations. Gauges have to be checked every year here and replaced every three years. Welding is a very repetitive process, if you watch someone weld six inches the next six inches and the six inches after that will be exactly the same. Not something that takes an entire DVD to show I thought. Practice, that is what is needed. David
__________________
Metalshaping DVD. www.metalshapingzone.com Metalshaping with hand tools on youtube http://www.youtube.com/watch?v=IGElSHzm0q8 All things are possible. |
|
#18
|
|||
|
|||
|
Hi Guys,
I am still practicing and getting better. Getting pretty good with steel but aluminum is a lot harder. Still having a lot of fun learning it and I like it better than MIG welding for thin stuff. Thanks, --louis
__________________
Louis |
|
#19
|
|||
|
|||
|
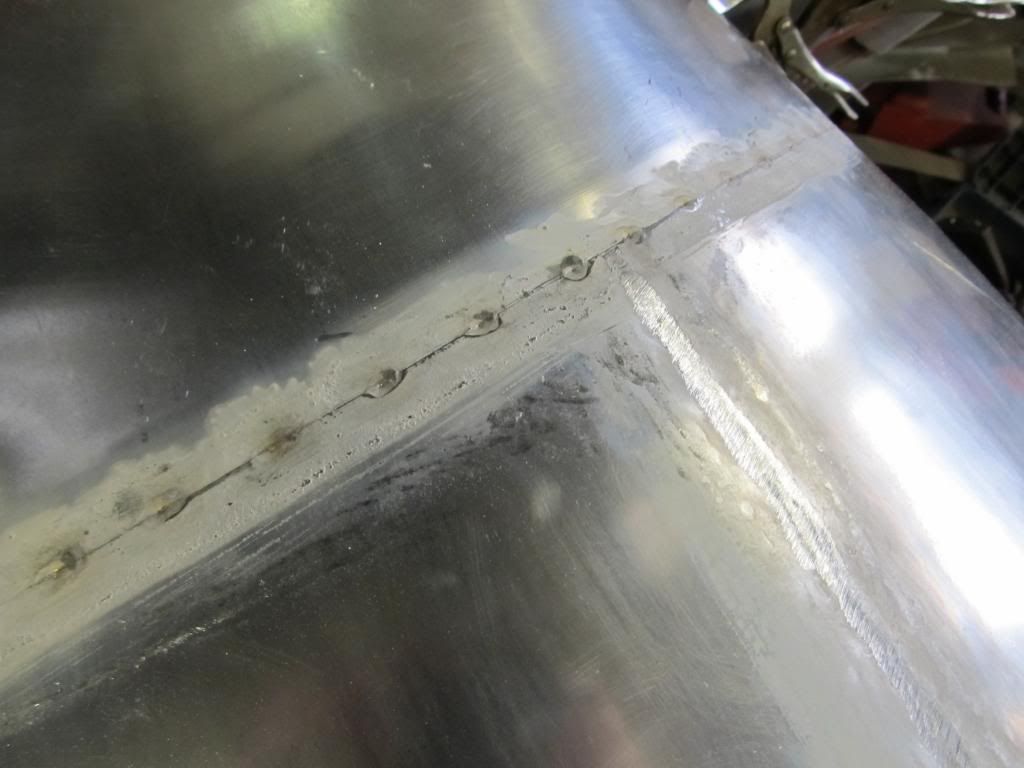
Tacked aluminium panel...
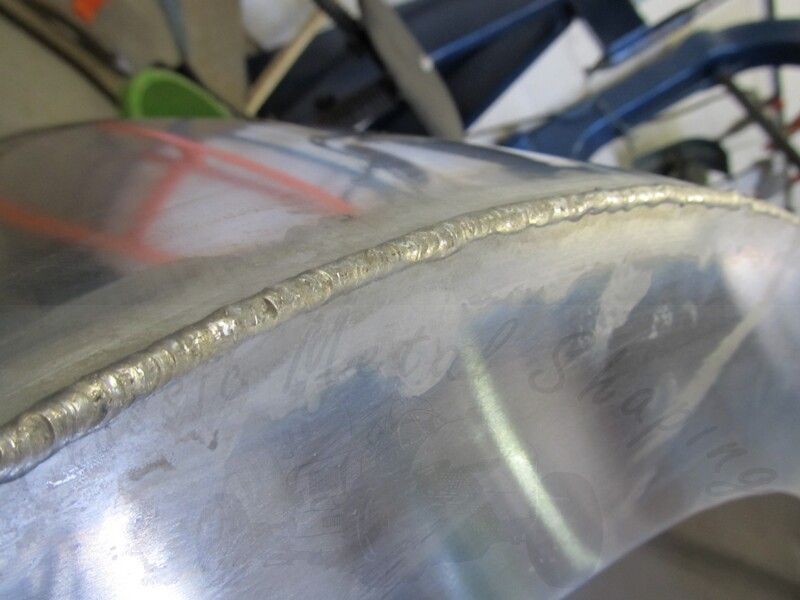
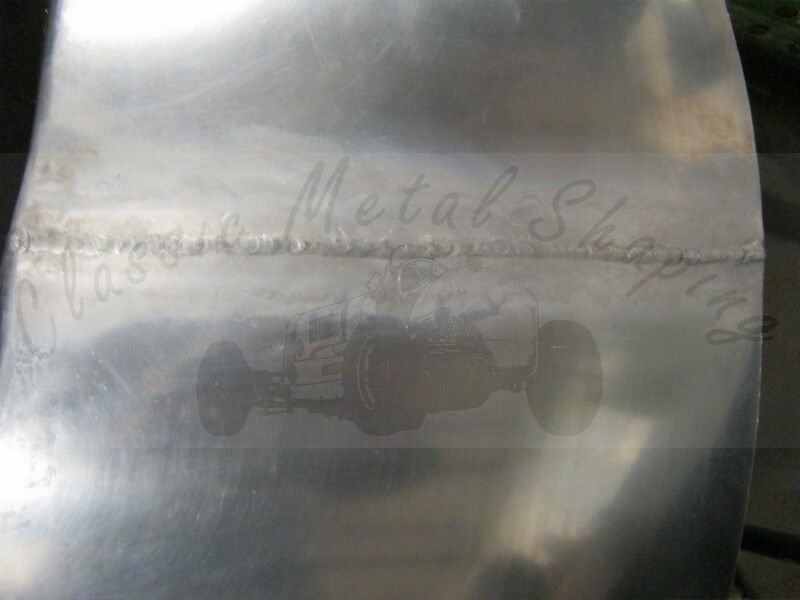
 Welded panel - corner butt weld...  Butt weld...  These are actual welds on real panels, not things that are set up for comfortably welding sitting down at a bench. I used the new 'safer' welding flux, this is not as good as the old stuff. The weld does not flow as well. I have now got some more anti-borax flux from Joe Stafford. David
__________________
Metalshaping DVD. www.metalshapingzone.com Metalshaping with hand tools on youtube http://www.youtube.com/watch?v=IGElSHzm0q8 All things are possible. Last edited by David Gardiner; 10-21-2013 at 04:04 PM. |
|
#20
|
||||
|
||||
|
Hi David,
When you say 'open the valve on the acetylene', do you mean all the way open as far as possible? After setting both O and A one starts by opening the Acetylene en igniting it. How far should one open this flame? Until it stop producing sud? Should it make any noise then? Many many thanks for your help. Frank PS very neat tacks!! Do you keep the flame at 90 degrees when you do that with a neutral flame or with a light feather?
__________________
Frank de Kleuver |
 |
| Thread Tools | Search this Thread |
| Display Modes | |
|
|