
|
|
|
#421
 11-28-2015, 11:26 AM
|
||||
|
||||
|
Artwork time with the remaining grille bitsa! I can visualize the two leftover pieces welded together and creating a skull&crossbones (but Jeep iteration thereof). Might as well have fun with it.
Keep up the work!
__________________
me: Mark home: Dry Heat, Arizona USA quote: What did you design or build today? projects: Curve Grande and the 11Plus Le Mans Coupe 
|
|
#422
11-29-2015, 04:02 AM
|
||||
|
||||
|
Thanks for the replies Mark and John.
 John I like to use as much of the original metal as possible and like to see it live on, so to speak. 
__________________
Marcus aka. Gojeep Victoria, Australia http://willyshotrod.com Invention is a combination of brains and materials. The more brains you use, the less materials you need.
|
|
#423
12-04-2015, 06:27 AM
|
|||
|
|||
|
Glad you got off lightly there - could've been much worse!
I got all my fire extinguishers in the workshop up to date and serviced earlier this week. You just never know when you might be glad of them!
|
|
#425
12-04-2015, 11:48 AM
|
|||
|
|||
|
Wow that's a harrowing story. Talk about a close call. So happy you didn't suffer a catastrophic loss - just think if the fire had hit the garage and damaged the jeep project !
Joking of course good on ya for handling that situation well, and already coming up with a solution for your grinding station.
|
|
#426
12-04-2015, 12:14 PM
|
||||
|
||||
|
Glad to see it didn't turn out as bad as it could have. I'll share with you a policy I follow. At work (and also when I'm working at home) we have a half hour rule. If you are throwing sparks from anything; cutting, grinding, welding, etc... you DO NOT WALK AWAY for at least a half hour. If you don't have time to hang around, do the welding or grinding tomorrow.
Just some good advice for everyone that could save costly and dangerous accidents and lives. I'm glad you caught it in time and no one was hurt. Take care.
__________________
Jack Set a Goal So Big That You Can't Achieve It Until You Grow Into The Person That Can.
|
|
#427
12-04-2015, 08:09 PM
|
|||
|
|||
|
I once pulled a very expensive car out of the shop, we are talking six figures here, and left it warming through. I did this every morning to keep the battery topped off and the condensation out, only this time I thought I would check the coolant level. I'd not done this before and normally I would go make a coffee but this time I came back out to find it had popped an o-ring on an injector and was on fire. Fortunately it had only just gone up and my fire extinguishers were properly serviced and right where I knew them to be so it cost only some slightly charred wires and not the whole car. The owner later admitted that he had never inspected anything on the engine in years and was very glad that I had been so quick to put the fire out.
Will
__________________
Here to learn. William Pointer
|
|
#428
12-05-2015, 05:20 AM
|
||||
|
||||
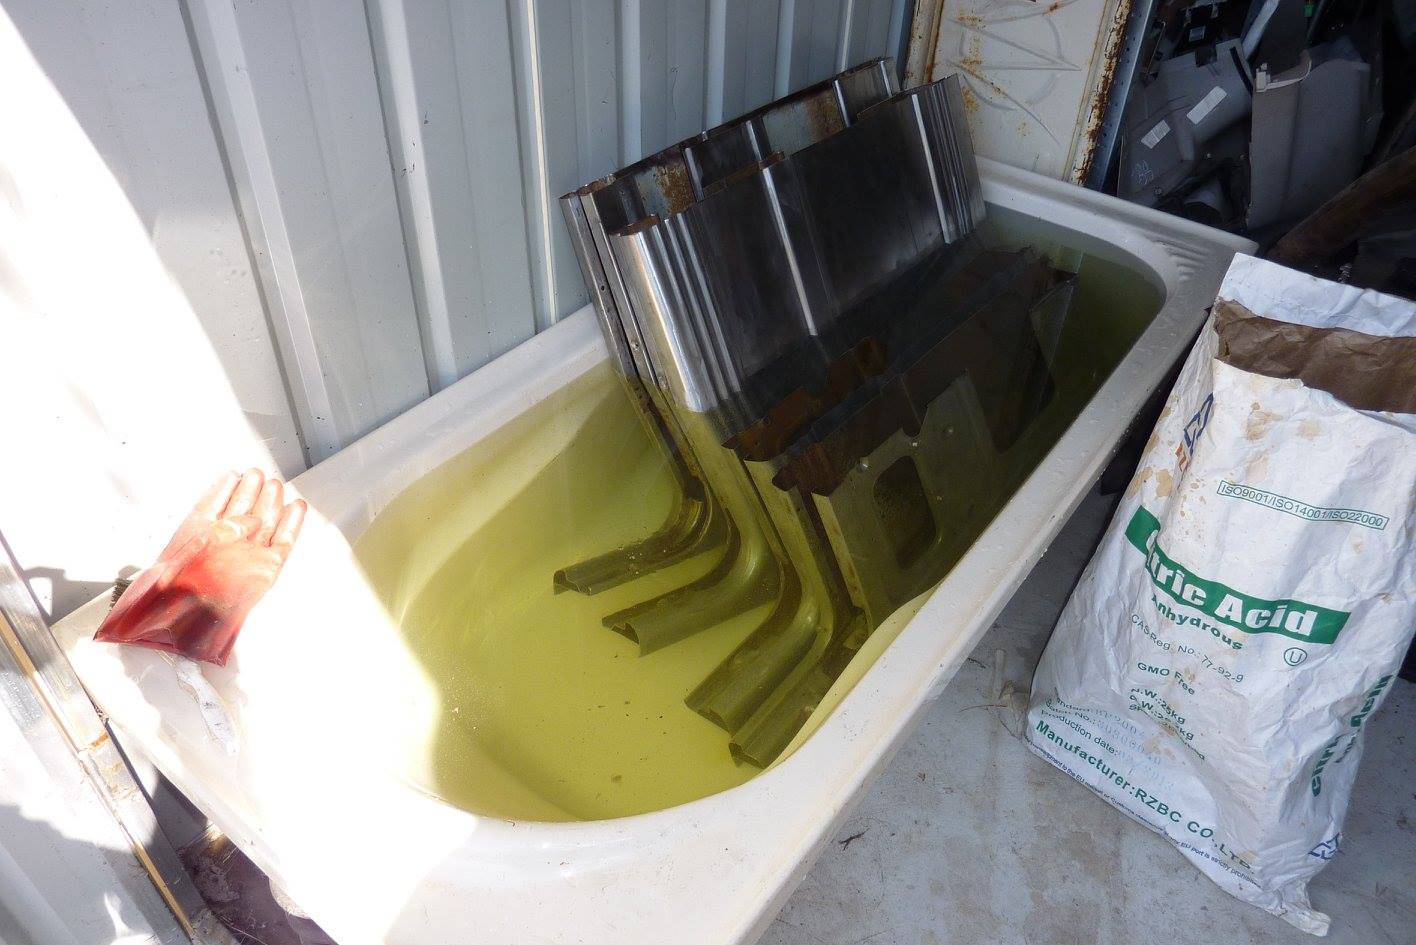 Made up a new batch of citric acid to strip the rust for all the remaining panels. I use 1kg acid to 10 litres of water. That is about 1lb acid to a gallon of water. 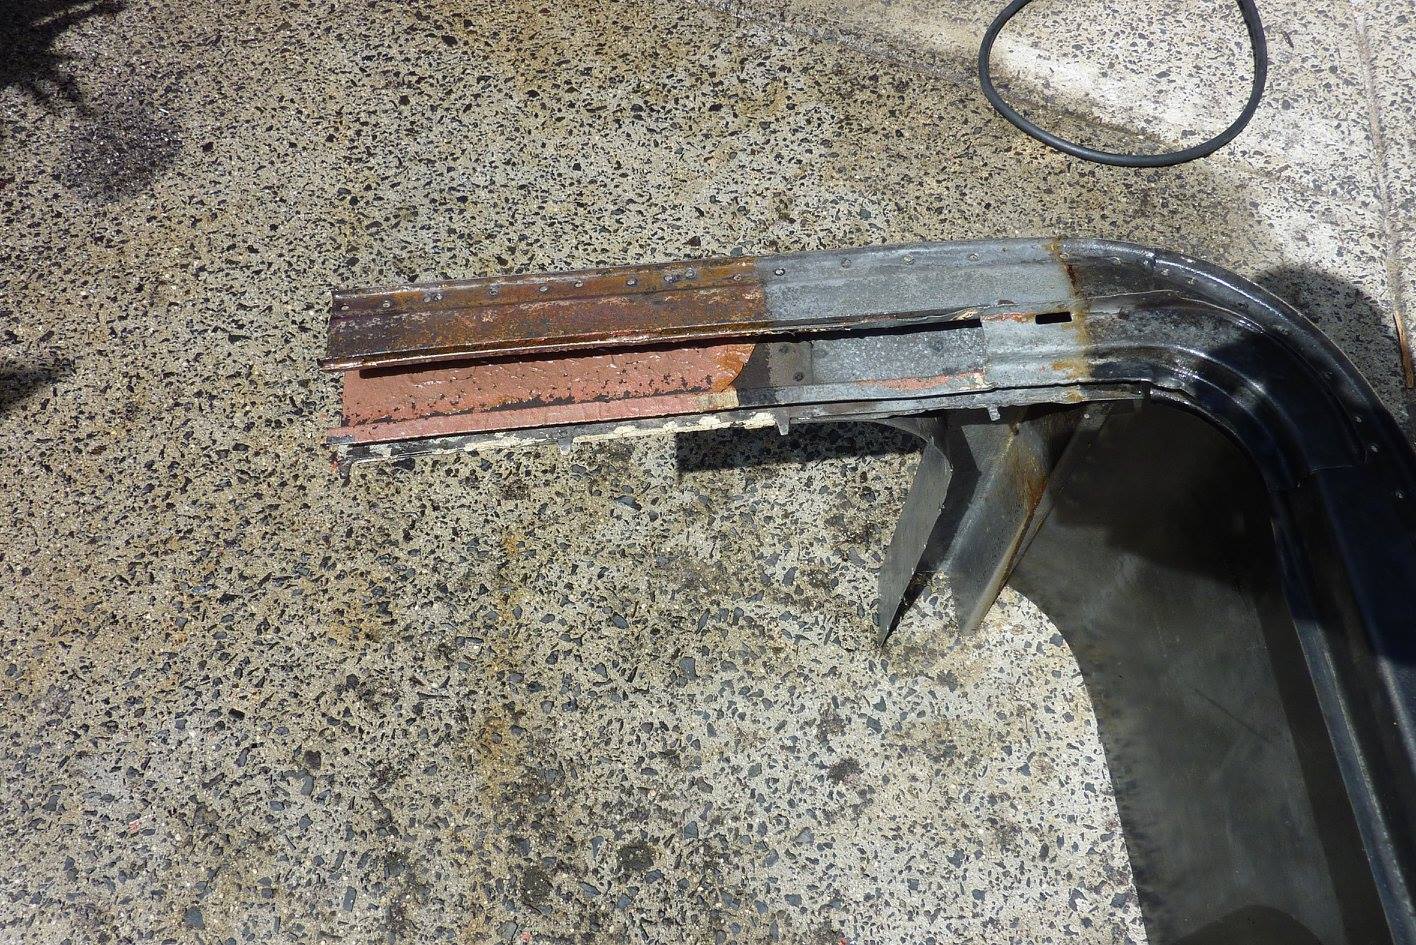 I hadn't stripped the over spray inside the roof channel here where some red oxide paint was. When you pull it out it looks like the acid hasn't done anything as you can see the rust above it as well. 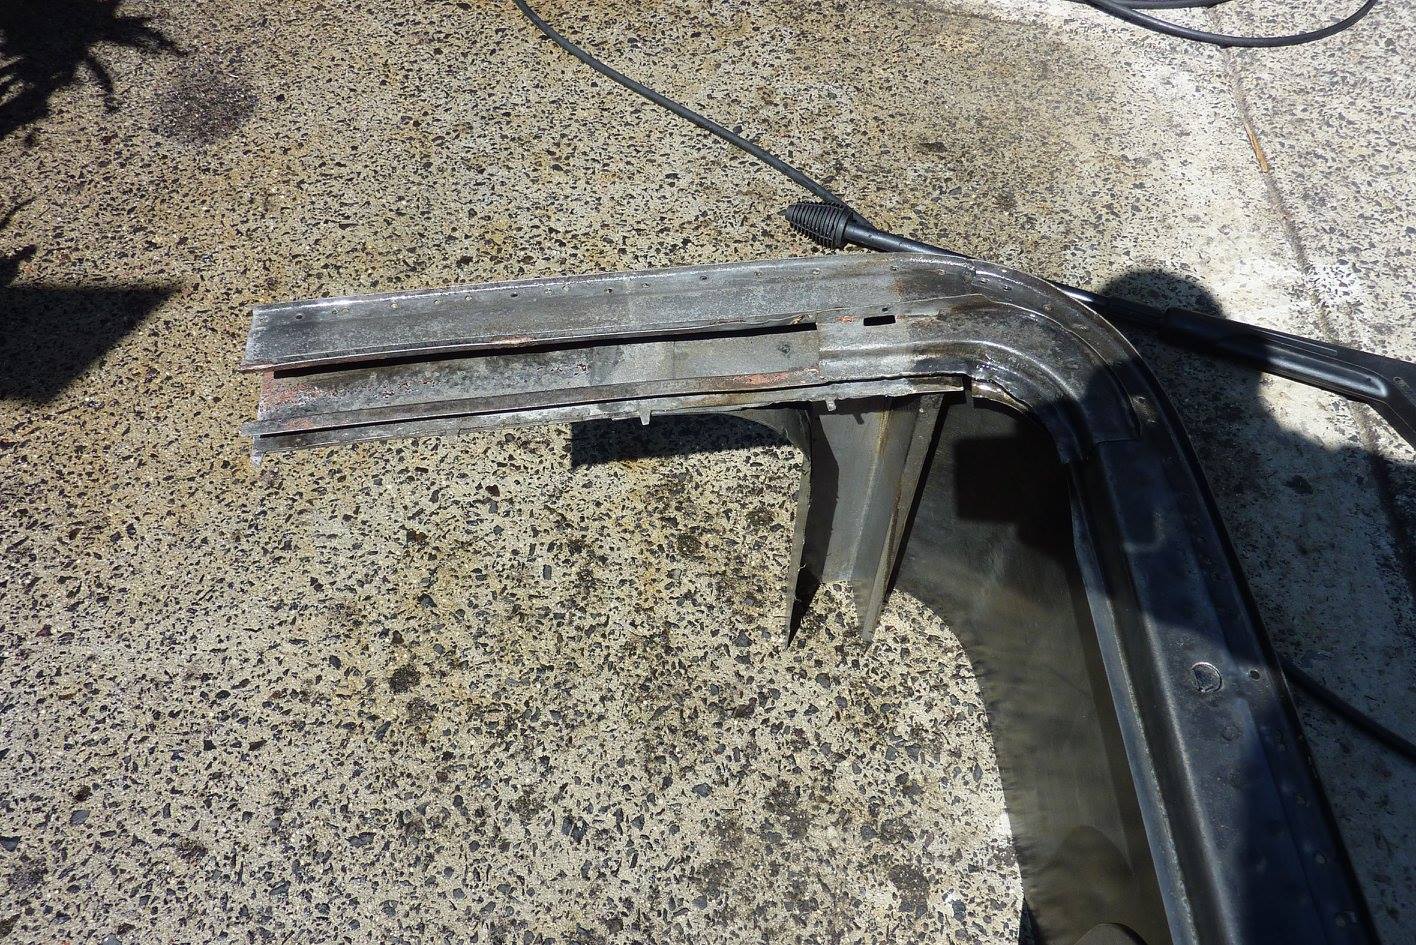 A few seconds with the pressure washer and it is like this. Just a few bits of red oxide left and all the rust gone. Paint has to be a bit flaky or have rust under it to work come off in the acid though. Good paint will stay there. 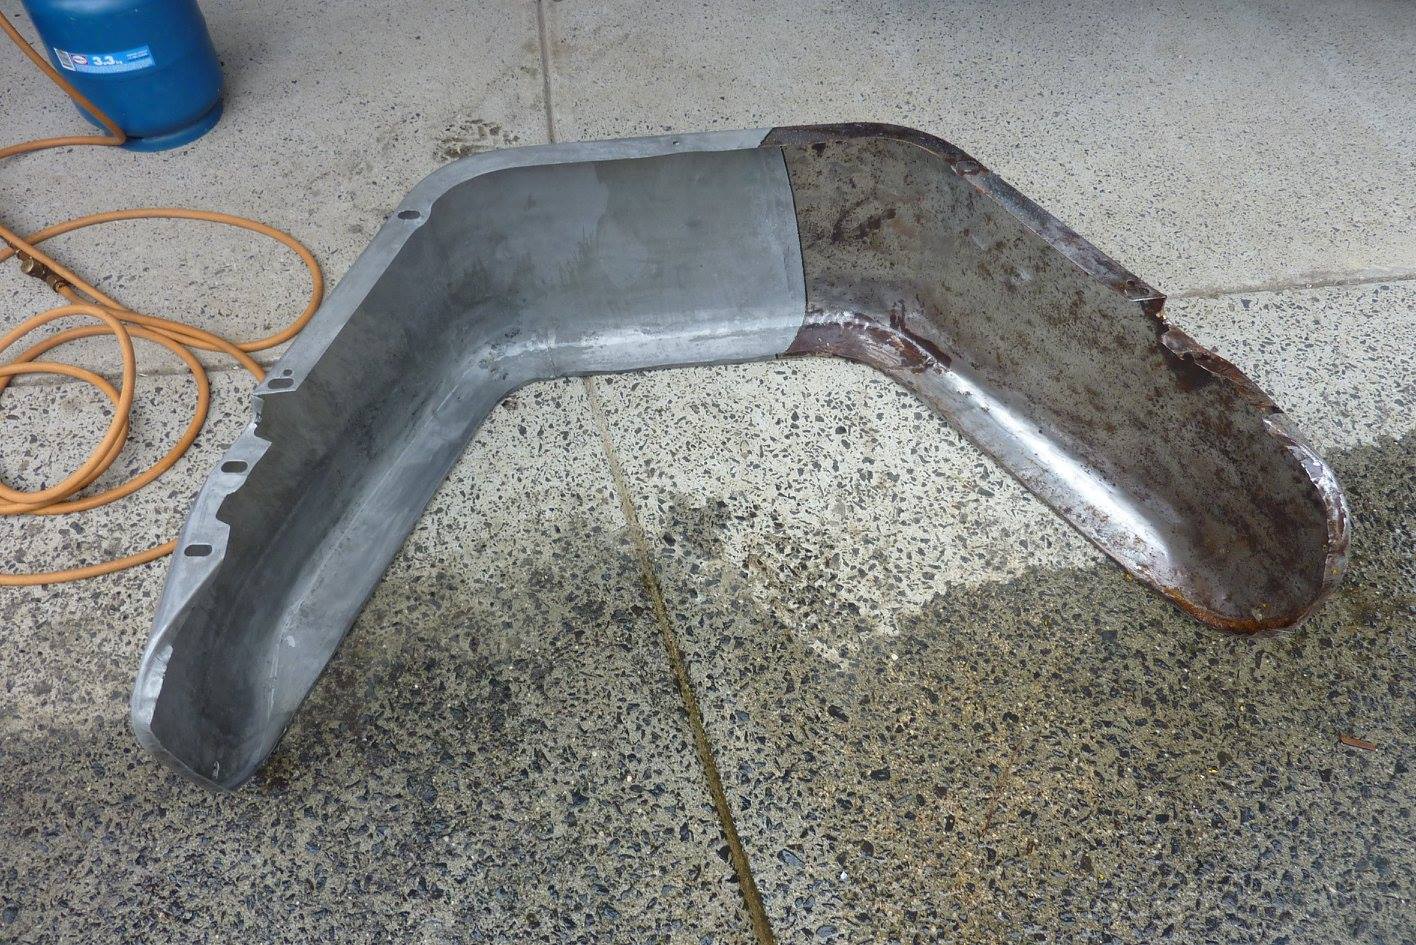 Love seeing the difference it makes. Can see the 'tide' mark clearly. 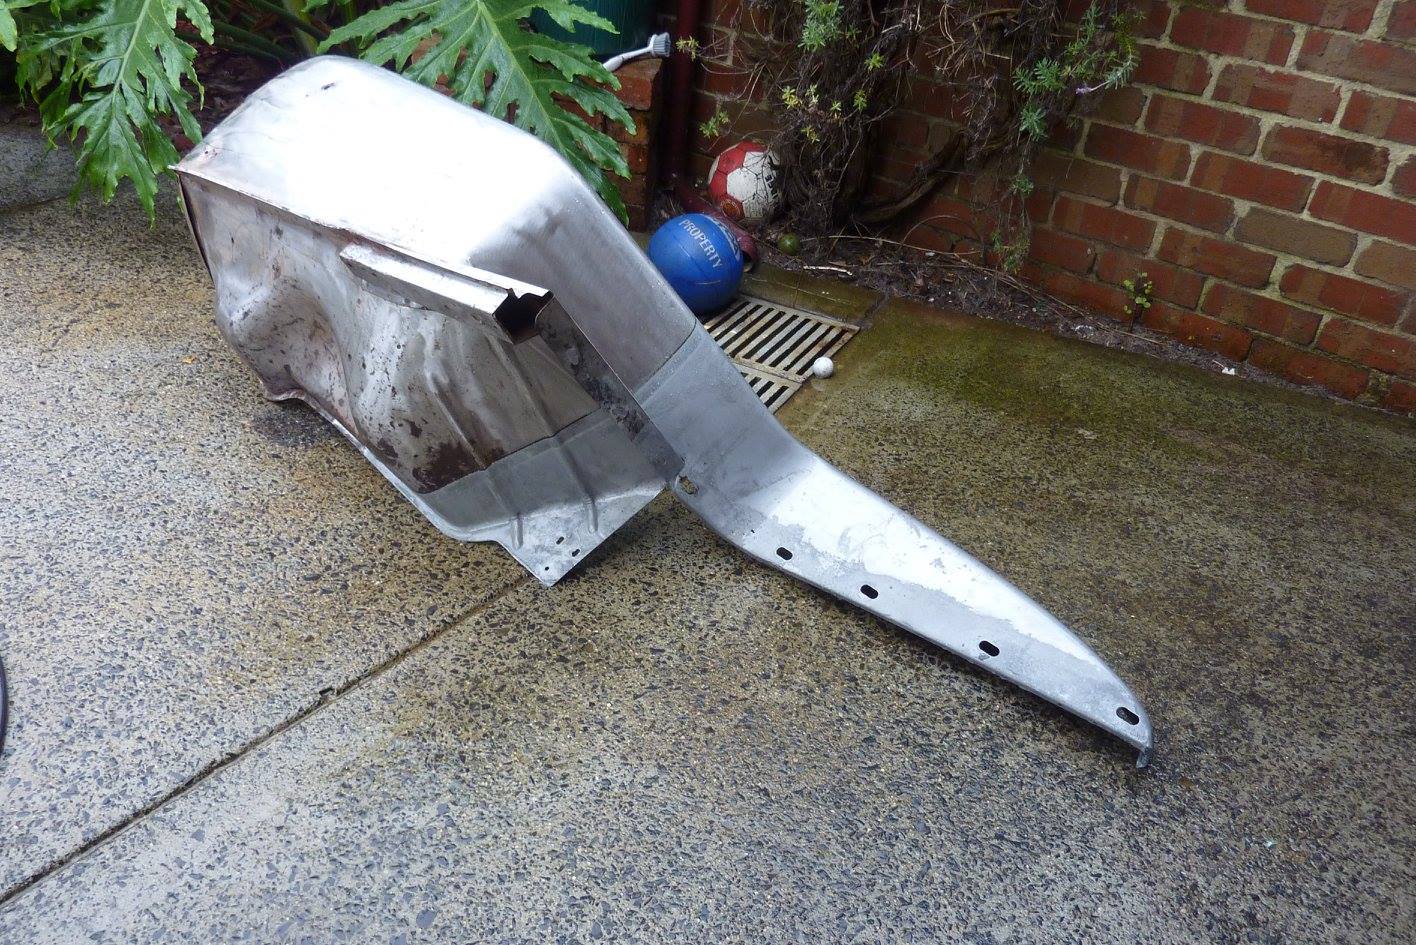 Half a front guard done. 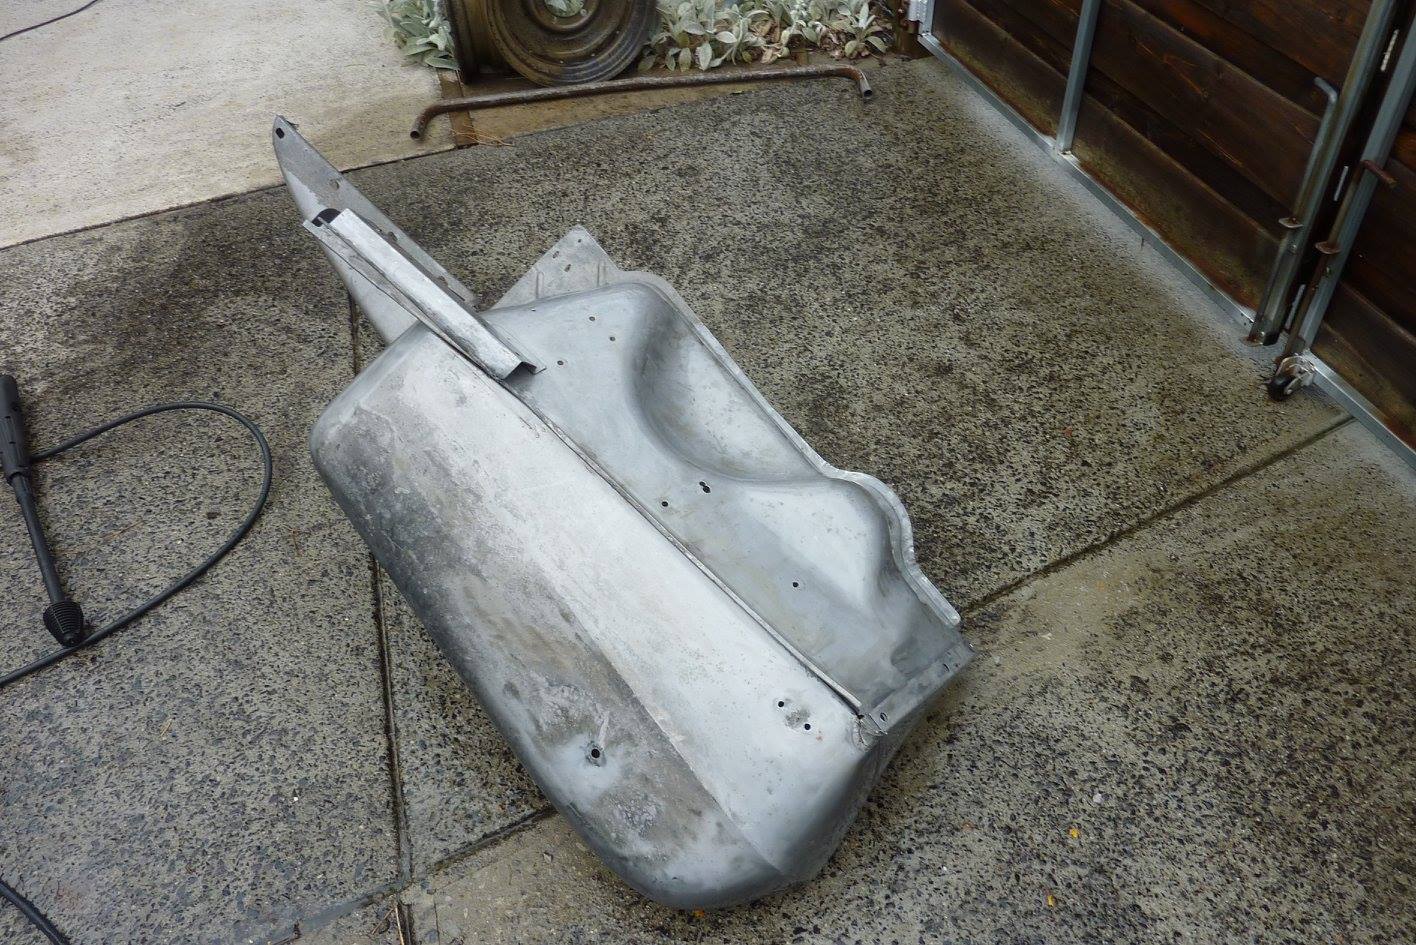 A week later the rest.  Free of rust now as the rust left beforehand was even after a strip disc had been over it and couldn't remove it. Blasting would not have got it out of the seams either which acid does a pretty good job of. If it can soak in there, it should remove it. No warpage risk as well.  A popular custom mod is rounding the corners of doors and bonnets etc, not sure if it suits the boxy Willys Truck or not? Here is a version made by Mitsubishi that has similar doors but a CJ3B front. Gives an idea what it would look like.
__________________
Marcus aka. Gojeep Victoria, Australia http://willyshotrod.com Invention is a combination of brains and materials. The more brains you use, the less materials you need. Last edited by Gojeep; 08-02-2017 at 07:55 PM.
|
|
#430
12-07-2015, 06:06 PM
|
||||
|
||||
|
Having a quick go at the roof.
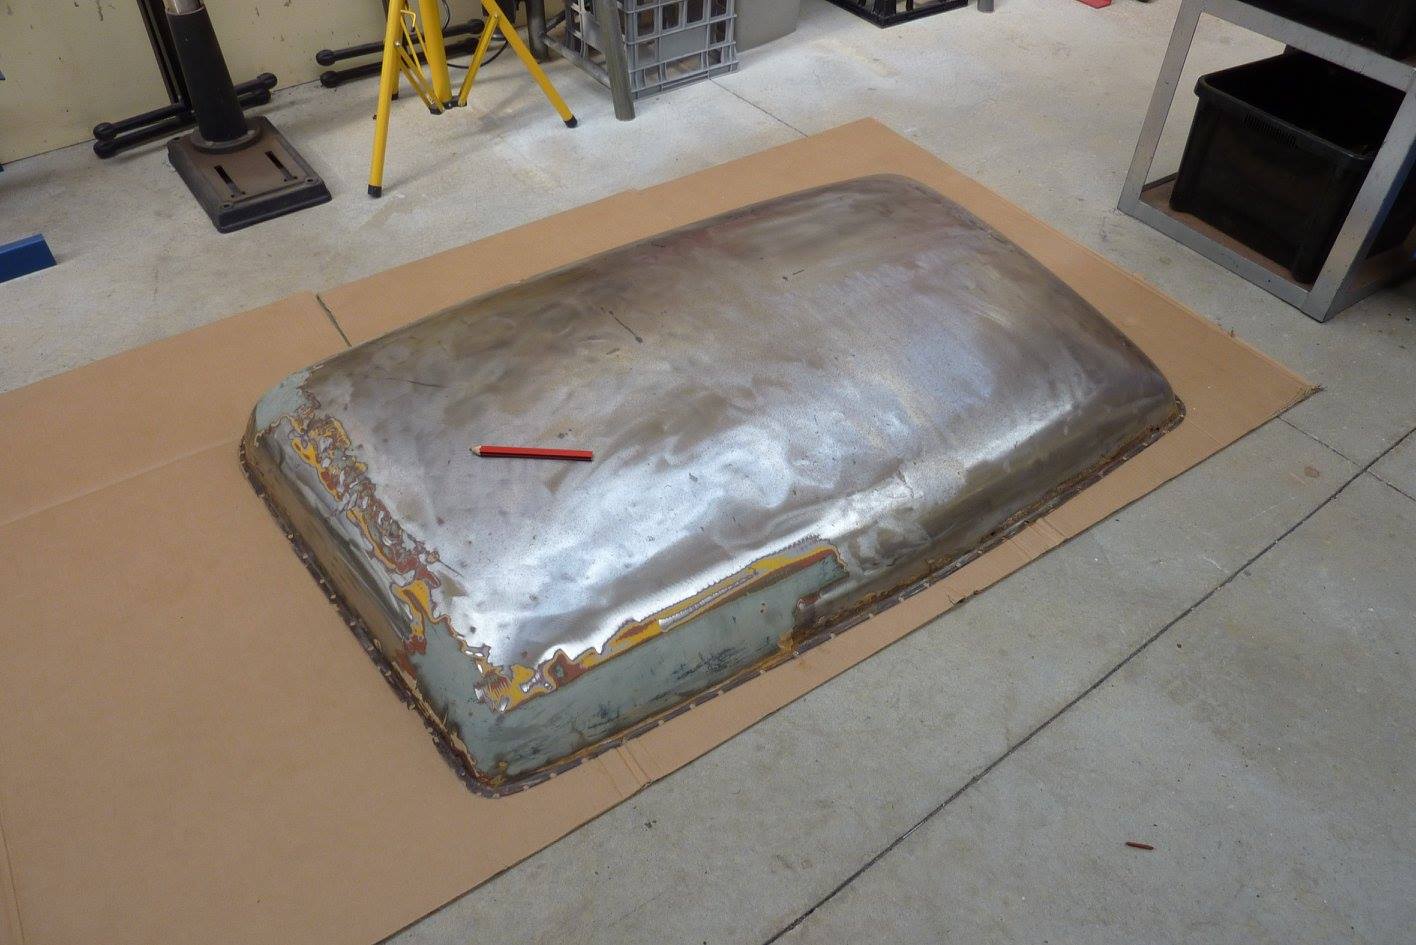 Just marking out the original size of the roof panel using a spare one from the 58.  Then laid out the one I had cut up earlier to be 9" wider and 7" longer than stock. The rear is wider still due to the shape of the roof. 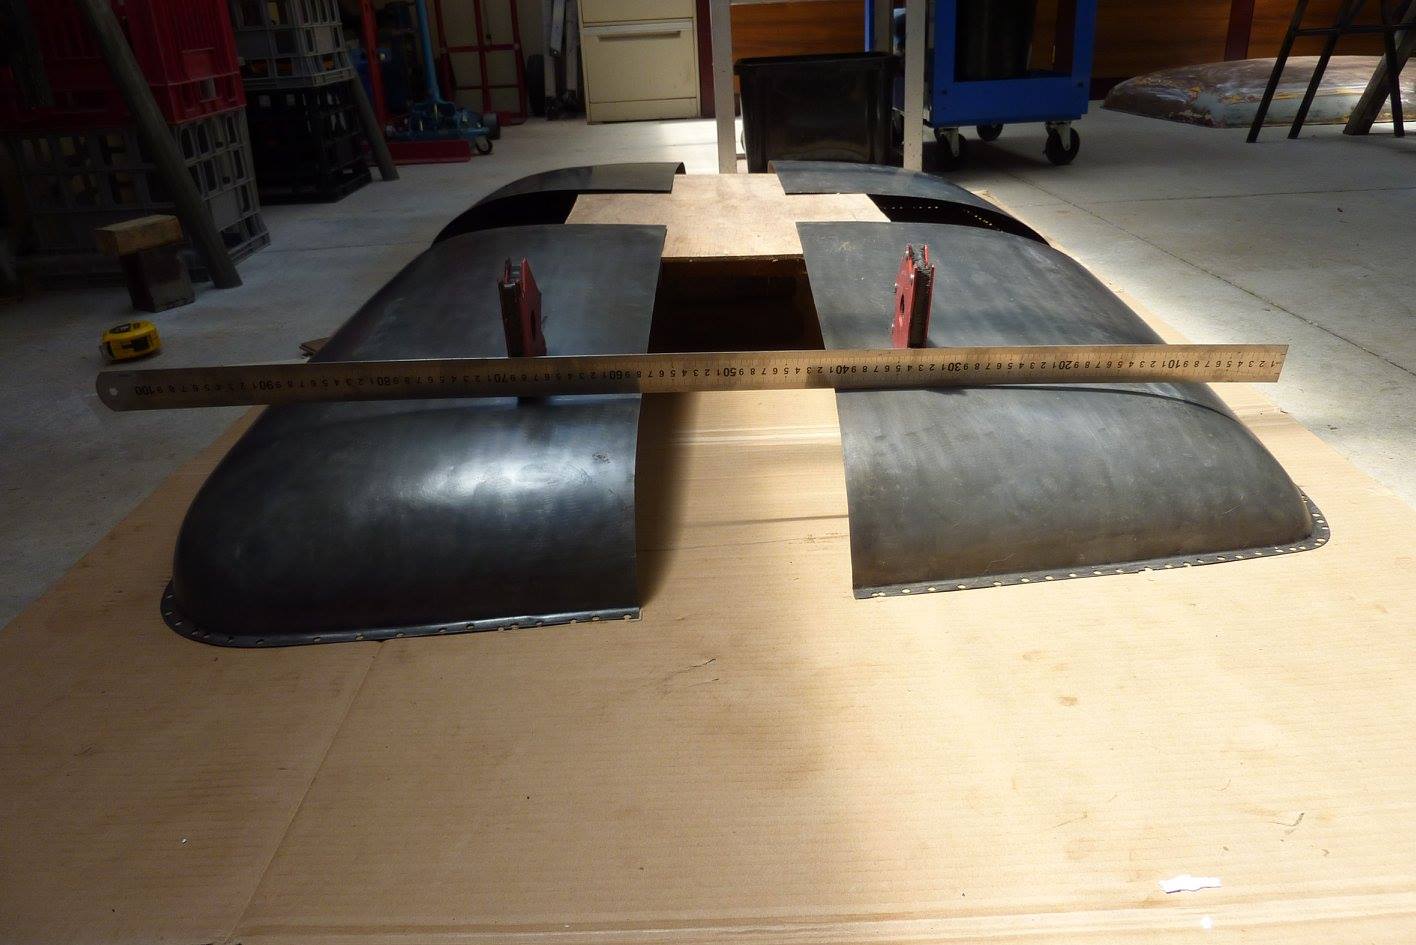 Because the cut was made in the middle and not at the highest point, you can see how it wont flow and end up with a big flat spot if a panel was just fitted in between. I knew this beforehand but I'm pancaking the roof anyway so it doesn't matter. The 4 even sections makes this laying out easier. 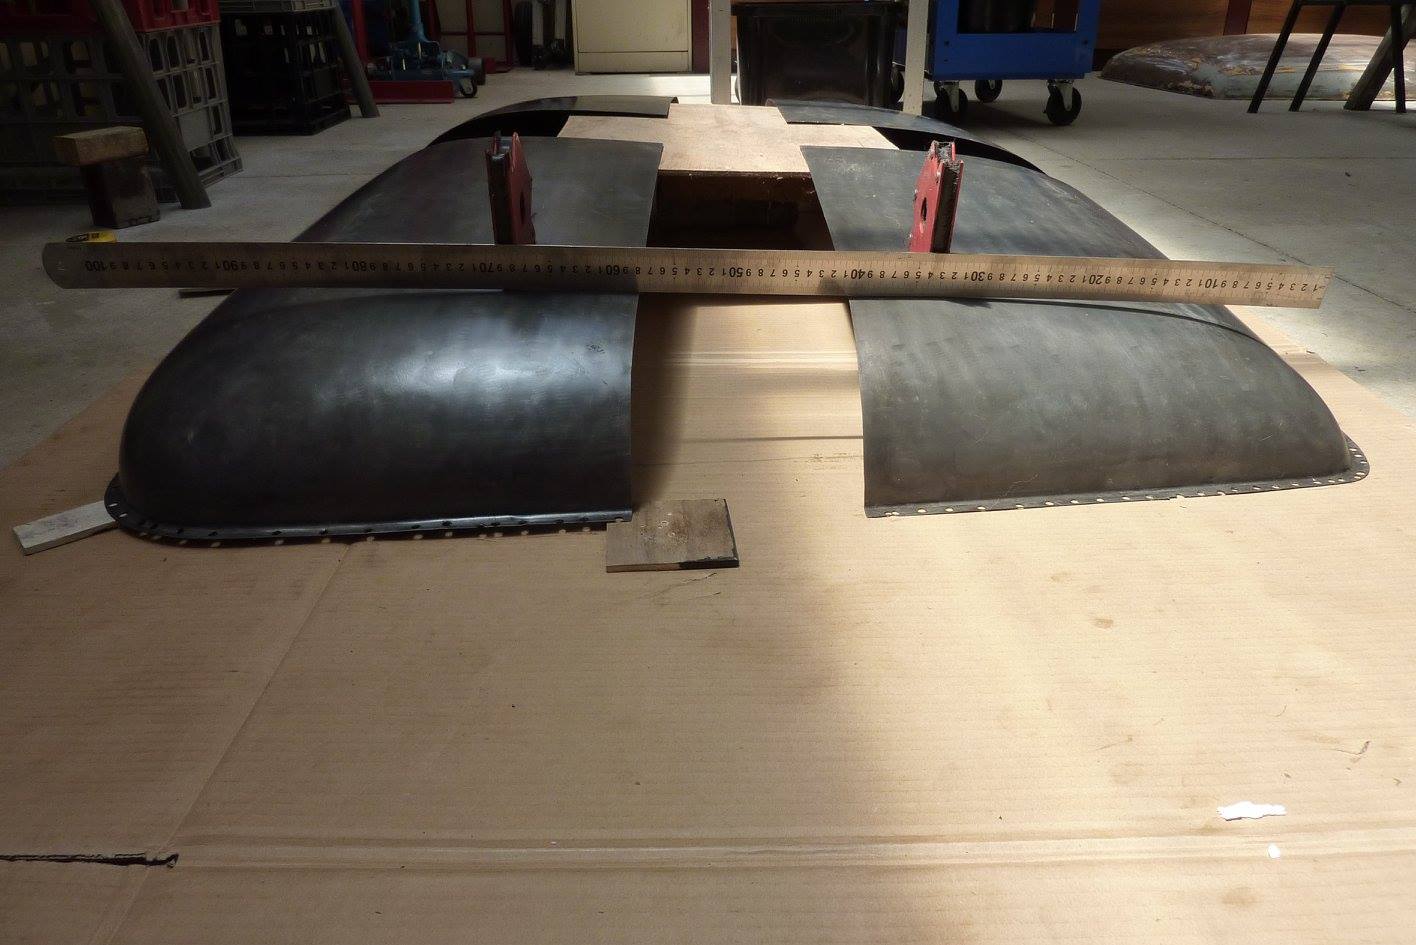 Raising the rear panel 6mm-1/4" evenly brings it all back into line. 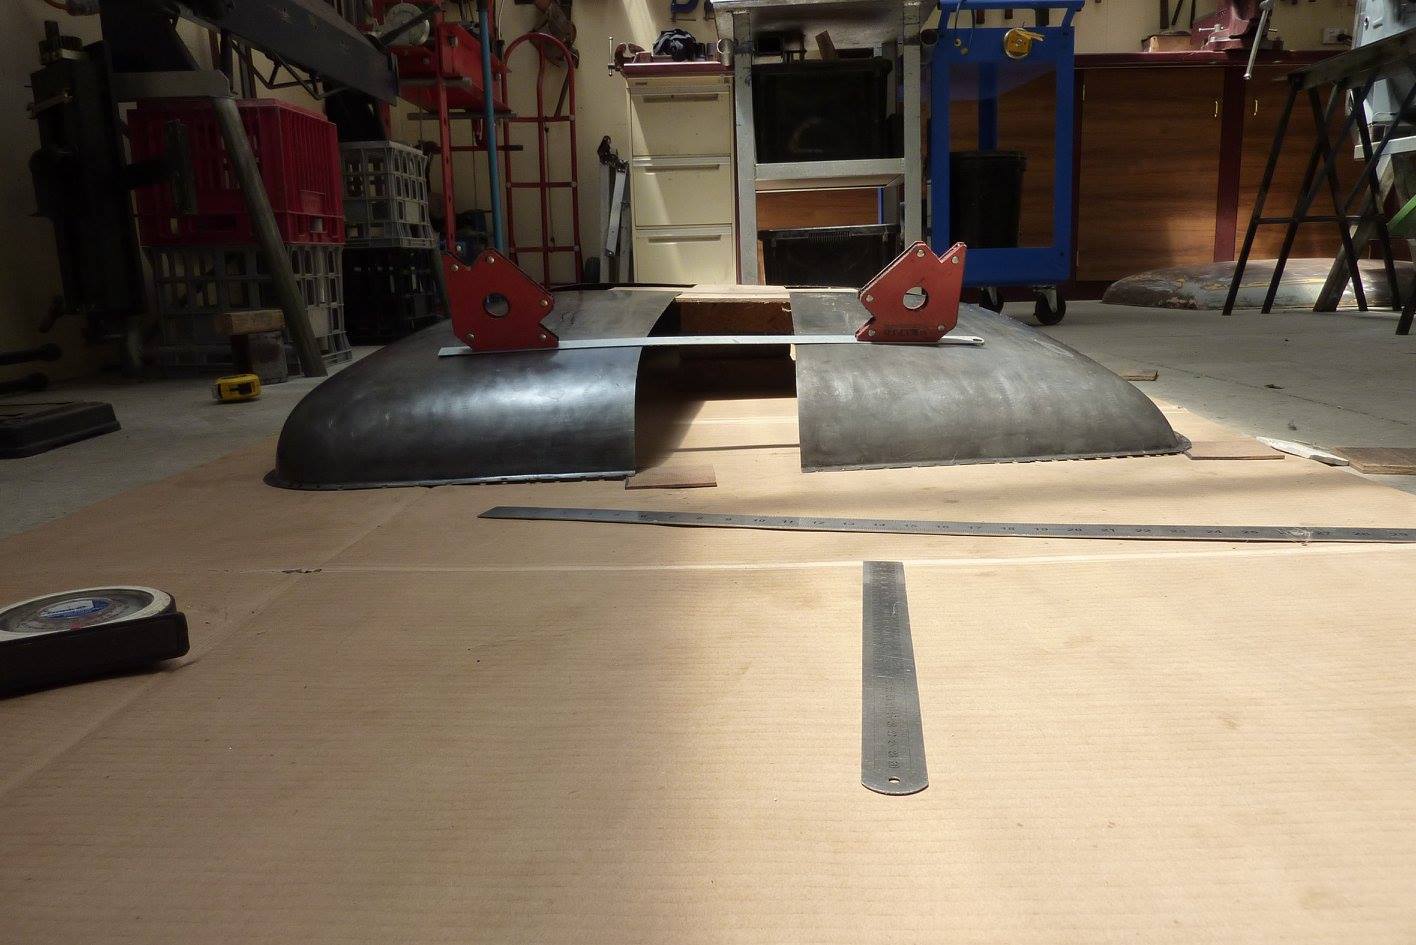 I looked at raising both the front and rear panels edges 3mm-1/8" as well, but it makes the highest point move forward. 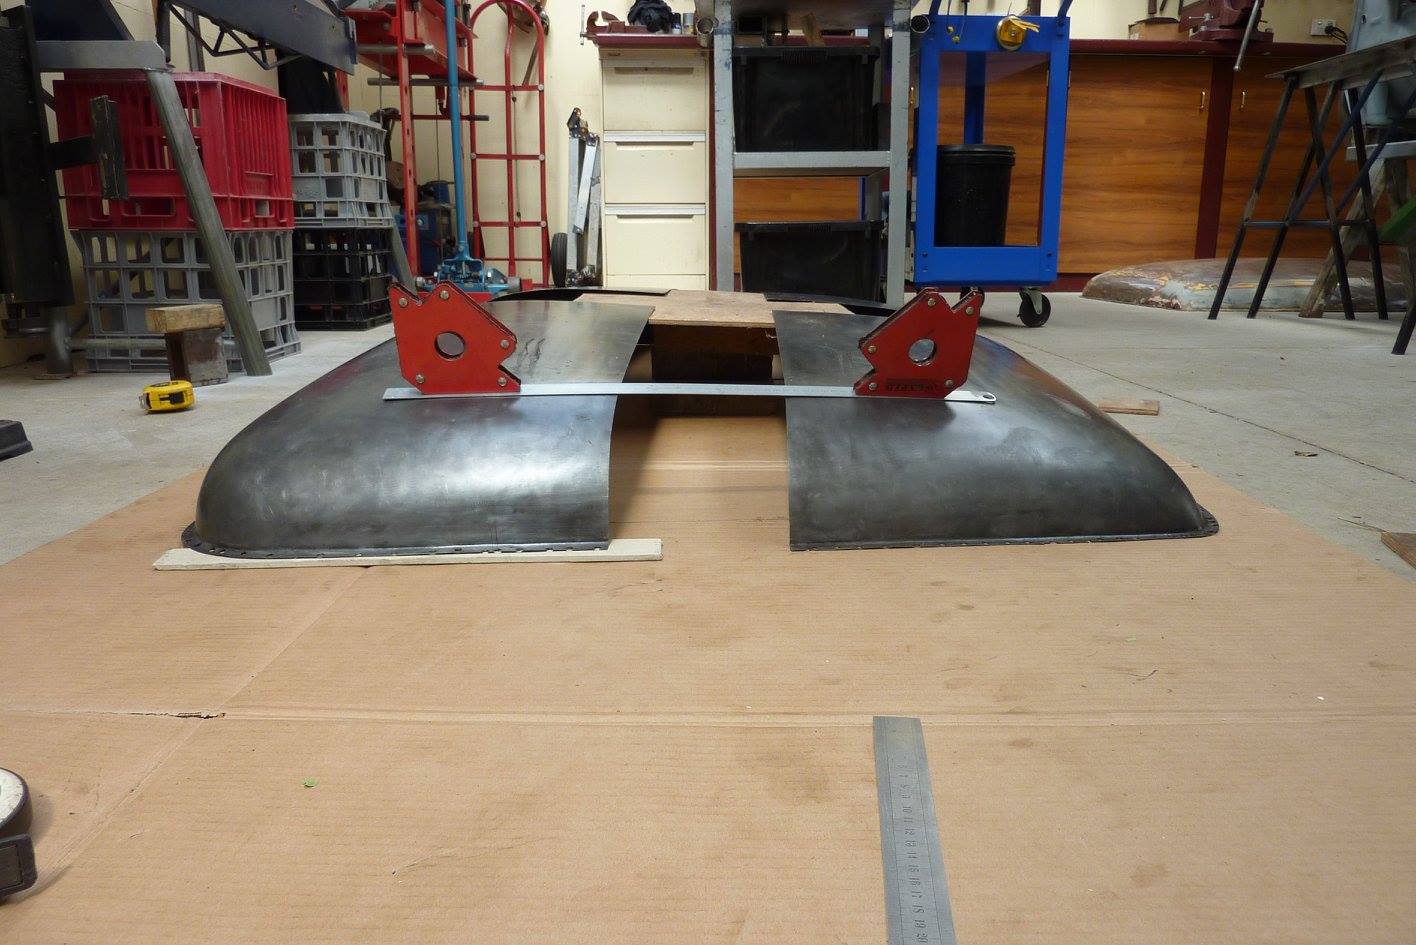 So decided just the rear panel lift looked the best.  Now for the pancaking or sectioning of the roof. I have always thought the stock profile was too high so had this modification planned right for the start. I also want to reduce the amount of wedge shape the side profile has. To this end the front will come down 25mm-1", the rear 38mm-1.5". The packers are 1/2" shorter than that as a new 1/2" flange still has to be bent along the bottom edge. 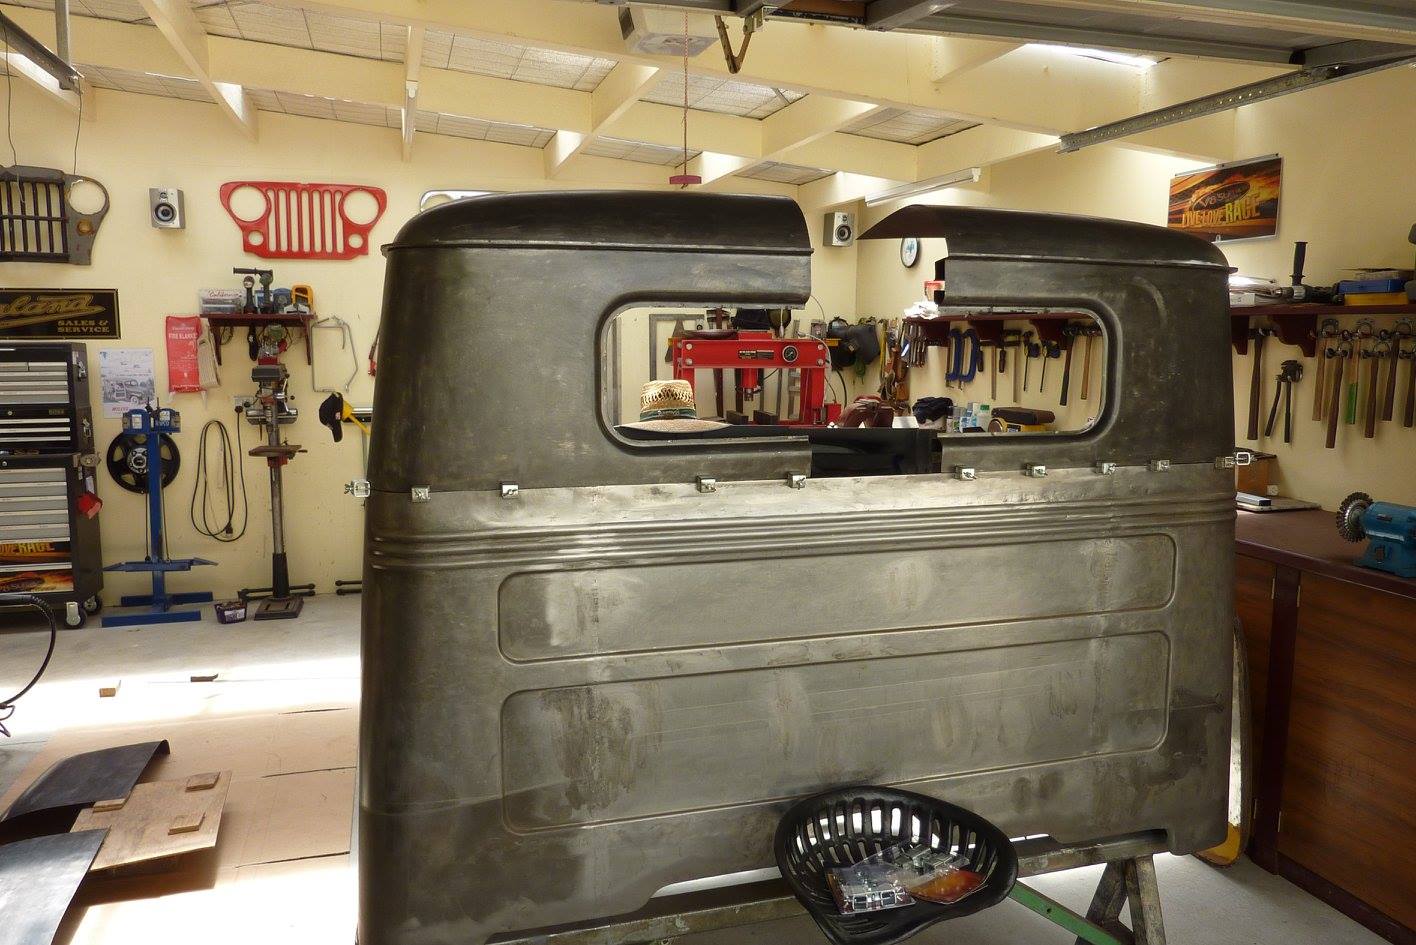 So this is what it looks like before the flange has been turned. I'm not entirely happy with the amount of crown at the back still, though but am on the front panels. 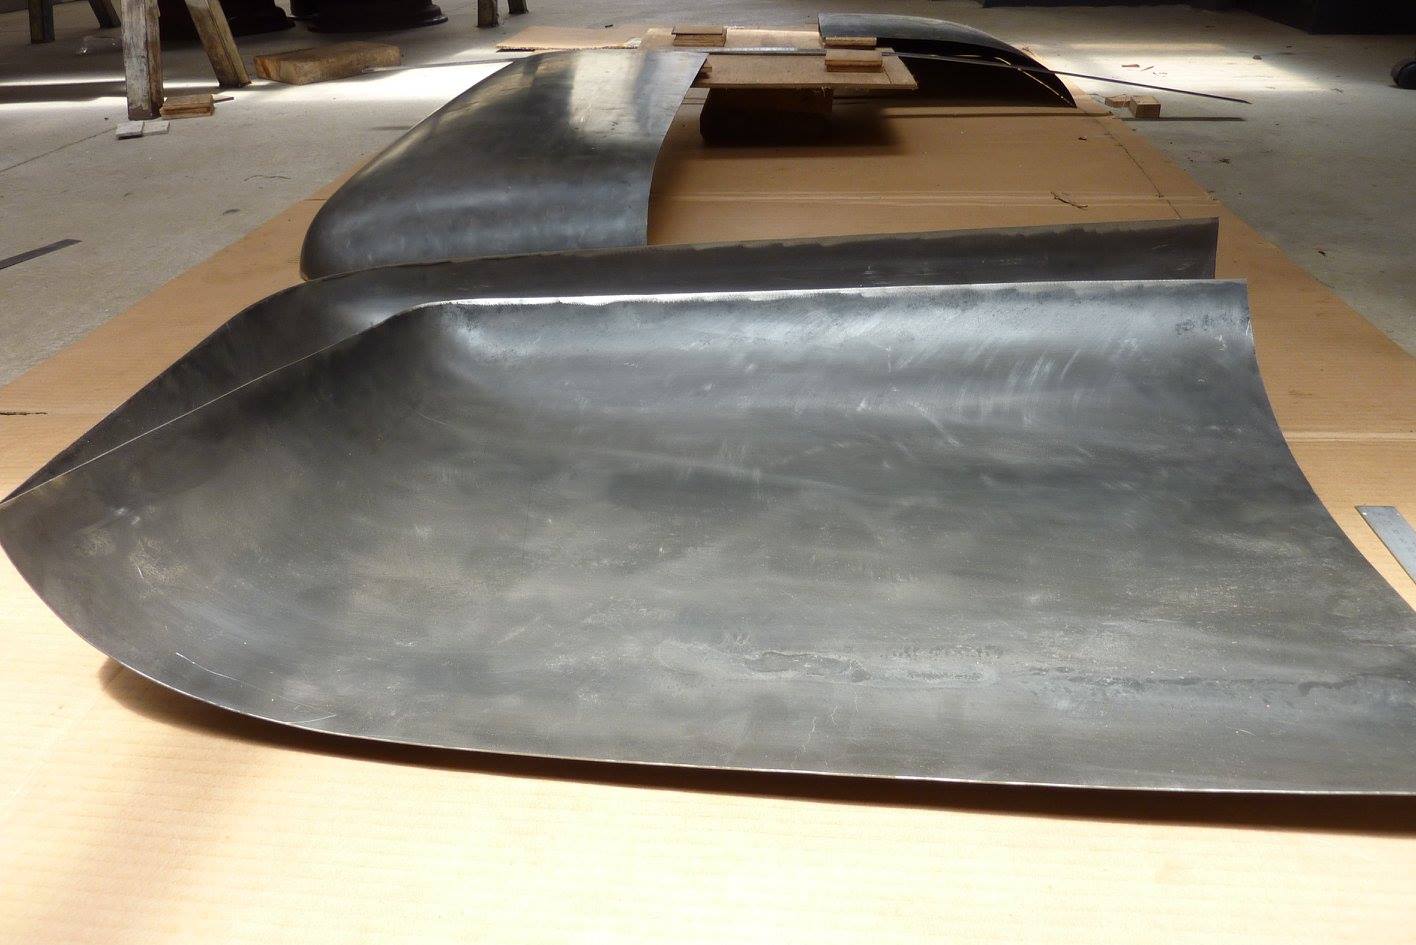 Putting a front panel inside a rear one shows that there is 13mm-1/2" more crown in the back panel compared to the front. It is an inch taller in the corner but 38mm-1" in the middle.  So left the 25mm-1" rake front to rear but have now made it so it has the same crown left to right. 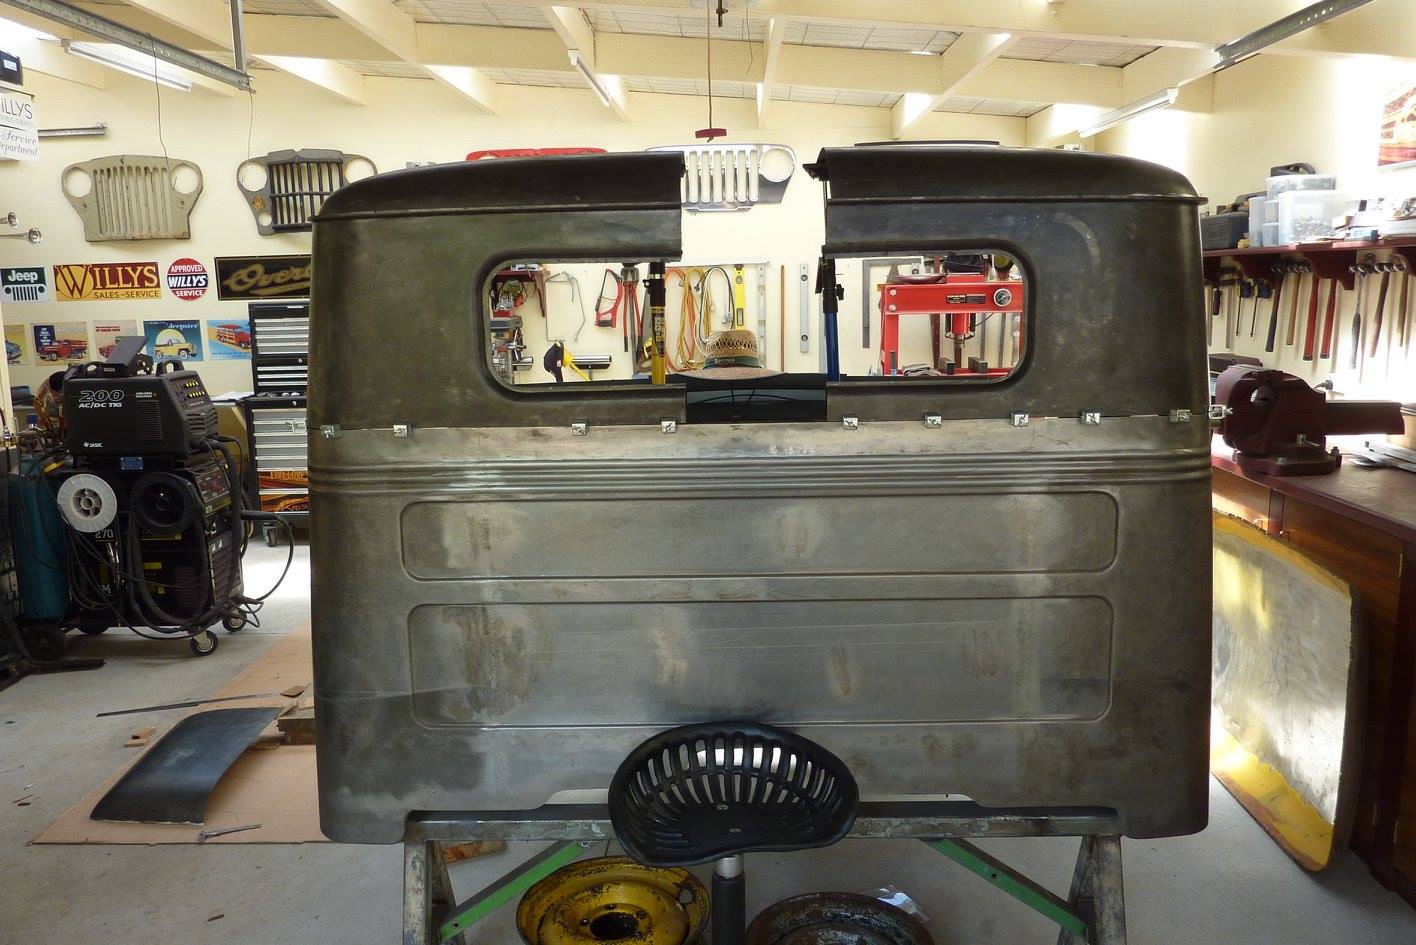 Happy with the profile now. 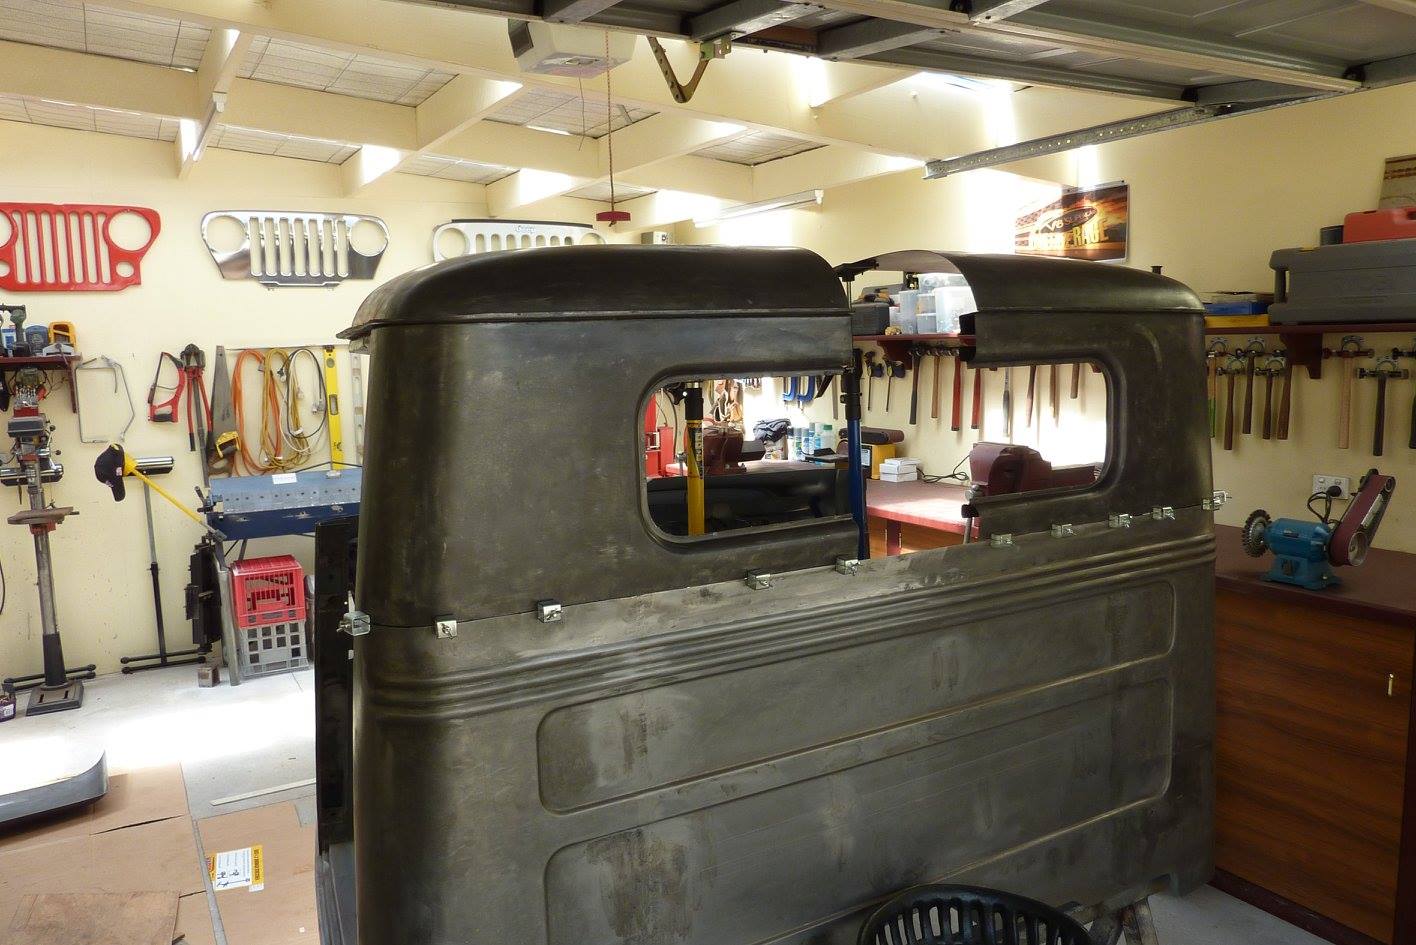 Flange still needs to be turned so overall will drop another 13mm-1/2" yet. 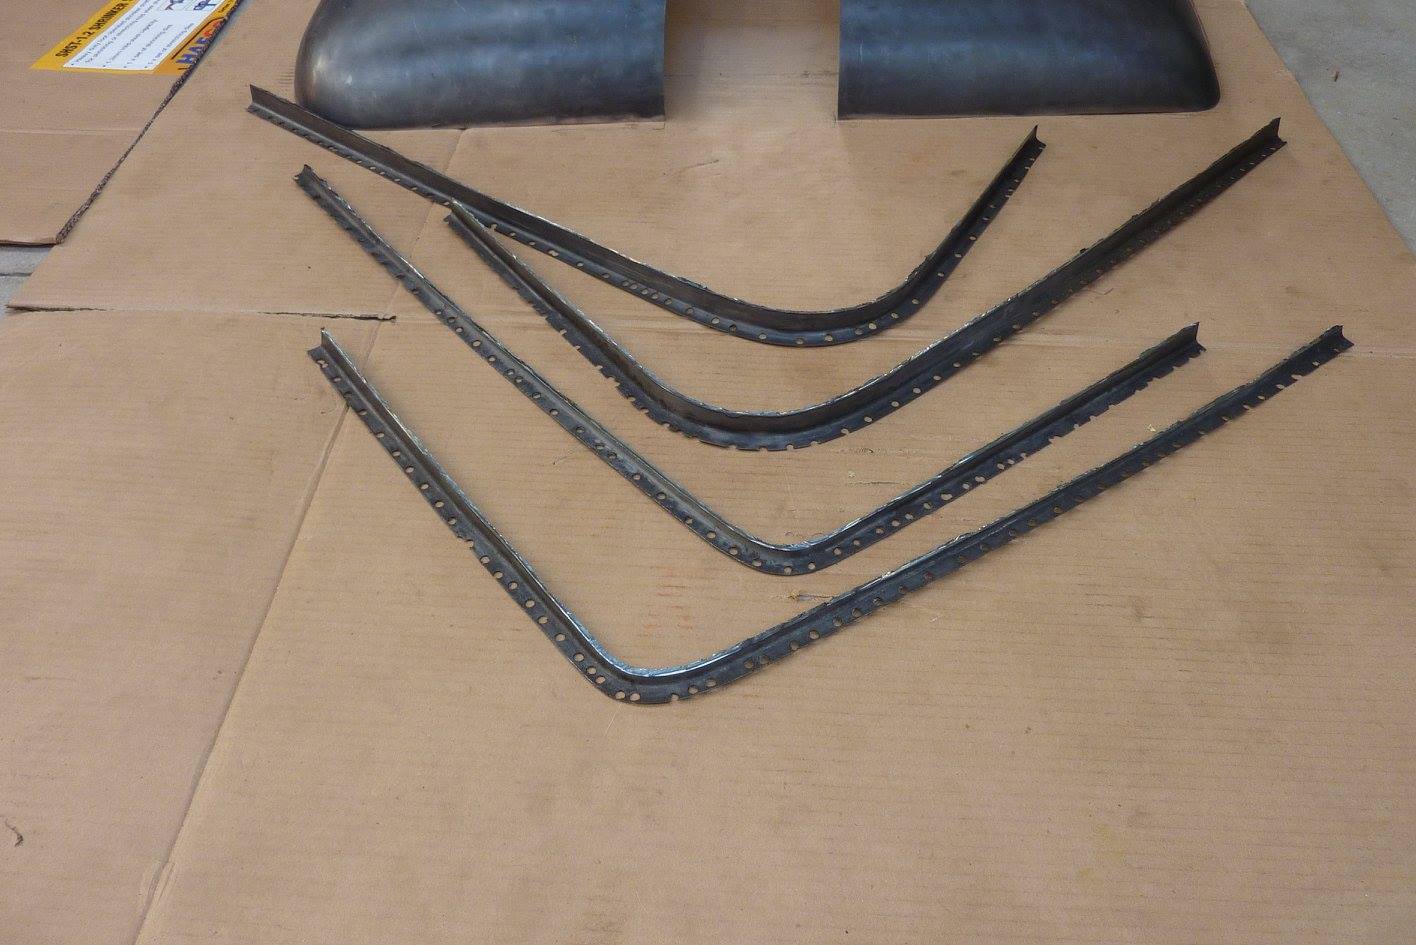 Was a good way to get rid of all those spot weld holes too and some rust pitting as well. 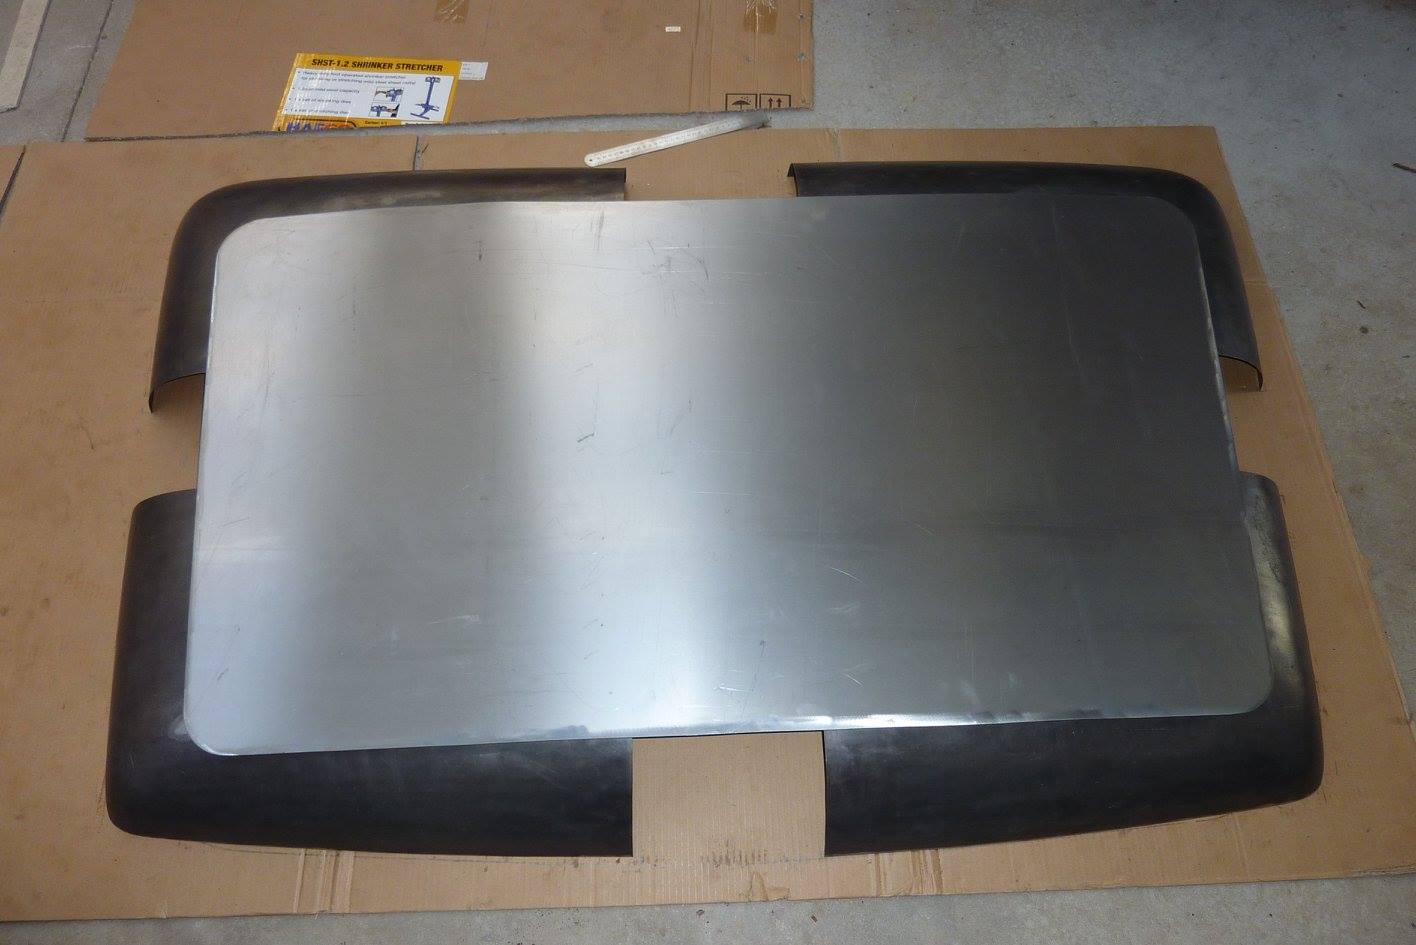 So rather than put a huge cross right across in both directions, I will be making a whole new centre panel instead with 4 smaller infill panels. This will stop a massive amount of weld shrink concentrating right in the middle of the roof which is the last place you want it. It would suck the whole centre downwards and be much harder to planish it all back up again at full arms reach. 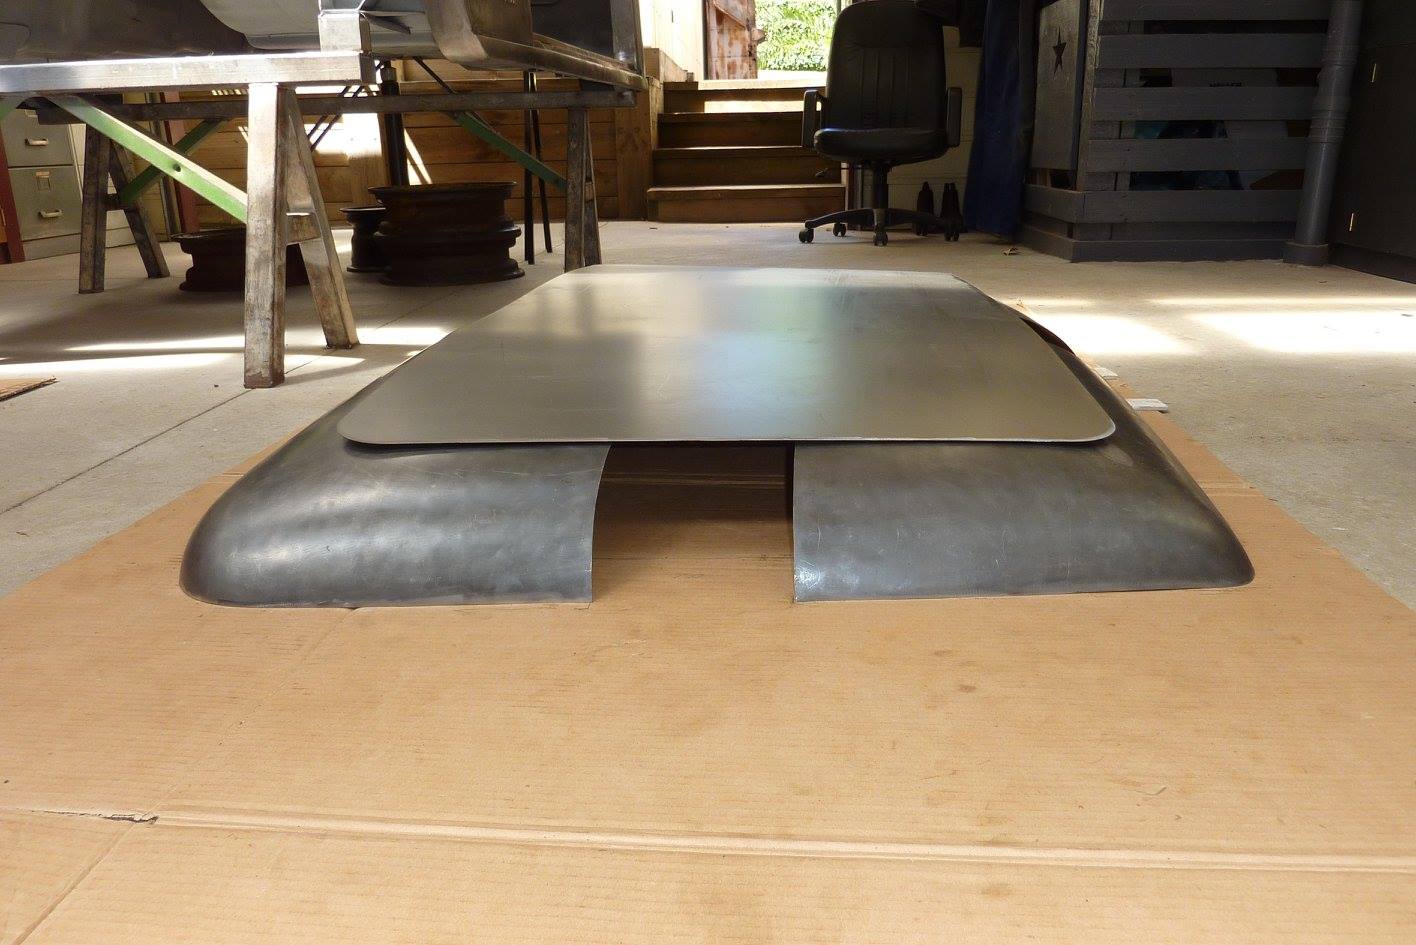 Next thing will be wheeling a nice smooth matching crown into the filler piece. Hoping someone can give me a hand to do it at the next metal meet as it is a two person job.  Can see the crown that needs to be wheeled in across the front too. Be nice if I can get help by someone with more experience than me on a bigger panel as only done small ones so far.
__________________
Marcus aka. Gojeep Victoria, Australia http://willyshotrod.com Invention is a combination of brains and materials. The more brains you use, the less materials you need. Last edited by Gojeep; 08-02-2017 at 07:58 PM.
|
 |
| Thread Tools | Search this Thread |
| Display Modes | |
|
|


 Linear Mode

