
|
|
|
#961
 05-17-2019, 07:02 AM
|
|||
|
|||
|
awesome work. i enjoyed the video update
__________________
Steve 
|
|
#962
05-18-2019, 06:16 AM
|
||||
|
||||
|
Quote:

__________________
Marcus aka. Gojeep Victoria, Australia http://willyshotrod.com Invention is a combination of brains and materials. The more brains you use, the less materials you need.
|
|
#963
05-18-2019, 07:47 AM
|
||||
|
||||
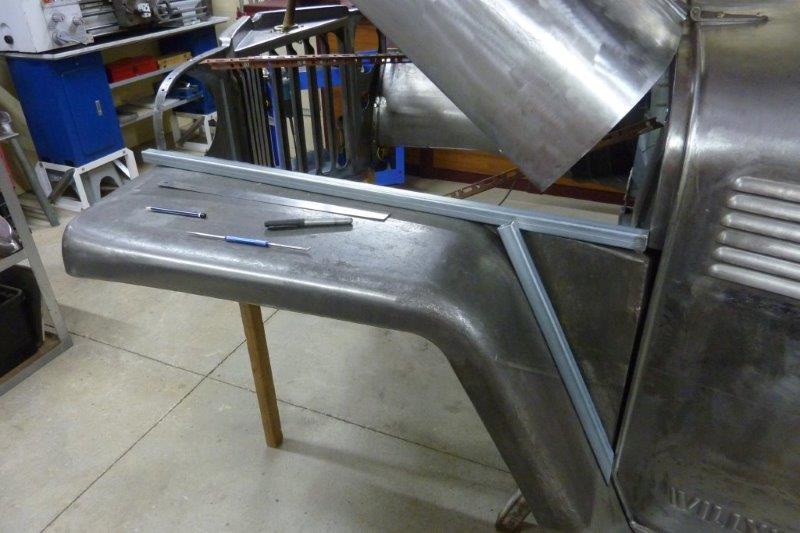
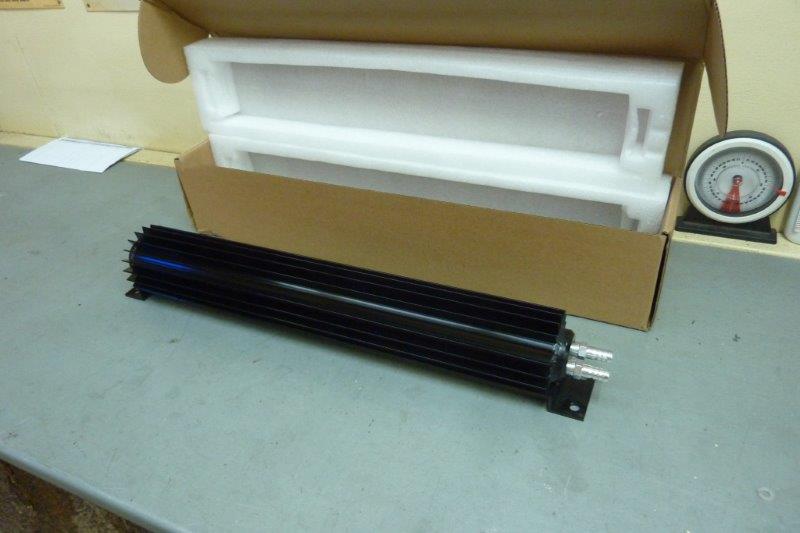 The only part of the whole cooling system I am changing is the cooler for the hydraulic fluid driving the fan and the power steering. It sat in front of the radiator and condenser and was only 100mm-4" high, but went the full width of it. That meant the whole radiator assembly had to be spaced back for it. So I thought replacing it with this 18" dual pass, (two chambers inside), finned cooler used for automatic transmissions would be a good idea.  Doesn't take up any space sitting in the V, but wasn't happy with the look of it and the outlets interfered with the latch. These are typically mounted to the frame rail so could place it there instead, but have decided to go with a shorter but taller OEM cooler instead with the same surface area as the stock one. So if anyone wants a brand new finned cooler for $50, let me know.   Next thing on my list to tackle is the triangle portion of the guard where it bolts to the firewall. I want to have the even gap continue all the way.  What I thought was caused by damage when I first got the truck, turns out to be factory! This part of the guard actually goes inwards by 10mm-3/8"! 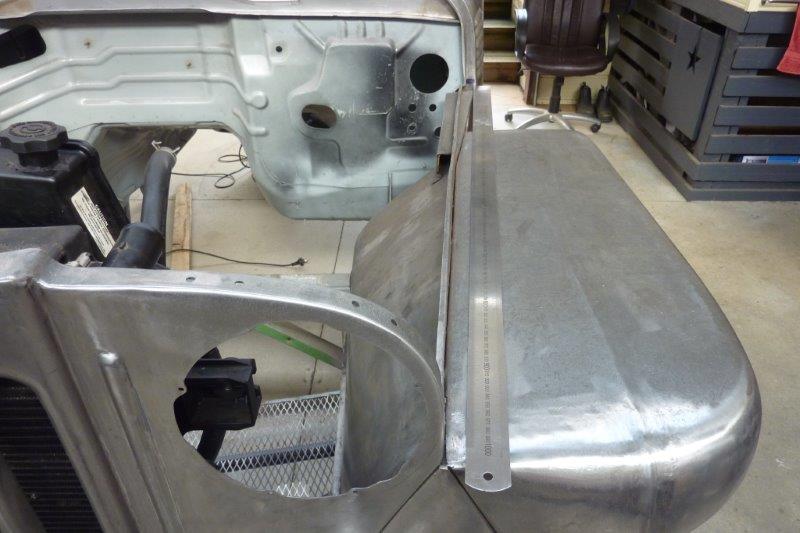 The ruler is showing where the edge of the bonnet sits over the guard. 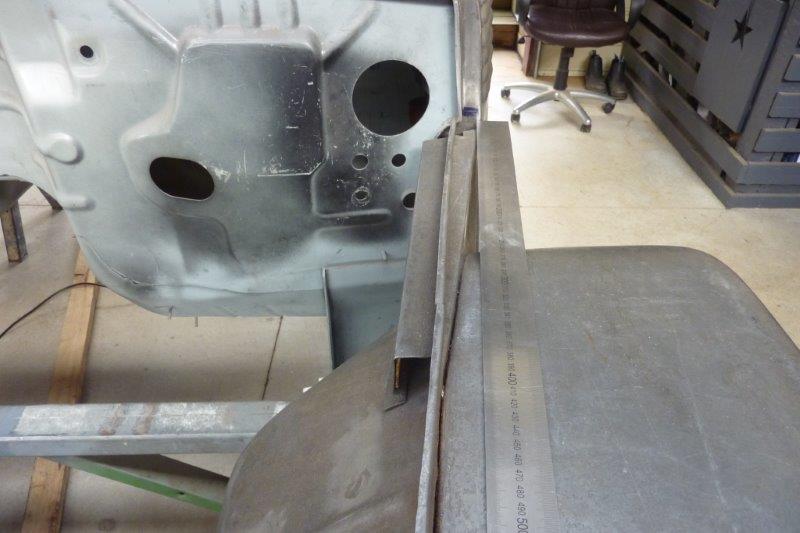 Now you can clearly see the gap they all have and how they have gone to some effort to make it this way too! Why I think it is there is that the corner of the bonnet drops down into this area as it is lifted due to the type of hinges used. I don't have stock hinges anymore so can't test that theory out. When choosing the different hinges to use on this I made sure this wouldn't happen so I could get rid of this. 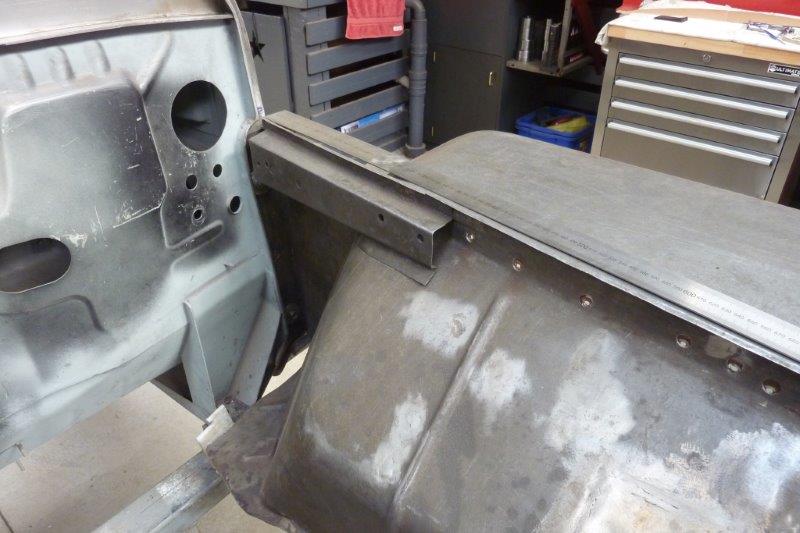 That triangle piece is actually part of the inner guard stamping, so not easy to redesign. The outer guard is spot welded to it as well so removing the gap actually moves the guard outwards. So all has to be redesigned.
__________________
Marcus aka. Gojeep Victoria, Australia http://willyshotrod.com Invention is a combination of brains and materials. The more brains you use, the less materials you need.
|
|
#964
05-18-2019, 08:06 AM
|
||||
|
||||
|
That looks to be a challenging!
Im sure you will find a perfect solution! Thanks for sharing all the ups and downs of your great project. Steve
__________________
Steve Hamilton Hamilton Classics Auto Restoration & Metalshaping
|
|
#965
05-25-2019, 07:02 AM
|
||||
|
||||
 The basic idea I have come up with to correct the awkward factory line along the top of the guard is starting with this. To run some 25mm-1" SHS under the flare part of the guard, (shown on top here), right to the firewall. Also to add a strengthening brace to support it as they are prone to tearing where they meet at the top. 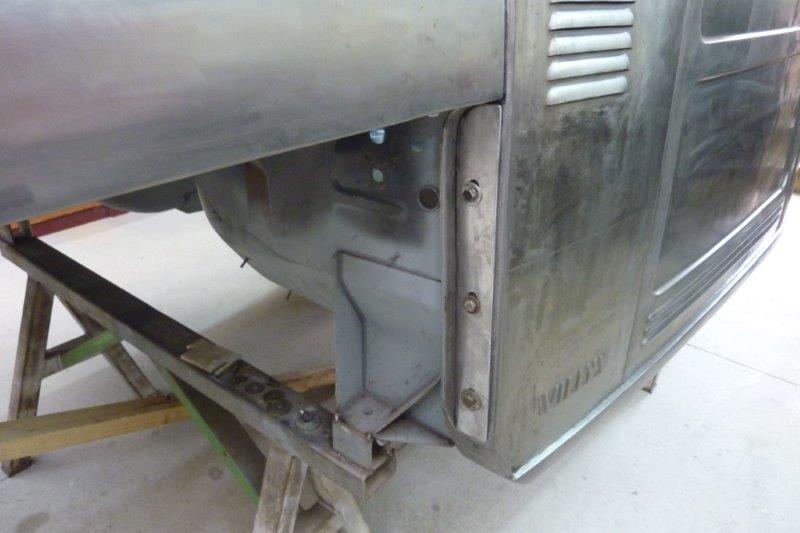 The guards also tear around where it mounts to the firewall, so made a flange from some 3mm-1/8" plate to attach the frame to. 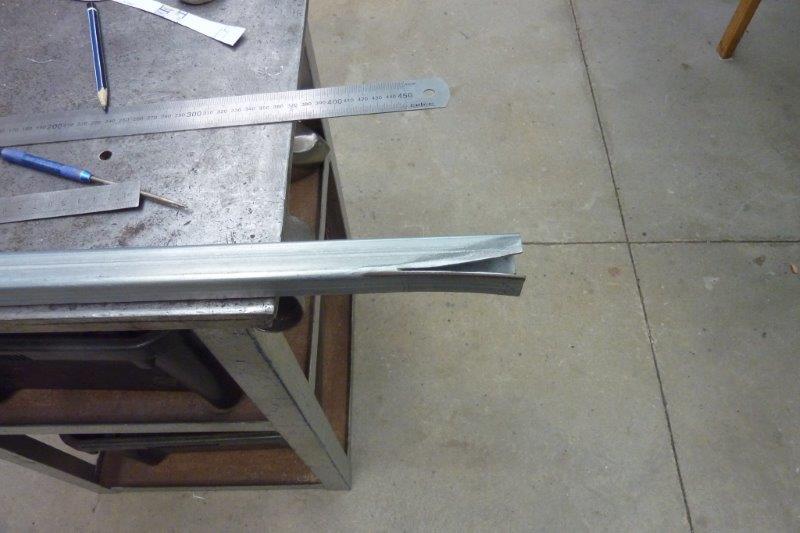 The top of the flare part is straight and flat for the most part until the grille where it slopes down. So curving the top of the frame to follow this. 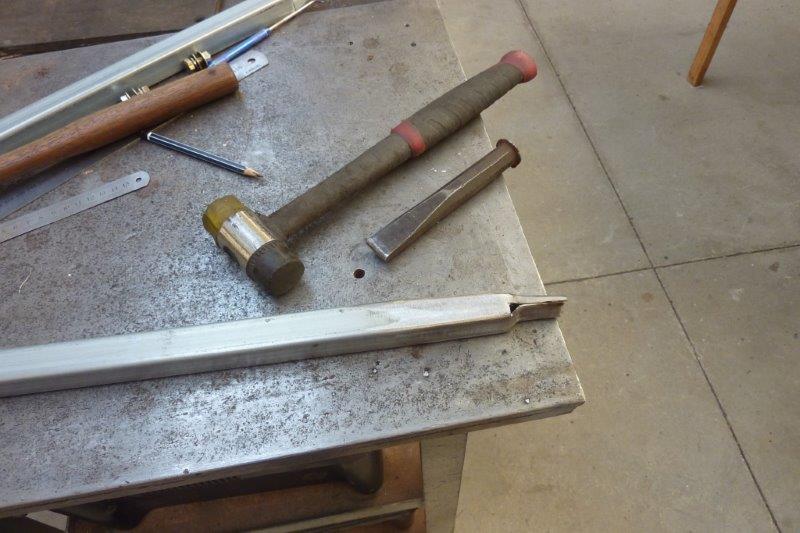 Also had to make a notch at the same place to clear the top bolt of the grille. Cut what I needed out and then used a rounded cold chisel to bend it into place. 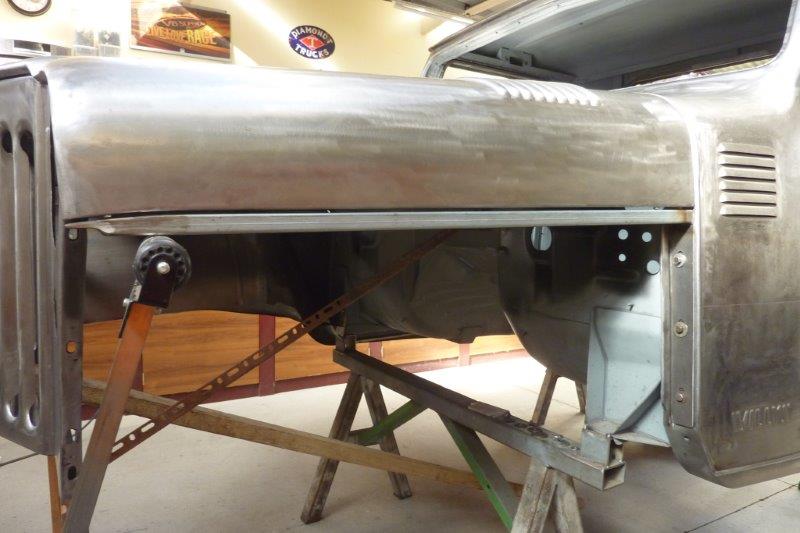 Can see how the top line follows the bonnet and the notch clears the top bolt hole at the grille. 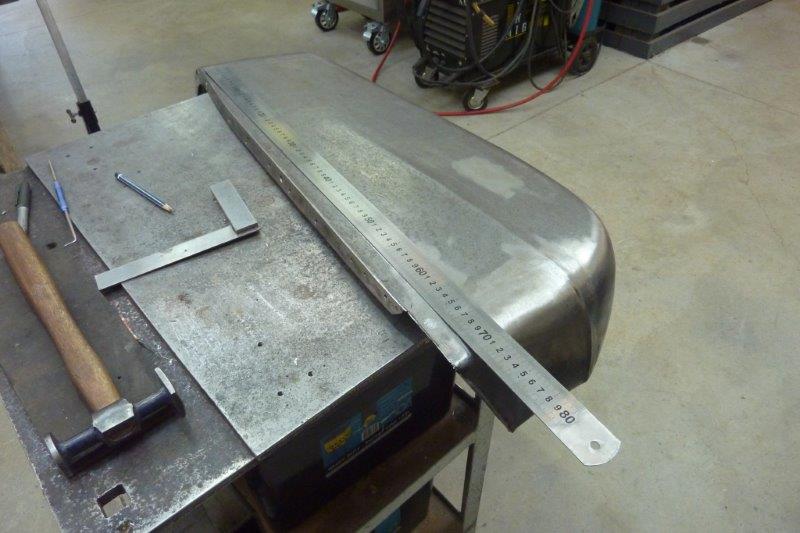 You might remember how I wanted to correct the 25mm-1" wider the guards were at the front compared to the back before it curves down. This is how I am going to remedy it by moving the inner fold line over. Also gets rid on that joggle at the same time. 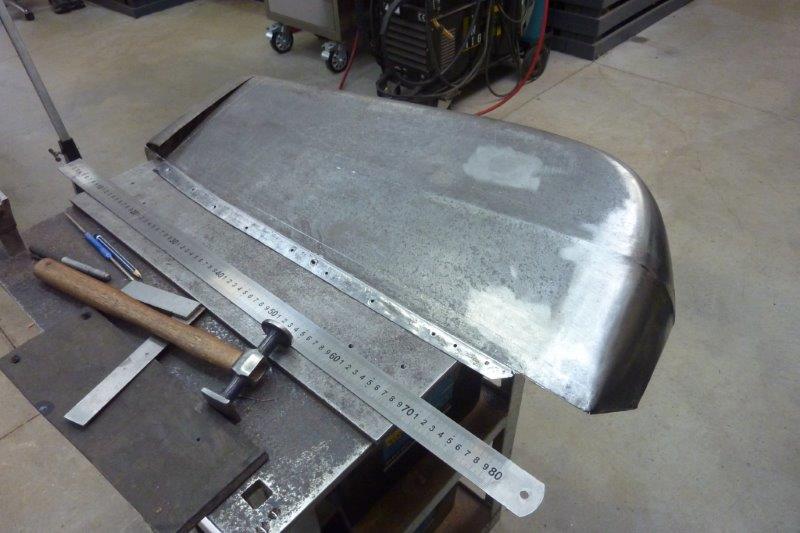 Flattened out the downward turned flange so I can use some of it where that joggle was.  Tipped the new fold 1" further in, but turned it upwards instead. This helps keep the water out of that seam and it can now be spot welded to the inner guard flange which sat up above the old seam. Makes for easier welding and adds more strength too. 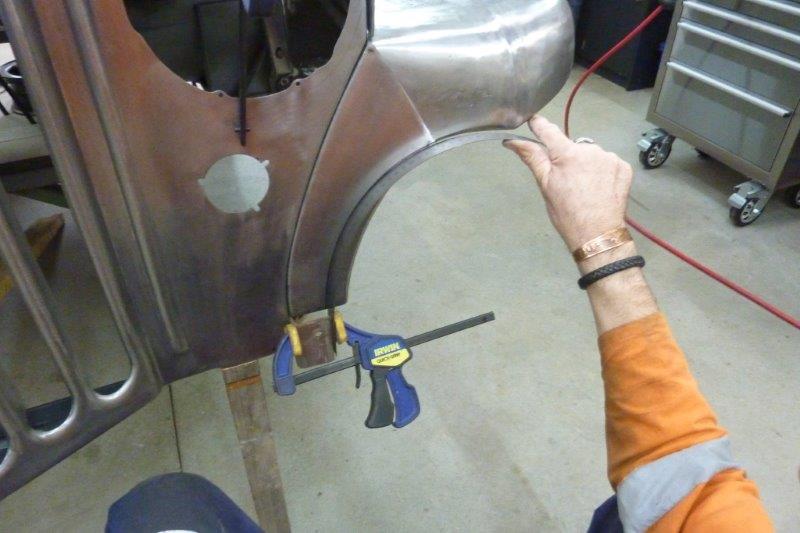 Now the part that went down the side of the grille needs an inch taken out as well. Rather than use one of my french curves, I find a stainless steel ruler works well to get a nice curve. 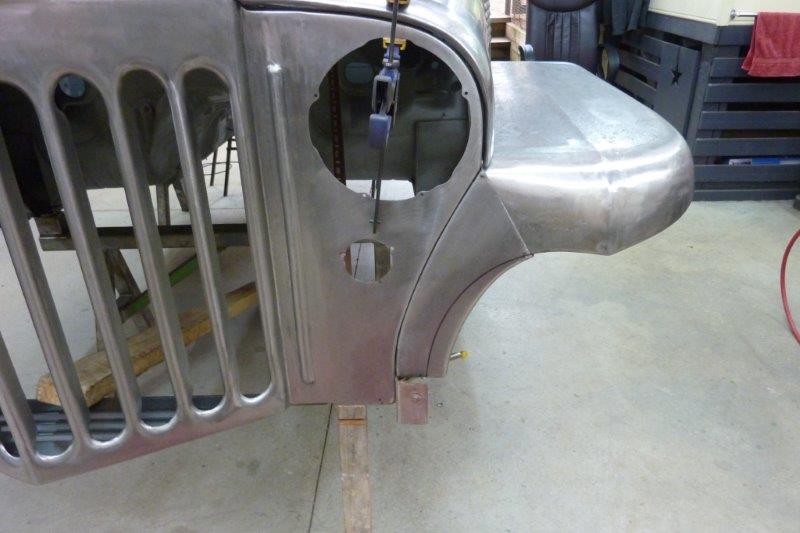 I wanted to thin the width of this section anyway so works out well. Also easier to tip the outside flange rather than the much wider bolt flange where it attaches to the grille. 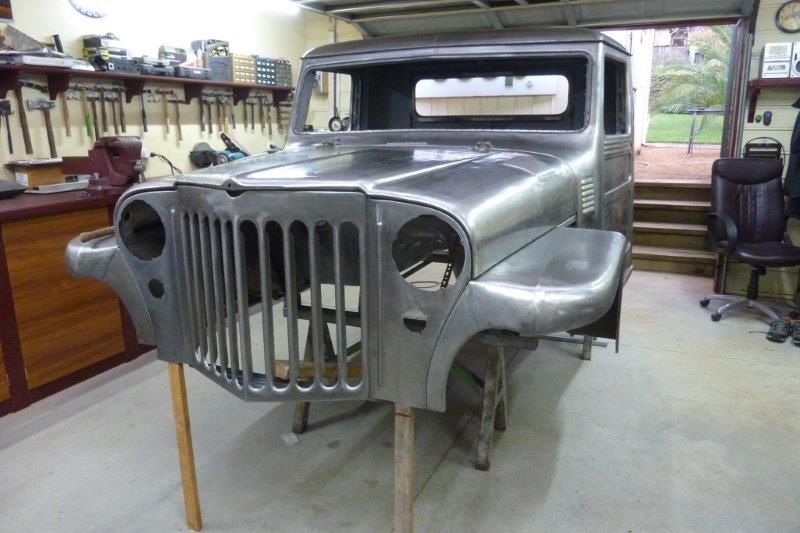 Extended the piece right to the bottom of the longer grille at the same time so the new flange is tipped as one. 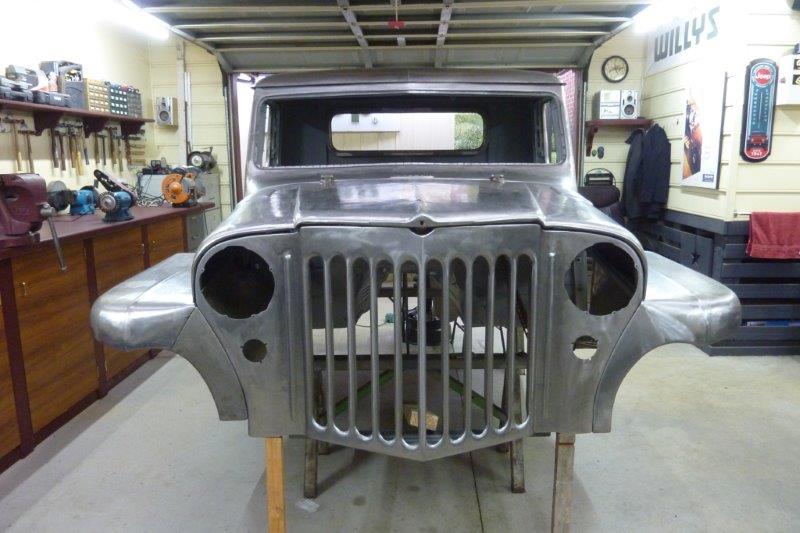 Can compare one side to the other. Only a small change to narrow the guard to get it parallel to the centreline, plus narrowing and lengthening the side piece, but it all adds up. Has removed a lot of the 9" wider grille to give better proportions. Now to finish the rest of the guard off before moving onto the other side.
__________________
Marcus aka. Gojeep Victoria, Australia http://willyshotrod.com Invention is a combination of brains and materials. The more brains you use, the less materials you need.
|
|
#966
05-25-2019, 07:23 AM
|
|||
|
|||
|
Really great work, Neil.
All aesthetics aside, I really appreciate your confidence to simply do it- make it from scratch, undo what's already been done, add a little bit, take something away, move it, do it again, whatever. Posting these things are even better. Great thread.
__________________
AC Button II http://CarolinaSculptureStudio.com https://www.youtube.com/channel/UCzSYaYdis55gE-vqifzjA6A Carolina Sculpture Studio Channel
|
|
#967
05-26-2019, 04:10 AM
|
||||
|
||||
|
Quote:
__________________
Marcus aka. Gojeep Victoria, Australia http://willyshotrod.com Invention is a combination of brains and materials. The more brains you use, the less materials you need.
|
|
#968
05-26-2019, 04:14 AM
|
||||
|
||||
|
Quote:
thanks marcus sorry i couldn't resist...
__________________
Neil
|
|
#969
05-26-2019, 06:10 AM
|
|||
|
|||
|
That looks nice Marcus!
__________________
Richard "I know nothing. I from Barcelona" (Manuel - Fawlty Towers) Link to our racecar project https://www.facebook.com/pages/Elan-...ab=public&view
|
|
#970
05-29-2019, 05:22 AM
|
||||
|
||||
|
Quote:
__________________
Marcus aka. Gojeep Victoria, Australia http://willyshotrod.com Invention is a combination of brains and materials. The more brains you use, the less materials you need.
|
 |
| Thread Tools | Search this Thread |
| Display Modes | |
|
|


 Linear Mode

